I. Introduction
Gift-wrapping is an essential part of gift-giving that adds a special touch to any occasion. Whether for a birthday, holiday, or special event, the right wrapping can make a gift feel more thoughtful and personalized. In this comprehensive guide, we will explore the ins and outs of gift-wrapping, going beyond the basics to discover creative and sustainable techniques that will make your gifts stand out.
Throughout this article, we will cover everything from the step-by-step process of wrapping a box to expert tips for adding extra touches that will truly impress the recipient. We will also delve into the world of DIY wrapping and eco-friendly solutions for those who want to give gifts that are both beautiful and sustainable.
II. Step by Step Guide: How to Wrap a Box Perfectly for Any Occasion
Before we get into the creative techniques and expert tips, let’s start with the basics. Here’s a step-by-step guide to wrapping a box perfectly for any occasion:
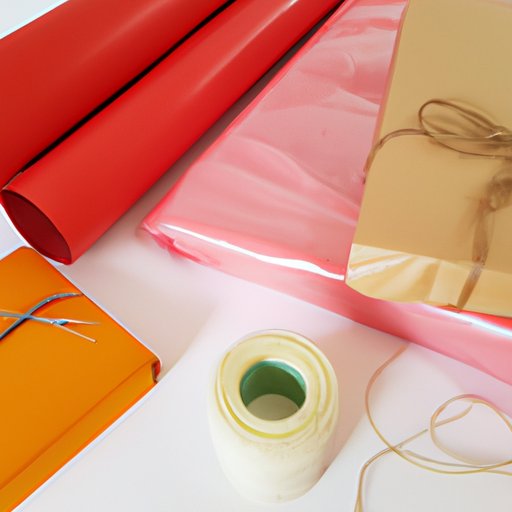
Materials needed:
- Wrapping paper
- Scissors
- Tape
- Ribbon or bow (optional)
Step 1: Measure the Wrapping Paper
Roll out the wrapping paper and place the box on it. Cut enough paper so that it completely covers the box, leaving a little extra on each side to fold over. Make sure the paper is flat and even before moving on.
Step 2: Fold in the Sides
Take one side of the paper and fold it in towards the center of the box. Press the fold down tightly and tape it in place. Do the same with the other side, making sure it overlaps the first fold slightly.
Step 3: Fold the Ends
Take one end of the paper and fold it up towards the center of the box. Press the fold down tightly and tape it in place. Do the same with the other end, making sure it overlaps the first fold slightly.
Step 4: Add Finishing Touches
If desired, add a ribbon or bow to the top of the box for a more polished look. Voila! Your perfectly wrapped gift is ready to go.
Additional tips:
- Make sure to crease your folds tightly to create a clean and crisp look.
- Use double-sided tape to avoid visible tape lines on your gift.
- For an added touch, use a contrasting ribbon or bow to create a pop of color.
III. 5 Creative and Simple Techniques for Wrapping a Box with Style
Now that you have the basics down, it’s time to get creative! Here are five stylish wrapping techniques to try:
- Furoshiki Wrapping: This Japanese technique uses fabric to wrap gifts, making it both sustainable and chic. Simply place the box diagonally in the center of the fabric, fold the corners up and over the box, and tie the ends together in a knot.
- Paper Flower Toppers: For a unique finishing touch, try making paper flower toppers to attach to your wrapped gift. Cut out different sized circles from colored paper, crinkle them up, and stack them with a glue dot in between each one. Finish with a button or bead in the center.
- Layered Paper: For a more textured look, layer wrapping paper in different colors and textures. Cut strips of paper in varying widths and lengths, and tape them together in a patchwork pattern before wrapping your gift.
- Photo Wrapping: For a personalized touch, print out a photo of the gift recipient on large paper and use it as wrapping paper. Add a ribbon or bow to finish off the look.
- Chalkboard Wrapping: Cover your gift box with black chalkboard paper, and use white chalk to draw designs or write a personalized message. This is a great option for gifts that are meant to be displayed, as the recipient can erase the writing and reuse the box later.
Each of these techniques can be adapted to fit different occasions and styles, so don’t be afraid to get creative!
IV. Expert Tips for Wrapping a Box: Make Your Gift Stand Out
Want to take your gift-wrapping to the next level? Here are some expert tips for making your gift stand out:
- Add Dimension: Use tissue paper or crinkle cut paper to add height and dimension to your gift box.
- Layer on the Details: Use multiple kinds of ribbon or twine to add texture and interest to your wrapped gift. Add embellishments like gift tags, small ornaments, or flowers for an extra special touch.
- Mix and Match: Combine different patterns and colors to create a unique look. Use a solid color wrapping paper as a base, and then add a patterned ribbon or bow for contrast.
- Think Outside the Box: Use unconventional materials like newspaper, map paper, or sheet music to wrap gifts in unexpected ways.
- Go Green: Use natural materials like twigs, leaves, or pinecones to create a rustic, eco-friendly look.
By adding these extra touches, you can truly elevate your gift-wrapping game.
V. DIY Wrapping: Quick and Easy Ways to Add a Personal Touch to Your Gift
Looking for a way to make your gifts even more personal? Try these fun and easy DIY wrapping ideas:
- Stamped Wrapping: Use rubber stamps to create patterns or designs on plain wrapping paper. You can even carve your own stamps for a truly personalized touch.
- Cookie Cutter Toppers: Make unique toppers out of cookie cutters by tying them onto your gift with twine or ribbon. This is a great option for holiday gifts!
- DIY Gift Bags: Make your own gift bags out of colorful scrapbook paper and twine. Simply fold the paper in half, punch holes along the top edge, and thread twine through the holes to create a handle.
- Personalized Gift Wrap: Draw a pattern or design on plain brown wrapping paper with a white paint pen. This is a great option for gifts that are meant to be displayed, as the recipient can reuse the paper as a personalized piece of artwork.
- Photo Gift Tags: Print out small photos of the gift recipient and attach them to the gift with string or ribbon. This adds a personal touch and helps the recipient identify their gift quickly.
These DIY tips are simple, fun, and customizable to fit any occasion. Try them out and see how easy it is to add a personal touch to your gift giving.
VI. Eco-Friendly Wrapping Solutions: How to Wrap a Box Sustainably
As we become more aware of our impact on the environment, it’s important to consider eco-friendly gift-wrapping solutions. Here are some sustainable options to try:
- Fabric Wrapping: Use scraps of fabric or old scarves to wrap gifts in the Furoshiki style mentioned earlier. The fabric can be reused countless times and creates less waste than traditional wrapping paper.
- Recycled Wrapping Paper: Look for wrapping paper made from recycled materials, or use old maps, newspapers, or magazines as alternative wrapping materials.
- Natural Elements: Use twine, string, or ribbon made from natural fibers like hemp or linen to wrap gifts. Add natural elements like twigs, dried flowers, or berries to create a sustainable and stylish look.
- Reusable Gift Wrap: Invest in reusable gift wrap like fabric gift bags or boxes that can be used year after year. This not only reduces waste, but also saves time and money in the long run.
By incorporating these sustainable options into your gift-wrapping routine, you can reduce your environmental impact without sacrificing style or creativity.
VII. Conclusion
Gift-wrapping is an art form that can truly elevate the gift-giving experience. By using these tips and techniques, you can create beautiful and thoughtful gifts that will impress any recipient. Whether you choose to go the DIY route or opt for sustainable wrapping solutions, there are endless possibilities for making your gifts truly unique and special.
So next time you’re preparing a gift for a loved one, take the time to invest in the wrapping as well. After all, it’s the little details that make the biggest difference.


