I. Introduction
If you are a beginner or an experienced painter looking to try a new medium, look no further than acrylic paint. Unlike other types of paint, acrylic is fast-drying, water-soluble, and easy to work with, making it ideal for a wide range of projects. Whether you are interested in painting landscapes, portraits, or abstract art, acrylic paint can help you achieve your artistic vision.
In this article, we’ll cover everything you need to know to get started with acrylic painting, from materials and techniques to color mixing and common mistakes to avoid. Let’s dive in.
II. Acrylic Painting 101: A beginner’s guide to using acrylic paints
Before we get into the nitty-gritty of acrylic painting, it’s important to understand what acrylic paints are and how they differ from other types of paint. Acrylics are water-based paints that dry quickly and are known for their versatility, durability, and vibrant colors. They can be used on a variety of surfaces, including canvas, paper, wood, and even fabric.
One of the biggest advantages of acrylic paints is their fast-drying time, which means you can work on your painting without having to wait long periods between layers. However, this also means that you need to work quickly and carefully if you want to blend or smooth out your paint.
Another advantage is that acrylic paints are water-soluble, which means you can thin them out with water to create a transparent or translucent effect. You can also add various mediums to the paint to achieve different effects, such as gloss or matte finishes or to create textures with impasto or modeling paste.
One downside of acrylic paints is that once they dry, they become permanent and difficult to remove. Additionally, because they dry so quickly, it can be challenging to blend or create smooth gradients, especially when you are starting out.
To get started with acrylic painting, you will need some basic materials and supplies, including:
- Acrylic paints in various colors
- Paintbrushes of different sizes and shapes
- A palette or mixing tray
- A painting surface, such as a canvas or paper
- Optional: mediums such as gels or modeling paste, or other materials like sponges or spray bottles for various effects
Once you have your materials together, you will need to prepare your painting surface. If you are using canvas, be sure to prime it with gesso or another suitable primer to prevent the colors from soaking into the fibers of the canvas, which could make the colors look dull or faded.
When you start painting, you can apply acrylics with a variety of techniques, such as using a wet-on-wet, wet-on-dry, or glazing method. You can also use a variety of brushstrokes and marks to create texture and add interest to your painting.
If you’re a beginner, don’t be afraid to experiment and try new things. Here are some tips and tricks to keep in mind:
- Start with a small painting or sketch to get a feel for the materials and techniques.
- Thin out the paint with water to create a transparent or translucent effect.
- Use a sponge or a spray bottle to create interesting textures or paint drips.
- Work in layers, allowing each layer to dry before adding the next one.
- Don’t be afraid to make mistakes! Acrylic paint is forgiving, and you can always paint over your mistakes or start over.
III. 10 Acrylic painting techniques you must try
Acrylic painting offers many possibilities for creative expression. There are numerous techniques that you can explore to add texture, movement, or interest to your painting. Here are ten popular acrylic painting techniques and how to achieve them:
1. Impasto
Impasto is a painting technique that involves applying thick paint onto the canvas to create a 3D effect. You can use a palette knife or a brush to apply the paint, and you can layer different colors together to create texture and depth.
2. Dry brushing
Dry brushing is a technique that involves using a dry, stiff bristle brush to apply paint over a dry surface. This technique creates a rough and scratchy texture that is ideal for creating fur, grass, or hair.
3. Stippling
Stippling involves using a brush or a sponge to create a pattern of dots or small strokes on the surface of the painting. This technique can be used to create the appearance of rough surfaces like rocks or bark.
4. Sgraffito
Sgraffito involves scratching or carving into a layer of wet paint to reveal the layer underneath. This technique can be used to add fine details or to create textural interest.
5. Pouring
Pouring is a technique that involves pouring thinned-out paint onto the surface of the painting and allowing it to flow and mix together. This technique creates unique patterns and colors that are difficult to achieve with a brush.
6. Masking
Masking involves applying a mask or tape to certain areas of the painting to create sharp lines or protect areas from paint. This technique is useful for creating straight edges or geometric shapes.
7. Stenciling
Stenciling involves applying paint over a stencil to create a pattern or design. This technique is useful for creating repeating patterns or shapes that are difficult to paint by hand.
8. Monoprinting
Monoprinting involves creating a unique print by applying paint to a surface and then transferring it to another surface, such as paper or canvas. This technique can be used to create abstract or expressive art.
9. Palette knife painting
Palette knife painting involves applying paint to the surface with a palette knife, rather than a brush. This technique creates a thick, textured surface that can add depth and interest to a painting.
10. Watercolor-like washes
Watercolor-like washes involve thinning out the paint with water to create a translucent or transparent layer. This technique can be useful for creating a soft, subtle effect that resembles watercolors.
IV. Step-by-step tutorial: How to create a stunning acrylic painting
To showcase some of the techniques we’ve covered, let’s look at how to create a simple but beautiful painting using acrylics. Here are the steps:
1. Sketching the subject
Start by sketching the subject of your painting onto the canvas using a pencil or charcoal. Keep your lines loose and simple, focusing on the basic shapes and proportions.
2. Blocking in colors
Next, use a large brush to block in the basic colors of your painting. Work from the general shapes to the smaller details, building up the layers as you go.
3. Adding details and highlights
Once you have the basic shapes and colors in place, start adding details and highlights using a smaller brush or a palette knife. Use light and dark colors to create contrast and depth, and pay attention to the direction of the light source.
4. Refining the painting
Finally, refine the painting by adding more details and making adjustments as needed. Pay attention to the composition and balance of the painting, and make sure all the elements work well together.
Remember, this is just one way to approach an acrylic painting. Don’t be afraid to experiment and try different techniques or styles!
V. Top 5 acrylic painting supplies every artist needs
When it comes to acrylic painting, having the right supplies can make all the difference. Here are the top 5 supplies that every artist needs:
1. Paintbrushes
A good set of paintbrushes is essential for acrylic painting. Look for brushes of different sizes and shapes, including round, flat, filbert, and fan brushes. Invest in high-quality brushes that will last you a long time and provide good results.
2. Paints
Acrylic paints come in a wide range of colors and consistencies. Look for high-quality paints that have good pigmentation and are rich in color. You can also consider buying a set of paints that covers a range of colors.
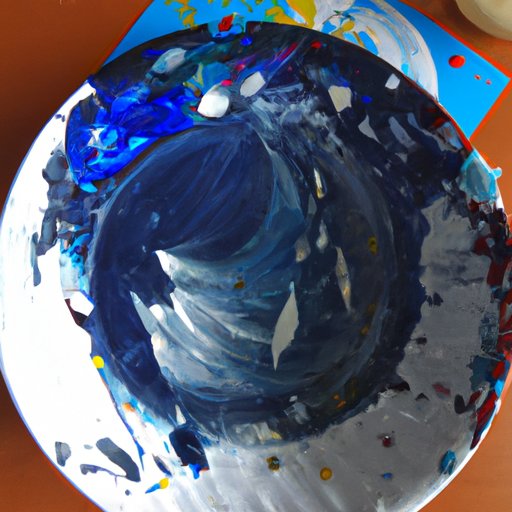
3. Palette
A palette is essential for mixing and blending paint. Look for a palette with a large mixing area and plenty of raised edges to prevent the paint from spilling over.
4. Painting surface
Choose a painting surface that suits your painting style and preferences. Canvas, paper, or wood panels are all popular choices. Make sure to choose a surface that has been primed properly to prevent the paint from soaking in.
5. Mediums
Mediums are additives that can be mixed with acrylic paint to achieve different effects. For instance, you can use a gloss medium to create a shiny finish, or a molding paste to create texture or build up layers. Experiment with different mediums to see which ones suit your needs and style.
VI. Mastering color mixing with acrylic paints
When it comes to getting the right colors in your painting, color mixing is essential. Here are some tips to help you master color mixing with acrylic paints:
1. Learn the color wheel
The color wheel is a tool that helps you understand how colors relate to one another. By learning the primary, secondary, and tertiary colors, you can mix a wide range of colors in your painting.
2. Use complementary colors
Complementary colors are colors that are opposite each other on the color wheel. When used together, they create contrast and make each other appear brighter. For instance, red and green or blue and orange are complementary colors.
3. Experiment with different ratios
When mixing colors, try different ratios of paint to understand how each color affects the final result. Start with a small amount of paint and add more as needed.
4. Use a clean palette
When mixing colors, use a clean palette to prevent any previous colors from contaminating your mix. You can use a plastic palette that’s easy to clean or a disposable palette that you can throw away after use.


