Introduction
Are you ready to unleash your creativity and add some bold and vibrant colors to your wardrobe or home décor? Tie-dyeing is a fun and easy technique that allows you to create unique and eye-catching designs on fabric using simple tools and materials. In this article, we will guide you through the step-by-step process of tie-dyeing, share some tips and tricks for successful outcomes, introduce different tie-dye patterns, explore the history of tie-dye, and provide some DIY project ideas to get you started.
Step-by-Step Guide
Before you begin, you will need to gather some supplies such as fabric, dye, rubber bands, gloves, and a container for mixing dye. Choose fabric that is suitable for tie-dyeing such as cotton, rayon, or silk. Here’s how to tie-dye in 5 simple steps:
1. Select your colors: Choose your dye colors and mix them according to the instructions on the package. You can mix different colors to create a unique palette or use one color for a monochromatic look.
2. Prepare your fabric: Wash and dry your fabric before dyeing it to remove any sizing or dirt. Wet your fabric thoroughly with warm or hot water, wring it out, and lay it flat on a surface covered with plastic or newspaper.
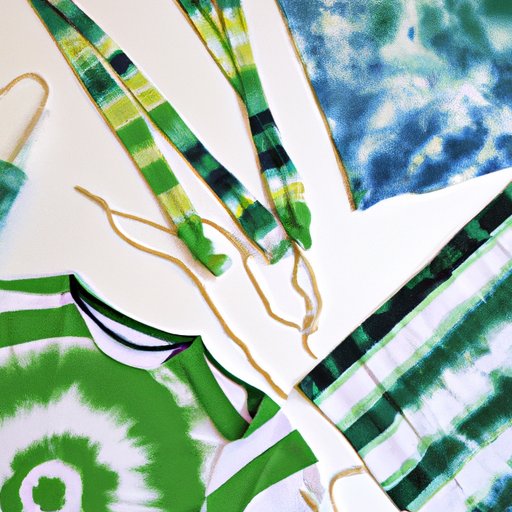
3. Tie your fabric: Use rubber bands, string, or folding techniques to create different tie-dye patterns. Some popular patterns include the spiral, bullseye, crumple, or stripes. The way you tie your fabric will determine the final outcome of your design.
4. Apply the dye: Wear gloves to protect your hands and immerse your tied fabric in the dye bath. You can dip, squirt, pour, or spray the dye onto the fabric using a brush or syringe. Make sure to saturate all areas of your fabric and flip it over to dye both sides.
5. Set the dye: Once you have applied the dye, wrap your fabric in plastic wrap or put it in a plastic bag to prevent the dye from drying out. Let it sit for a few hours or overnight depending on the dye instructions. Rinse your fabric with cold water until the water runs clear, remove the ties, and wash it separately in warm water with a mild detergent. Dry your fabric in the dryer or hang it to air dry.
Voila! You have created your own tie-dyed masterpiece that is ready to wear or use in DIY projects.

Tips and Tricks
To achieve the best results in tie-dyeing, here are some tips and tricks to keep in mind:
- Use natural fiber fabrics for best results.
- Pre-wash your fabric to remove any sizing or dirt.
- Wear gloves to protect your skin from dye stains.
- Mix your dye carefully and use a container that will not stain.
- Experiment with different tie-dye techniques and patterns to create unique designs.
- Allow enough time for your fabric to soak in the dye to ensure vibrant colors.
- Use a fixative or vinegar in the rinse water to help set the dye.
Avoid these common mistakes:
- Using too much or too little dye
- Not binding the fabric tightly enough
- Using synthetic fabrics that do not absorb the dye well
- Not washing and rinsing the fabric thoroughly before and after dyeing
By following these tips and avoiding common mistakes, you can achieve great outcomes in your tie-dyeing projects.
Tie-Dye Patterns
Tie-dye offers endless opportunities for creativity and experimentation. Here are some popular tie-dye patterns you can try:
- The spiral pattern: Create a spiral on your fabric by twisting it into a tight roll and binding it with rubber bands. Apply different dye colors to the sections of the spiral and let the colors blend into each other.
- The bullseye pattern: Make a small fold in your fabric and pinch it with a fork, then wrap rubber bands tightly around the fabric at intervals to create concentric circles. Apply different dye colors to each section and blend them together.
- The crumple pattern: Simply scrunch up your fabric into a ball and hold it together with rubber bands. Apply dye to the sections and let the colors blend together randomly for a unique design.
Check online tutorials or books for more tie-dye patterns and techniques to create your own styles.

History of Tie-Dye
Tie-dye has a long and rich history that dates back to the ancient civilizations of Egypt, China, and India, where it was used as a way to decorate fabrics with symbols or patterns. The technique gained popularity in the United States during the 1960s and 1970s as part of the counterculture movement that embraced peace, love, and personal expression. Tie-dye clothing, especially t-shirts, became a symbol of hippie culture and was worn by musicians, artists, and activists. Today, tie-dye remains a popular form of self-expression and creativity, often associated with music festivals, summer camps, and DIY fashion trends.

Tie-Dye DIY Projects
Ready to put your tie-dye skills to the test? Here are some DIY projects that you can try:
- Tie-dye t-shirts: Express your style by creating your own tie-dye t-shirts with different colors and patterns. You can also add stencils or motifs to your designs.
- Tie-dye bags: Upgrade your plain tote bags or backpacks by adding some tie-dye colors and designs. You can use different fabric paints or markers to add details to your bags.
- Tie-dye pillows: Add some bohemian flair to your home décor by making your own tie-dye pillows. Choose fabric that complements your room and experiment with different patterns and colors.
You can find more tie-dye DIY ideas and tutorials on social media platforms or craft websites.

Conclusion
Tie-dyeing is a fun and rewarding activity that allows you to unleash your creativity and express your personal style. By following our step-by-step guide, trying different patterns, and experimenting with colors, you can create your own unique designs and DIY projects. Remember to follow our tips and tricks for successful outcomes and learn about the history of tie-dye for inspiration.


