Introduction
Learning how to tie a range of knots is an important skill for any well-dressed person. From tying a classic knot for a job interview to mastering a unique knot for a special occasion, knowing how to properly knot a tie can elevate your style and make you stand out in a crowd. In this article, we will cover everything you need to know to become a knotting expert.
7 Easy Steps to Tie a Classic Windsor Knot
The Windsor knot is a classic knot that is perfect for a formal occasion. It was named after the Duke of Windsor, who popularized it in the 1930s. To tie a classic Windsor knot, follow these easy steps:
1. Start by draping the tie around your neck with the wide end on the right side, and the narrow end on the left side. The wide end should extend about a foot lower than the narrow end.
2. Cross the wide end over the narrow end, then loop it around and behind the narrow end and bring it back to the front.
3. Next, loop the wide end behind the knot and bring it back to the front.
4. Now take the wide end and loop it over the knot and back behind the narrow end.
5. Bring the wide end up and over the knot, then tuck it down behind the knot and through the loop in front.
6. Hold the knot with one hand and use the other hand to adjust the tie ends to your desired length.
7. Finally, tighten the knot by pulling on the narrow end while holding the knot with your other hand.
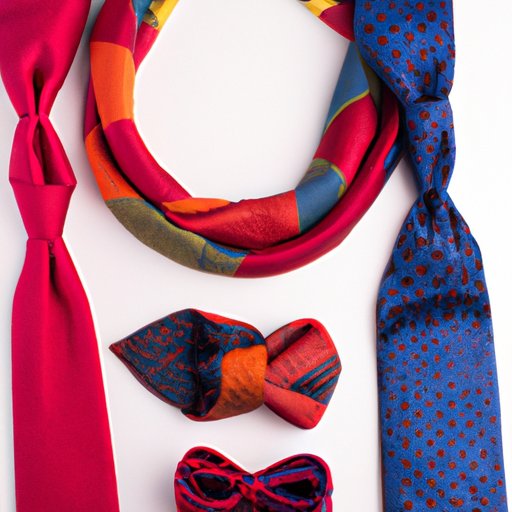
Master the Art of Tying a Bow Tie in 5 Simple Steps
Bow ties can be worn on both formal and casual occasions. They add a touch of class and sophistication to any outfit. To tie a bow tie, follow these easy steps:
1. Start by draping the bow tie around your neck with the right end slightly longer than the left.
2. Cross the longer end over the shorter end and bring it up through the loop.
3. Loop the shorter end over the middle of the longer end.
4. Fold the longer end over itself, creating a bow.
5. Bring the folded end up and behind the bow, then feed it through the loop, and adjust.
4 Unique Knots to Spice up Your Necktie Game
Mastering more than the classic Windsor knot is what sets you apart from the crowd. Here are four options to try:
1. The Eldredge knot: Start with the wide end of the tie on the left and a small up tuck on the right. Loop the wide end twice and tighten it to form the knot.
2. The Trinity knot: Start with the wide end of the tie on the right and the narrow end on the left. Loop the tie thrice and tuck the wide end behind in the loop around the neck.
3. The Pratt knot: It is a versatile knot that works well with modern ties. Start with the wide end of the tie on the right but leave it shorter than the narrow end. Loop the wide end and tuck it both over and under the neckband.
4. The Oriental knot: It comes from ancient Chinese men’s clothing style. It starts with the wide end of the tie on the left, cross the narrow end on the top, loop it under and then bring it up to the neck loop. Make the knot and adjust the looks.
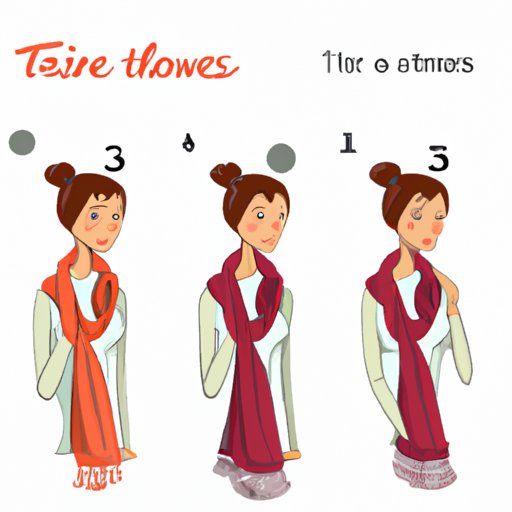
How to Tie a Scarf: 3 Different Ways
Scarves are a winter staple that keeps you warm while adding extra style to your outfit. Here are three ways to tie a scarf:
1. The loop: Fold the scarf in half, drape it over your neck, and pull the loose ends through the loop.
2. The classic drape: Drape the scarf over your neck with one end longer than the other. Wrap the longer end and tuck it into the neck loop to create a neat look.
3. The Parisian knot: Fold the scarf in half, drape it around your neck, grab the ends and feed them through the loop.
Tie Like a Pro: Tips and Tricks for a Perfect Knot Every Time
Here are some tips and tricks to help you tie a perfect knot:
1. Always start with the wide end of the tie on the right side.
2. Make sure the narrow end ends up at the right length.
3. Pull the knot tight to avoid it slipping out of place.
4. Iron out any wrinkles in your tie before knotting it.
Step-by-Step Guide to Tying a Half Windsor Knot
The half Windsor knot is perfect for a less formal occasion. Here are the steps:
1. Start by draping the tie around your neck with the wide end on the right side and the narrow end on the left.
2. Cross the wide end over the narrow end, then bring it under the narrow end and up through the loop.
3. Now loop the wide end over the knot, then bring it back down and behind the knot.
4. Take the wide end and loop it over the knot once more, then bring it up and through the loop in front.
5. Finally, adjust the knot and your tie ends to your desired length.
From Dull to Dazzling: Creative Techniques for Tying a Necktie
If you are someone who likes to be bold, this section is for you. Here are some creative ways to tie a necktie:
1. The double knot: Tie a basic four-in-hand knot, but then loop the wide end back up through the knot before tightening.
2. The Trinity knot: Start by pulling the wide end of the tie up and over the knot. Then, wrap it behind the knot and bring it up and through the middle.
3. The Eldredge knot: It is an intricate knot that takes different loops, tucks, and pulls to form and gives a mysterious feel.
Conclusion
In conclusion, learning how to tie different knots is an essential skill for any well-dressed individual. From classic to sophisticated styles, this article has taught you everything you need to know. Practice these knots and use them on the appropriate occasions. Lastly, remember that confidence in how you wear them is the key to pulling off any kind of knot well.


