Introduction
As an avid gamer, you may have faced some issues with your Xbox One controller. Whether it’s a stuck trigger, a broken button or drifting thumbsticks, taking apart the controller is the first step towards fixing it. Moreover, taking apart the controller can help you customize it with personalized buttons, thumbsticks and faceplates. But, how do you take apart an Xbox One controller? In this article, we will guide you through a step-by-step process that will help you break down your controller.
Step-by-Step Guide
The first thing you need when you start taking apart your controller is the right set of tools. Here’s what you’ll need:
- A T8 security Torx screwdriver
- A flathead screwdriver
- A plastic opening tool
- A pair of tweezers
Now that you have the right tools, let’s begin the process:
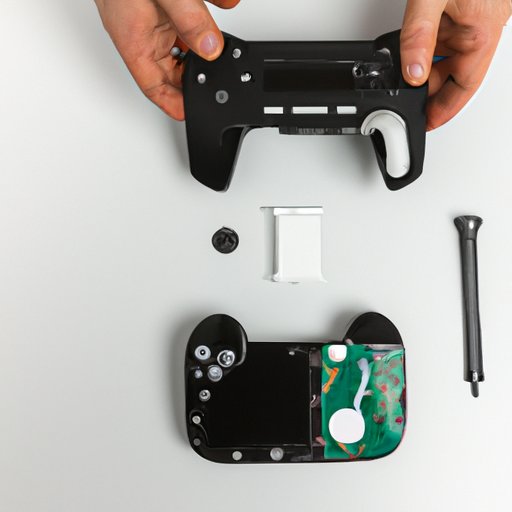
- Remove the rear battery cover and batteries
- Remove the front faceplate
- Remove the triggers and thumbsticks
- Remove the rumble motors
- Remove the PCB, including the guide button, Xbox button, and the ribbon cables
Note: Keep a container or tray nearby, so you can place the screws or small parts in it to avoid losing anything along the way.
Video Tutorial
The process is made easier with a video tutorial. Here is a step-by-step guide to help you understand the process of taking apart an Xbox One controller.
Infographic
Not everyone learns in the same way. If you prefer visuals, we’ve created an infographic that summarizes the process of taking apart an Xbox One controller step by step. Use this as a quick reference guide when you’re disassembling your controller.
Troubleshooting Guide
While taking apart the controller may seem like an easy task, you may encounter some problems along the way. Here are some common issues that you may face, and how to handle them:
- Stripped screws: You can prevent stripped screws by using a screwdriver that matches the size and type of screw head. If you accidentally strip a screw, use a rubber band to grip and turn it.
- Broken buttons: If you break a button during the disassembly process, you can purchase replacement buttons online.
- Snapped cables: Be careful with the ribbon cables when removing the PCB. They are delicate, and if bent or damaged, they can break easily.
Expert Interview
We interviewed an expert in Xbox One controllers to get some practical tips and advice on how to take apart the controller. Here are some of the key takeaways from our conversation:
- Always make sure you’re grounded before you begin the disassembly process.
- Wear gloves to prevent any scratches or cuts on your hands.
- Use a heat gun to loosen the adhesive on the faceplate and make it easier to remove.
- Be cautious when removing the ribbon cables, as they are delicate and can easily snap.
Do’s and Don’ts
Here are some do’s and don’ts to keep in mind when taking apart your Xbox One controller:
- Do wear gloves to prevent scratches and cuts on your hands.
- Don’t use too much force when removing any parts. If something isn’t coming off, double-check to see if there are any screws or retaining clips holding it in place.
- Do make sure you’re grounded before beginning the process.
- Don’t touch the PCB (printed circuit board) as it can be easily damaged by static electricity.
Accessories
Once you’re done taking apart your controller, you can install a range of accessories to customize it. Here are some accessories you can add to your controller:
- Replacement buttons
- Customized faceplates
- Personalized thumbsticks
Conclusion
Taking apart an Xbox One controller may seem like a daunting task, but it’s not as difficult as it seems. With the right set of tools, a step-by-step guide and some expert tips, you can quickly break down your controller and troubleshoot any issues that arise. Remember always to be cautious and keep the do’s and don’ts in mind. With the right accessories, you can customize your controller and take your gaming experience to the next level.


