How to Set Up Apple Pay: A Step-by-Step Guide
Apple Pay is a mobile payment and digital wallet service that allows users to make purchases with their Apple devices without the need for a physical credit or debit card. With Apple Pay, users can securely pay for goods and services in stores, apps, and on the web.
If you’re new to Apple Pay and are unsure how to set it up, don’t worry! This guide will take you through the steps to set up Apple Pay on any compatible device.
Step-by-Step Guide for Setting Up Apple Pay
1. Enabling Apple Pay on Your Device
The first step to setting up Apple Pay is enabling it on your device. If you’re an iPhone user, you can access Apple Pay through the Wallet app. To enable Apple Pay:
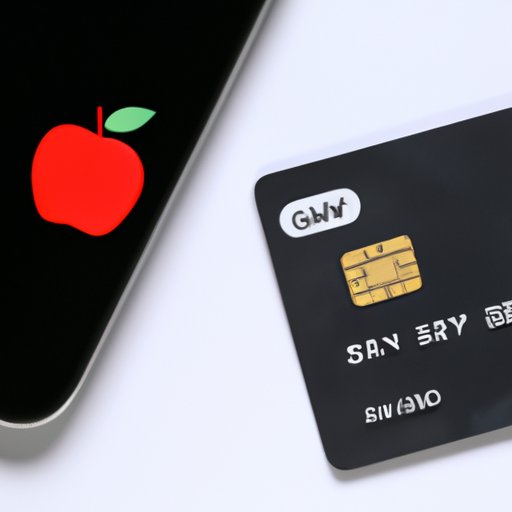
- Open the Wallet app on your iPhone and tap the “+” sign in the top right corner.
- Follow the prompts to add a new card.
- Once you’ve added a card, tap “Next” and then “Agree” to the terms and conditions.
- Next, you’ll need to verify your card. This can be done via SMS, email, or by contacting your bank.
- Once your card is verified, you’re good to go!
If you’re an iPad user, you can enable Apple Pay through the Settings app. To do this:
- Open the Settings app on your iPad and select “Wallet & Apple Pay”.
- Follow the prompts to add a new card.
- Once you’ve added a card, tap “Next” and then “Agree” to the terms and conditions.
- Next, you’ll need to verify your card. This can be done via SMS, email, or by contacting your bank.
- Once your card is verified, you’re ready to use Apple Pay on your iPad!
2. Adding Your Payment Cards
Adding your payment cards to Apple Pay is quick and easy. Simply follow these steps:
- Open the Wallet app on your iPhone.
- Tap the “+” sign in the top right corner of the screen.
- Select the type of card you’d like to add (credit or debit).
- Follow the prompts to add your card details.
Alternatively, you can add your card by taking a photo of it. To do this, follow the same steps as above, but instead of typing in your card details, select “Add Card” and use your device’s camera to scan your card.
If you’re adding a card to Apple Pay on your iPad, the process is very similar. Simply open the Settings app, select “Wallet & Apple Pay”, and follow the prompts to add your card.
3. Verification Process
Once you’ve added your card to Apple Pay, you’ll need to verify it to ensure it’s you who added the card. Verification is done via SMS, email, or by contacting your bank. To verify your card:
- Open the Wallet app on your device.
- Select the card you’d like to verify.
- Follow the prompts to complete the verification process.
If you’re having trouble verifying your card, contact your bank for assistance.
4. Using Apple Pay
Using Apple Pay is simple. To pay for goods or services, simply hold your device up to a contactless reader and place your finger on the Touch ID sensor (or look at the Face ID camera on iPhone X and later). Your device will beep or vibrate to indicate that the payment has been successfully completed.
You can also use Apple Pay to make purchases in apps and on websites that support Apple Pay.
Video Tutorial
For those who prefer video tutorials, we’ve created a step-by-step guide to setting up Apple Pay:
Feel free to share this video on social media to help your friends and family learn how to set up Apple Pay too!
FAQs
Q: Is Apple Pay safe?
A: Yes. Apple Pay uses several industry-standard security technologies to ensure your personal and financial information is kept safe and secure.
Q: What happens if I lose my device?
A: If you lose your device, you can use the “Find My” app to lock your device and disable Apple Pay, or you can contact your bank to suspend or remove your cards.
Q: Can I use Apple Pay with all banks?
A: Unfortunately, not all banks support Apple Pay. You can check if your bank supports Apple Pay on the Apple website.
Advantages and Disadvantages of Apple Pay
Like any payment system, Apple Pay has its pros and cons. Here are a few of the advantages and disadvantages:
Advantages:
- Convenience – You don’t need to carry a physical credit or debit card around with you.
- Security – Apple Pay uses advanced security features to protect your financial and personal information.
- Speed – Payments with Apple Pay are typically faster than traditional card payments.
Disadvantages:
- Compatibility – Not all banks and merchants support Apple Pay.
- Limitations – There are limits on the amount you can spend with Apple Pay.
- Technical issues – Occasionally, technical issues may prevent Apple Pay from working correctly.
Despite some of the disadvantages, Apple Pay has become increasingly popular for its convenience and security features. Many people find that they prefer using Apple Pay over traditional payment methods.
Compatibility
Apple Pay is compatible with a variety of devices, including:
- iPhone 6 or later
- Apple Watch
- iPad Air 2 or later
- iPad Pro
- iPad Mini 3 or later
Apple Pay is also supported by a wide range of banks and merchants. To check if your bank or merchant supports Apple Pay, visit the Apple website.
Troubleshooting
Occasionally, users may experience issues with Apple Pay. Here are a few of the most common issues and their solutions:
Issue: My card was declined when making a payment.
Solution: Check to make sure your card is activated and there are no issues with your account. Contact your bank if you’re not sure.
Issue: Apple Pay won’t accept my card.
Solution: Make sure your card is compatible with Apple Pay and that you’ve followed the proper steps to add it. Contact your bank if you’re not sure.
Issue: Apple Pay won’t work in a certain store or app.
Solution: Not all stores and apps support Apple Pay. Check with the merchant to see if they accept Apple Pay.
Conclusion
Setting up Apple Pay is a quick and easy process that can save you time and add an extra layer of security to your purchases. By following the steps above, you can start using Apple Pay in no time. If you run into any issues, check out the troubleshooting section for solutions.
We hope you found this guide helpful in setting up Apple Pay.


