I. Introduction
Headlight restoration is a crucial process that car owners often overlook. Over time, headlights become hazy and yellowed, which can impair driving vision. However, restoring your headlights can make them look like new and improve road safety. In this article, we’ll cover the basics of headlight restoration, including the benefits of restoring your headlights, expert tips, DIY methods, and a step-by-step guide to restoring your headlights at home.
II. Why Restoring Your Headlights is Crucial for Road Safety: A Comprehensive Guide
Driving with hazy and yellowed headlights can increase the risk of accidents. The cloudy or discolored lenses can reduce visibility, making it difficult to see the road ahead, especially at night or in bad weather. According to the National Highway Traffic Safety Administration (NHTSA), cloudy headlights can reduce visibility up to 80%. This means that the driver may not be able to see an obstacle or a pedestrian on the road, leading to a potential accident.
Moreover, oxidized headlights can be a legal hazard. Most states have laws that set standard requirements for the brightness of your headlights. Hazy or yellowed headlights may not meet the standards, and you may get fined for it. Therefore, continuing to drive with cloudy or discolored headlights is not only dangerous but also illegal.
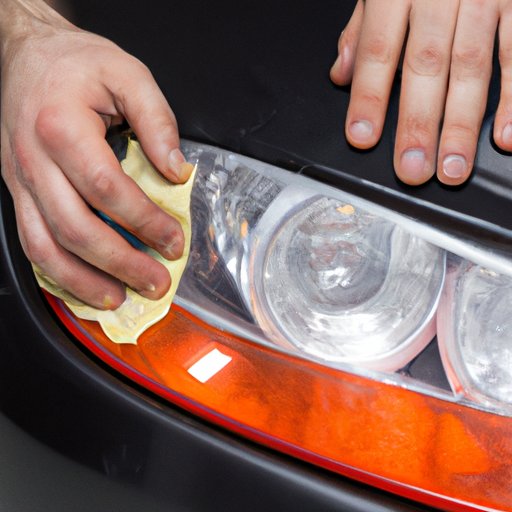
III. The Do’s and Don’ts of Restoring Headlights: A Helpful Guide
Restoring headlights is a simple process that you can do with minimal tools and equipment. However, it is essential to follow some dos and don’ts to make sure you get the best results. Firstly, always use a dedicated headlight restoration kit that comes with all the necessary items such as sandpaper, polish, and a sealant. Avoid using home cleaning solutions that can damage your headlights further. Also, read the instructions carefully before starting the process.
Remember to mask any non-painted areas around the headlights before starting restoration, as some products may damage the paint. Use a microfiber towel or a soft cloth to avoid scratches. Do not press too hard while polishing, as this may heat up the plastic and cause deformation. Finally, always protect your headlight’s surface by applying a UV sealant to prevent oxidation from recurring.
IV. Expert Secrets to Bringing Your Car’s Headlights Back to Life
If you want to give your headlights a professional look, consider getting the advice of experts. They will provide you with tips and techniques on how to restore your headlights that you may not find anywhere else. For example, professional restoration services use power sanding and machine-polishing techniques for better outcomes. They also have access to high-quality products and equipment that are not available over the counter.
If you plan to do a professional-grade restoration yourself, you can buy the same products and equipment used by experts. For instance, you can use a rotary buffer or a dual-action polisher, a high-quality abrasive, compound, and polish. These products are often more expensive than DIY headlight restoration kits, but they provide better results.
V. 10 DIY Methods to Restore Hazy and Yellowed Headlights
There are several DIY methods that you can use to restore your headlights without breaking the bank. These methods are cost-effective and require minimal tools and equipment. Here are ten practical methods;
- Use Toothpaste: Apply non-abrasive toothpaste on the headlight surface and rub gently. Rinse with water and wipe with a cloth.
- Baking Soda and Vinegar: Make a paste of baking soda and vinegar and apply it on the headlights. Rub gently, rinse with water, and dry with a cloth.
- Coca-Cola: Pour some Coca-Cola on the headlight surface and let it sit for a few minutes. Scrub gently and rinse with water.
- Ammonia: Mix water and ammonia in a 1:1 ratio and apply the solution on the headlights. Rub gently, rinse with water, and dry with a cloth.
- Brass Cleaner: Apply brass cleaner on to a cloth and rub the headlight surface gently. Rinse with water, and dry with a cloth.
- Rubbing Alcohol: Apply rubbing alcohol on the headlights and rub gently with a cloth. Rinse with water and dry.
- Bug Spray: Spray bug spray on a cloth and wipe the headlight surface. Rinse with water, and dry with a cloth.
- Hairspray: Apply hairspray on the headlight surface and rub gently with a cloth. Rinse with water, and dry with a cloth.
- Pencil Eraser: Use a pencil eraser to remove minor scuffs and scratches from the headlight surface.
- Sanding and Polishing: Sand the headlight surface with sandpaper and use a polishing compound to restore its clarity. Apply a UV sealant to protect the surface.
It’s important to note that not all of these methods may work for every situation. Some may provide better results for lightly fogged or scratched headlights, while others may work on severely yellowed or hazy headlights. It is best to test each method on a small area of your headlight surface before you proceed with the rest.
VI. Step-by-Step Guide to Restoring Your Headlights at Home
If you prefer a more detailed method for restoring your headlights, follow this step-by-step process;
Step 1: Gather all the necessary tools and products. You will need sandpaper (800-grit and 2000-grit), plastic cleaner, polishing compound, microfiber cloth, and UV sealant.
Step 2: Tape off any non-painted areas around the headlights to avoid damaging the paint. Cover the fenders and windshield with newspaper.
Step 3: Sand the headlight surface with a 800-grit sandpaper. Use water to keep the surface wet while sanding. Sand in one direction, and do not apply too much pressure.
Step 4: Rinse the headlight surface with water and dry with a clean cloth. Repeat the sanding process with a 2000-grit sandpaper. Sand in different directions to remove scratches from the first sanding.
Step 5: Rinse the headlight surface with water and dry with a clean cloth. Apply plastic cleaner to the cloth and rub gently on the headlight surface. Wipe with a clean cloth to remove any excess cleaner.
Step 6: Apply the polishing compound to the microfiber cloth and apply it to the headlight surface. Buff the surface until the headlight becomes clear. Change the cloth when necessary.
Step 7: Apply the UV sealant to the headlight surface to protect it from fading and oxidation. Wait for a few minutes and wipe off any excess sealant with a clean cloth.
VII. 3 Effective and Affordable Ways to Polish and Restore Your Headlights
Here are three affordable and straightforward methods to polish and restore your headlights;
- Restore Headlights Using Toothpaste: Use non-abrasive toothpaste to restore your headlights. Apply toothpaste to a soft cloth and rub gently in circular motions. Rinse with water and dry with a clean cloth.
- Use Vinegar and Baking Soda: Mix two tablespoons of baking soda with vinegar to make a paste. Apply the paste to your headlights and rub gently. Rinse with water and dry.
- Use a Glass Cleaner: Apply a glass cleaner on a soft cloth and wipe your headlights until it sparkles.
Table Comparing Results from DIY and Expert Restoration Methods
| DIY Methods | Expert Restoration | Pros and Cons |
|---|---|---|
| Simple and affordable | Professional grade techniques and equipment | DIY methods are generally less effective and do not provide long-lasting results. Expert restoration may cost more, but it includes techniques and equipment that offer better results and durability. |
| No expertise required | Requires specialized knowledge and training | DIY methods are easy to use and require minimal tools. Expert restoration requires experienced technicians and access to specialized equipment. |
| May not work for all headlights | Works for all types of headlights | DIY methods are simple and quick, but they may not work for severely yellowed or hazy headlights. Expert restoration techniques are more effective for old or damaged headlights. |
VIII. Conclusion
Restoring your headlights is a crucial process that you cannot overlook. Hazy and yellowed headlights can endanger your life and the lives of others on the road. In this article, we covered the basics of headlight restoration, including why it’s crucial, the do’s and don’ts, and ten DIY methods. We also offered a step-by-step guide to restoring your headlights. In the end, we emphasized the importance of restoring your car’s headlights and encouraged readers to do so immediately.


