I. Introduction
Removing a tub drain can be a daunting task, especially for those who do not have plumbing experience. It is a common problem that homeowners face and unfortunately, it is not easy to fix. That being said, with patience, the right tools, and a bit of guidance, you can successfully remove a tub drain. In this article, we will provide you with a step-by-step guide with troubleshooting tips on how to remove a tub drain.
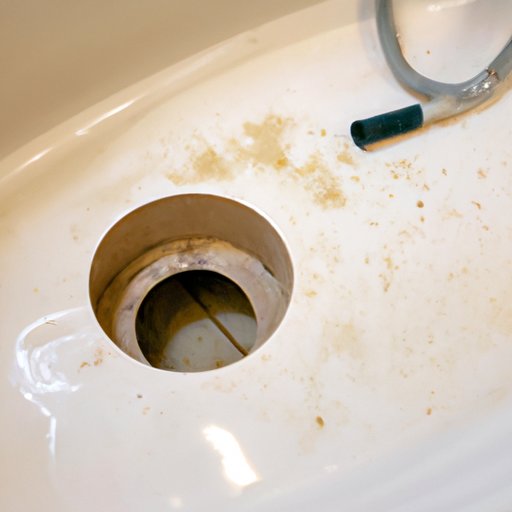
II. Step-by-Step Guide
Before we begin, you will need the following tools:
- Flathead screwdriver
- Needle-nose pliers
- Tub drain removal tool
The steps to remove a tub drain are as follows:
- Remove the screws covering the overflow plate, if any
- Loosen and remove the overflow plate
- Push down the drain stopper and unscrew the drain body
- Use the tub drain removal tool to remove the drain body
- Remove any remaining gunk or sealant around the drain hole
If you encounter any issues during the process, don’t worry. Here are some tips and tricks to help you troubleshoot:
- If the drain stopper is difficult to remove, use a pair of pliers to pull it out
- If there is rust or corrosion making it hard to remove the drain, use penetrating oil or a rust dissolver
- If the sealant around the drain body is not budging, use a putty knife to gently scrape it away
- If you can’t find a tub drain removal tool, you can make one yourself using a screwdriver and pliers
III. Video Tutorial
For those who are visual learners, video tutorials can be a great resource. We have created a video tutorial that will guide you through the process of removing a tub drain:
In this video tutorial, we will cover:
- How to remove the overflow plate
- The process of removing the drain stopper and drain body
- How to clean the area around the drain hole
- Installing a new tub drain, if needed
IV. Troubleshooting Article
Despite following the steps in the guide or watching the video tutorial, you may still encounter some challenges along the way. Some of the common problems faced when removing a tub drain include:
- The drain stopper is stuck and won’t budge
- The drain is rusted or corroded
- The sealant around the drain is difficult to remove
- You can’t find a tub drain removal tool
Here are some troubleshooting solutions to help you overcome these challenges:
- Place a washcloth around the drain stopper and use pliers to pull it out
- Use a rust dissolver or penetrating oil to loosen the rust or corrosion
- Scrape away the sealant with a putty knife
- Make your own tub drain removal tool using pliers and a screwdriver
V. Insider Tips
Now that you have a better understanding of how to remove a tub drain, we want to provide you with some additional tips and tricks to help make this task easier:
- Use gloves to protect your hands
- Apply lubricant to the drain body threads to make future removal easier
- Avoid using chemical drain cleaners as they can damage the drain
- If your drain is still not coming out, consider seeking professional assistance
Remember, the goal is to remove the drain without damaging the tub. By following these tips, you can help ensure that this DIY project goes smoothly.
VI. Comparative Analysis
There are different methods to remove a tub drain. Some people prefer to use chemical drain cleaners, while others opt for more manual methods. Here is a comparison of the different methods:
Chemical Drain Cleaners
Pros:
- Easy to use
- Can dissolve rust and corrosion
Cons:
- Can damage pipes if not used properly
- Can cause skin and eye irritation when exposed to the skin
- Not environmentally friendly
Manual Methods
Pros:
- Do not require the use of chemicals
- Can remove stubborn drains
- Can be less expensive than using chemical drain cleaners
Cons:
- Can take longer to remove drain compared to chemical drain cleaners
- Requires physical effort
- May require the use of additional tools
VII. Conclusion
By following our step-by-step guide, watching the video tutorial, and utilizing some insider tips and common troubleshooting solutions, hopefully, you now feel confident in tackling the task of removing a tub drain. Remember, if you encounter any issues, don’t hesitate to call a professional. With the right approach and tools, you can successfully remove your tub drain without causing damage to your tub or plumbing fixtures.
Final tip for success: take your time and don’t rush the process.


