I. Introduction
Removing tile floors can be a daunting task for many homeowners. Common problems such as damage to the subfloor, time-consuming clean-up, and the potential for injury can make the process overwhelming. The purpose of this article is to provide a step-by-step guide for removing tile floors, including DIY options and tools to rent. By following these instructions, you can save money and ensure a successful removal process.
II. Step-by-Step Guide
Step 1: Preparation
The first step in removing a tile floor is to prepare the room. Remove all furniture, appliances, and other objects from the space. Cover doorways and vents with plastic sheeting to prevent debris from spreading throughout the house. It is also essential to wear gloves, masks, and safety goggles to protect yourself during the process.
Step 2: Removing the Grout
Before breaking the tiles, it is necessary to remove the grout between them. This can be done using a manual grout saw or a rotary tool with a grout removal attachment. Use caution not to damage the surrounding tiles while removing the grout.
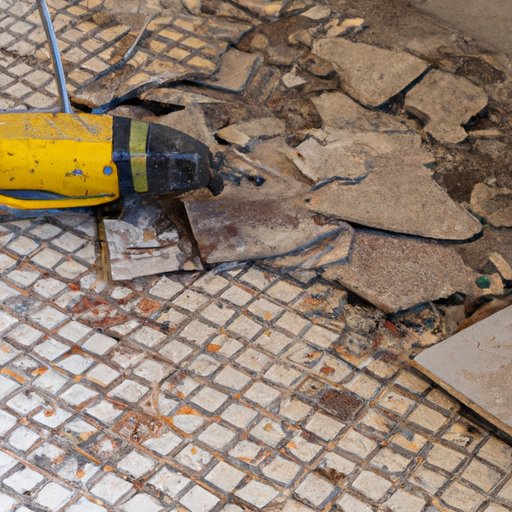
Step 3: Breaking the Tiles
The next step is to break the tiles. For a DIY option, you can use a hammer and chisel to break the tiles into small pieces. Wear gloves and long sleeves to protect yourself from the sharp edges. Work carefully to avoid damaging the subfloor.
Step 4: Removing the Adhesive
After removing the tiles, there will be adhesive left on the subfloor. The type of adhesive will determine the best way to remove it. Use a scraper for water-soluble adhesive, and a chemical adhesive remover for tougher adhesives. Follow the instructions carefully and use safety precautions when working with chemical agents.
Step 5: Clean-up
Once the tiles and adhesive are removed, clean the area thoroughly. Use a shop vacuum or broom to remove debris. Use a cleaning solution and mop to clean the subfloor before proceeding with the next step. Proper clean-up will ensure a smooth installation of the new floor.
III. DIY Without Power Tools
If you prefer a DIY approach without using power tools, you can still remove the tiles with a few simple tools. A hammer, chisel, and scraper can do the job. This method takes more time and effort, but it is cost-effective and can be an excellent option for small projects.
IV. Renting Tools
For more extensive projects, renting tools may be necessary. Tools such as a tile stripper, jackhammer, and power scraper can make the job much more efficient. Renting tools can save time and energy, but it is essential to follow safety guidelines carefully. Be sure to rent from a reputable supplier and select the right tool for the job.
V. Chemical Agents for Tile Removal
Chemical agents can dissolve adhesive and make removing tiles much easier. There are a variety of chemical options available on the market, but it is essential to use them with caution. Follow the manufacturer’s instructions and use safety precautions such as gloves, masks, and goggles. These agents can be particularly useful for removing stubborn adhesive.
VI. Alternative Uses for Removed Tiles
The removed tiles can be repurposed in various ways. You can create DIY projects with them, such as mosaic art or coasters. Alternatively, they can be used to create a garden path or border. Repurposing old tiles can add a unique touch to your home and prevent them from ending up in a landfill.
VII. Tips for Disposal
Disposing of the removed tiles and debris requires careful consideration. Check with your local regulations to ensure proper disposal methods. In many areas, residential customers can dispose of construction debris at the local dump. Be sure to take proper precautions when handling the debris and wear gloves to protect yourself from sharp edges.
VIII. Conclusion
Removing tile floors can be a complicated and challenging process. However, with the right tools, information, and safety precautions, the job can be completed successfully. Whether you choose a DIY approach or rent tools, be sure to follow the steps carefully to avoid damage or injury. By disposing of the old tiles correctly, you can also be eco-friendly and repurpose them creatively. With this guide, you can remove tile floors with confidence and prepare your space for a beautiful new floor.


