Introduction
If you’re a homeowner or renter, knowing how to remove a shower drain is a crucial DIY skill to have. Not only does it save money and time instead of calling a professional plumber, but it also allows you to clean and maintain your shower more easily.
This article is for anyone who wants to remove their shower drain with confidence and avoid potential mistakes. Whether you’re a beginner or seasoned DIY enthusiast, this step-by-step guide and accompanying DIY tips will help you get the job done.
Step-by-Step Guide
Before starting, make sure you have all the necessary tools and that you turn off the water supply to your shower.
1. Remove the drain cover using a flat-head screwdriver. Set aside the screws and cover.
2. Use pliers or a wrench to loosen the locking nut underneath the cover. Turn counterclockwise until the nut is off.
3. Grab the strainer and gently pull it upwards. If it doesn’t come out easily, try using a lubricant like WD-40 or boiling water to loosen any debris. Be careful not to damage the shower liner or plumbing connections.
Make sure not to damage the shower liner or plumbing connections in your shower while removing the strainer.
4. Clean the drain area thoroughly with a wire brush or pipe cleaner to remove any buildup or hair.
5. Check the drain piping and traps for damage or clogs, and remove any debris.
6. Insert the new drain or strainer into the hole, and tighten the locking nut by turning clockwise.
7. Replace the drain cover and screws, and test for any leaks.
Video Tutorial
For those who prefer a more visual step-by-step tutorial, we’ve included a video tutorial to accompany our written guide.
View this video tutorial for additional guidance in removing a shower drain.
DIY Tips
Removing a stubborn shower drain can be a challenge, even for experienced DIYers. Here are some tips and tricks to make the process smoother:
- Use pliers or channel-locking pliers to grip the strainer securely, making it easier to remove.
- Soak a cloth or rag in boiling water and place it over the strainer to loosen any debris.
- If the screws are rusted or stuck, use a hammer to tap the screwdriver gently and loosen the rust.
- Wear gloves and eye protection to protect your hands and eyes from any debris or sharp edges.
Take the stress out of removing your shower drain with these helpful DIY tips.
Choosing the Right Tools
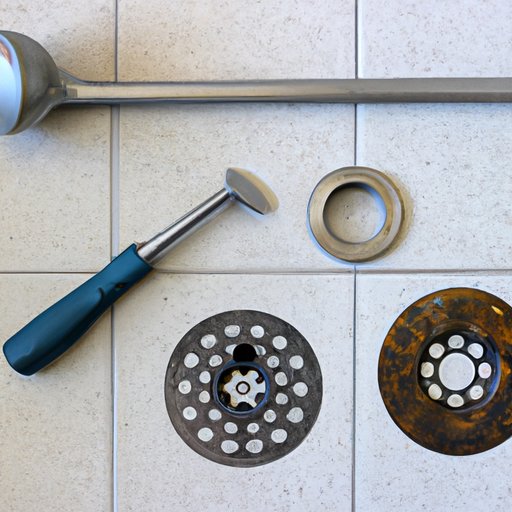
Having the right tools on hand makes removing a shower drain much easier and minimizes any potential damage. Here are the essential tools needed for the job:
- Flat-head screwdriver
- Pliers or channel-locking pliers
- Wrench
- Lubricant, like WD-40
- Wire brush or pipe cleaner
We recommend investing in high-quality tools to ensure effective removal and ease of use. Here are some recommended products:
- IRWIN VISE-GRIP Pliers – https://www.amazon.com/IRWIN-VISE-GRIP-GrooveLock-2078712/dp/B01M0S1IZS/ref=sr_1_4
- GEARWRENCH Wrench Set – https://www.amazon.com/GEARWRENCH-81916-Piece-Combination-Wrench/dp/B0002NYD8E/ref=sr_1_3
- WD-40 Multi-Use Lubricant – https://www.amazon.com/WD-40-Multi-Use-Product-Non-Aerosol-Trigger/dp/B000BPHXJA/ref=sr_1_3
- Superio Wire Brush – https://www.amazon.com/Superio-Brush-Set-Stainless-Scrubbing/dp/B07CZ1FPCK/ref=sr_1_4
The Importance of Regular Removal
Removing a shower drain on a regular basis is important for maintaining proper water flow and preventing any potential clogs. We recommend removing your shower drain every six months to a year, depending on how frequently it is used.
Some warning signs that it’s time to remove your shower drain include slow draining water, strange smells, and visible buildup around the drain area. By regularly removing the drain, you can avoid clogs, extend the life of your shower liner, and improve your overall shower experience.
Professional Advice
We also reached out to professional plumbers for their insights and advice on removing shower drains. Here are some tips they suggested:
- Be cautious when removing the strainer to prevent any damage to the shower liner or plumbing connections.
- If you encounter any issues while removing the drain, like a stubborn nut or screw, don’t force it – you risk damaging the plumbing.
- If the shower drain is part of a larger plumbing problem, like a leak or clog, it’s best to call a professional plumber.
Always proceed with caution and follow professional advice to prevent any unnecessary plumbing or drain issues.
Conclusion
Removing a shower drain may seem like an intimidating task, but with the right tools and guidance, it’s a straightforward process. Remember to gather all necessary tools, follow the step-by-step guide, and consider our DIY tips for a smooth and easy removal.
By regularly removing your shower drain and taking care of your plumbing and shower liner, you can extend their lifespan and improve your shower experience.


