Introduction
If you are a homeowner, contractor, or DIY enthusiast, you know how important it is to know how to remove paint. Whether you are dealing with chipped, peeling, or old paint, refreshing a space by removing all the old paint can give it a brand new look. However, removing paint can be a daunting task, especially if you do not know the best method to use. This article will provide you with five simple techniques for removing paint from any surface, tips and tricks to make the process easier, eco-friendly and budget-friendly options, chemical-free methods for safe paint removal, and a step-by-step DIY tutorial.
5 Simple Techniques for Removing Paint from Any Surface
Technique 1: Sanding
If you are dealing with a surface with multiple layers of old paint that are flaking, sanding is the best technique to use. Sanding removes paint by grinding it off using abrasive material.
When to use sanding as a technique
Sanding is best used when dealing with wooden surfaces or surfaces with intricate designs and hard-to-reach spots. Additionally, it is best to use sanding when removing lead-based paint because the sanding process captures the paint dust, preventing it from spreading around the area.
Tools needed for sanding
For sanding, you will need an electric sander, sandpaper, a mask, and safety goggles to protect your eyes.
Steps to follow for sanding
- Wear a mask and safety goggles.
- Attach the sandpaper to the electric sander and turn it on.
- Work in small sections and sand the surface working in a circular motion.
- Change the sandpaper frequently to continue removing paint effectively.
- Use a scraper to remove any remaining paint on hard-to-reach spots.
- Clean up the area by sweeping or wetting the surface then wiping it off with a rag.
Technique 2: Heat Gun
A heat gun is a tool used to blow hot air onto a surface to soften and loosen the paint. The softened and loosened paint can then be easily scraped off using a scraper.
When to use a heat gun as a technique
A heat gun is the best technique to use when dealing with large surfaces with thick coats of paint, such as walls, doors, and windows.
Safety precautions to follow when using a heat gun
When using a heat gun, it is crucial to wear gloves and protective eye equipment because the process can easily burn your skin and eyes.
Steps to follow for using a heat gun
- Put on gloves and safety glasses to protect yourself from the heat and flying debris.
- Turn on the heat gun and hold it about six inches from the surface, moving it back and forth over the painted area.
- The paint will start to bubble, which indicates that it has softened.
- Use a scraper to remove the paint that has loosened and become soft.
- Repeat the process until most of the paint has been removed.
- Use a rag or sponge dipped in warm soapy water to clean away any residue left by the paint removal process
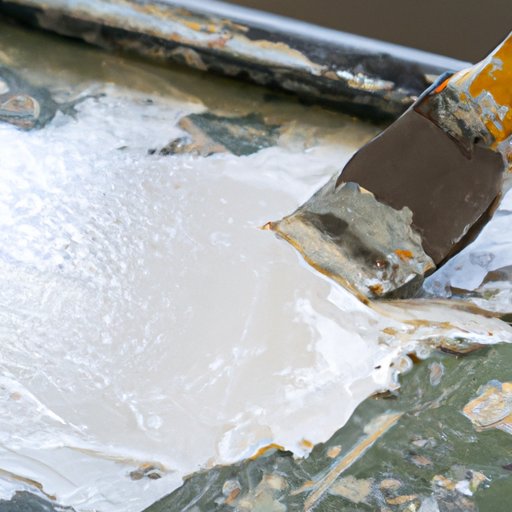
Technique 3: Chemical Paint Stripper
Chemical paint strippers are made up of chemicals that dissolve paint when applied to a surface. Once the paint has been dissolved, it can be washed away using water.
When to use a chemical paint stripper as a technique
A chemical paint stripper is the best technique to use when dealing with a surface with several layers of paint or paint that is not easily removable using other techniques.
Safety precautions to follow when using a chemical paint stripper
When using a chemical paint stripper, it is essential to protect your skin and respiratory system by wearing gloves, protective clothing, and a mask. Additionally, make sure that the area is well ventilated.
Steps to follow when using a chemical paint stripper
- Put on gloves, protective clothing, and a mask to protect your skin and respiratory system.
- Apply the chemical paint stripper to the surface using a paintbrush or spray can, making sure that the entire surface is covered.
- Leave the chemical paint stripper to melt the paint for the time specified on the label.
- Once the paint is dissolved, use a scraper to remove it, and wash the surface with water to remove any remaining chemical residue.
- Disposal of the chemical paint stripper should be done according to the instructions on the label.
Technique 4: Power Washing
Power washing or pressure washing removes paint by using pressurized water to blast the paint from the surface.
When to use power washing as a technique
Power washing is best used when dealing with large surfaces, such as walls or concrete surfaces.
Tools needed for power washing
You will need a power washer and a scraper.
Steps to follow when power washing
- Attach the power washer to a hose and turn on the water.
- Point the high-pressure water jet at the surface, moving it around and focusing on areas with old paint.
- Use a scraper to remove any remaining paint that could not be removed by the power washing.
- Clean up the area by sweeping or wetting the surface then wiping it off with a rag.
Technique 5: Scraping
Scraping removes paint by scraping it from the surface using a scraper, putty knife, or paint scrapper.
When to use scraping as a technique
If you are dealing with a small surface or with small specks of paint, scraping is the best technique to use.
Tools needed for scraping
You will need a scraper, putty knife or paint scraper, and sandpaper.
Steps to follow when scraping
- Scrape the surface using a scraper, putty knife, or paint scraper, and remove as much of the paint as possible until you reach the surface layer.
- Use sandpaper to smooth out any rough surfaces or remaining paint residue.
- Clean up the area by sweeping or wetting the surface then wiping it off with a rag.
The Ultimate Guide to Removing Paint: Tips and Tricks
Common mistakes to avoid when removing paint
- Not wearing protective equipment.
- Not following instructions on the label of the paint removal product.
- Scratching the surface with the scraper.
- Starting the job when the surface is wet or dirty.
Tips for selecting the right technique
When selecting the right technique to use, consider the type of surface you are dealing with, the condition of the paint, the amount of time you have, and your budget.
Tricks for making the process of removing paint easier and faster
- Apply multiple thin layers of paint stripper instead of one thick layer.
- Use a plastic paint scraper instead of a metal one to avoid scratching the surface.
- Use a pressure washer with a rotating nozzle to remove the paint quickly and efficiently.
- Use a heat gun that has multiple heat settings so that you can adjust it to the amount of paint that needs to be removed.
Steps to follow for preparing the surface after removing the paint
- Clean the surface with warm soapy water to remove any residue left from the paint removal process.
- Allow the surface to dry thoroughly.
- If needed, sand the surface to remove any rough patches or remaining residue.
- Apply primer and paint to the surface for a new finish.
DIY Paint Removal: A Step-by-Step Tutorial
Why you may prefer DIY paint removal
DIY paint removal can save you money on labor costs and give you a sense of accomplishment. Additionally, you have control over the process and can be more selective of the products used.
Steps to follow for DIY paint removal using the sanding technique
- Wear protective gear, including a mask and safety glasses.
- Attach sandpaper to an electric sander and turn it on.
- Sand the surface with a circular motion.
- Use a scraper to remove any remaining old paint.
- Clean up the area by sweeping or wetting the surface then wiping it off with a rag.
Steps to follow for DIY paint removal using the heat gun technique
- Put on gloves and protective glasses.


