I. Introduction
Reheating crab legs is a common issue faced by many seafood lovers. Cold crab legs are an unappetizing experience, but reheating them can be a challenge. Incorrect reheating can make the crab legs rubbery and ruin the entire culinary experience. This article will guide you through multiple methods to reheat crab legs perfectly while maintaining their original taste and texture.
II. Microwave Method: How to Reheat Crab Legs in the Microwave
The microwave method is the quickest way to reheat crab legs. It is an ideal method for busy days or when you crave crab legs in a rush.
Step-by-step instructions:
- Place the crab legs in a microwave-safe dish, with just a little butter or water to moisten them.
- Cover the dish with a microwave-safe lid or wrap it with microwave-safe plastic wrap.
- Microwave on high for 2-3 minutes.
- Remove the crab legs from the microwave and let them rest for a minute before serving.
Tips for success:
- Do not cook them for too long in the microwave. Overcooking will result in dry and rubbery crab legs.
- Make sure to cover the crab legs with a lid or plastic wrap to help trap the steam and prevent dryness.
- Adding butter or water to the dish will prevent the crab legs from drying out.
Potential pitfalls to avoid:
- Avoid using too high of a microwave setting as the crab legs can burn or overcook.
- Overcooking the crab legs will result in them losing their original texture and taste as well as making them rubbery.
- Ensure that the lid or plastic wrap is not too tight on the dish. The trapped steam can cause explosions and create a mess inside the microwave.
III. Oven Method: How to Reheat Crab Legs in the Oven
The oven method is perfect for reheating many crab legs simultaneously. This method takes a little longer but produces excellent results and provides a crispy texture.
Step-by-step instructions:
- Preheat the oven to 350°F (175°C)
- Place the crab legs in an oven-safe dish and add melted butter or water.
- Cover the dish with aluminum foil.
- Bake in the preheated oven for 10-15 minutes, depending on the thickness of the crab legs.
- Remove the dish from the oven and let them cool for a few minutes before serving.
Tips for success:
- Preheat the oven to get the best results.
- Make sure to wrap the dish tightly in foil to keep the moisture inside the dish and prevent it from leaking out.
- Add a little butter or water to the dish to provide moisture and prevent dryness.
Potential pitfalls to avoid:
- Avoid overcooking the crab legs as it can produce a rubbery texture.
- Do not overstuff the baking pan, allowing enough space for the crab legs to cook evenly.
- Avoid overcooking the crab legs as it can produce a dry texture.
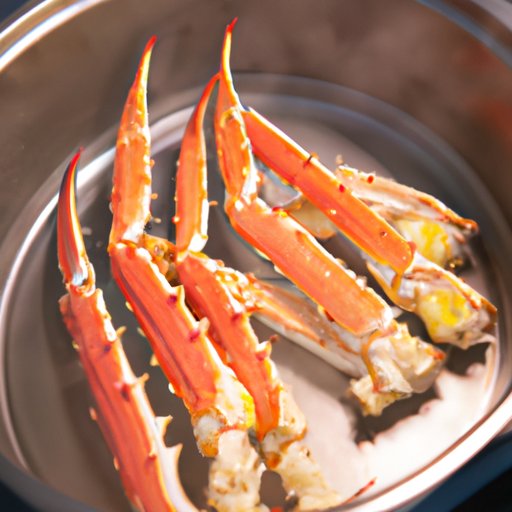
IV. Steaming Method: How to Reheat Crab Legs with Steaming
Steaming is a classic method to cook and reheat seafood. This gentle method reheats crab legs without losing their moisture and flavor.
Step-by-step instructions:
- Fill a large pot with water and bring it to a boil.
- Once the water starts boiling, insert a steamer basket into the pot.
- Put the crab legs in the steamer basket and cover the pot with a lid to keep the steam inside.
- Steam the crab legs for 5-7 minutes, depending on the thickness of the crab legs.
- Remove the crab legs from the steamer basket, and wait for 1-2 minutes before serving.
Tips for success:
- Steam the crab legs in a boiling pot to ensure a consistent temperature and timing.
- Do not overcrowd the steamer basket to ensure even cooking.
- Drizzle butter or lemon juice over the crab legs before steaming them to enhance their taste.
Potential pitfalls to avoid:
- Avoid overcooking the crab legs, as they will become tough and rubbery.
- Do not steam them with a lid that does not fit correctly as the steam can escape, leading to uneven cooking.
- Keep a check on the boiling water and add more water if necessary to prevent it from drying out.
V. Grilling Method: How to Reheat Crab Legs on the Grill
If you have leftovers from a crab feast party, grilling crab legs is a fun way to reheat them. This method gives the crab legs a smoky char flavor that enhances their taste.
Step-by-step instructions:
- Preheat your grill to medium heat.
- Brush the crab legs with a light coat of butter and place them on the grill grates.
- Grill the crab legs for 4-6 minutes on each side, depending on the thickness of the crab legs.
- Remove the crab legs from the grill and let them rest for a minute before serving.
Tips for success:
- Preheat your grill to medium heat to get an even cook on the crab legs.
- Time your grilling according to the thickness of the crab legs, and flip the legs to grill both sides evenly.
- Add different seasonings or ingredients such as garlic, chili flakes to add different flavors to the crab legs.
Potential pitfalls to avoid:
- Avoid overcooking the crab legs as it can make them dry and rubbery.
- Do not overcrowd the grill, or the heat might not be distributed evenly, leading to uneven cooking.
- Be careful when flipping the crab legs to avoid breaking them apart.
VI. Boiling Method: How to Reheat Crab Legs in Boiling Water
Boiling is a straightforward method when looking for quick and easy reheating. This method retains the original tenderness and flavor of the crab legs.
Step-by-step instructions:
- Fill a pot with water and bring it to a boil.
- Add a tablespoon of salt to the water.
- Place the crab legs inside the pot and let them cook for 3-5 minutes, depending on their thickness.
- Remove the crab legs from the pot using tongs and let them drip dry for a minute before serving.
Tips for success:
- Use a pot with enough space to ensure even cooking of the crab legs.
- Adding salt enhances the flavor and gives an extra kick to the crab legs.
- Season with some herbs and butter before boiling to enhance the flavor of the crab legs.
Potential pitfalls to avoid:
- Avoid over-boiling the crab legs as it can make them dry and stringy.
- Monitor the cook time according to the thickness of the crab legs.
- Boil the crab legs covered to retain the steam and prevent evaporation.
VII. Sautéing Method: How to Reheat Crab Legs by Sautéing
Sautéing is a famous cooking technique to reheat leftover crab legs. This method provides a crispy texture to the crab legs, making them an ideal appetizer or side dish.
Step-by-step instructions:
- Heat some butter in a skillet on medium-high heat.
- Place the leftover crab legs in the skillet and sauté for 2-3 minutes until they are crispy on the outside.
- Flip the crab legs and sauté for another 2-3 minutes on the other side.
- Remove the crab legs from the skillet and let them cool for a minute before serving.
Tips for success:
- Use butter instead of oil to add flavor to the crab legs.
- Sauté the crab legs in batches to avoid overcrowding and ensure that they cook evenly.
- Season the crab legs with different herbs and spices to add varied flavors to them.
Potential pitfalls to avoid:
- Avoid overheating the skillet as it can burn the crab legs.
- Maintain the right heat, so that the crab legs cook to a crispy state and have a golden color but do not become burnt or charred.
- Do not over sauté the crab legs, as they can become tough and rubbery.
VIII. Sous Vide Method: How to Reheat Crab Legs using Sous Vide
The Sous vide method involves sealing the crab legs in an airtight bag and immersing them in a water bath. This cooking method is ideal for reheating crab legs while preserving flavor and tenderness.
Step-by-step instructions:
- Fill a large pot with water and place it on the stovetop to heat.
- Season the crab legs with salt, butter, or herbs of your choice.
- Insert the crab legs into a vacuum-sealed bag.
- Place the sealed bag into the water bath and let the crab legs cook for 10-15 minutes.
- Remove the crab legs from the bag and let them cool for a minute before serving.
Tips for success:
- Use Sous vide precision-cooking equipment to maintain a consistent temperature of the water bath.
- Maintain the optimal cooking temperature (130°F) for Sous Vide to cook the crab legs evenly and retain their flavor and tenderness.
- Add different spices such as garlic powder, paprika, or cumin to the vacuum-sealed bag with crab legs to enhance their flavor.
Potential pitfalls to avoid:
- Avoid using thin bags to seal crab legs as they may puncture or tear during cooking.
- Do not jam too many crab legs in the sealed bag as overcrowding can disturb the cooking process.
- Ensure that there is no air cushion in the vacuum seal bag, which may cause uneven cooking or floating of the crab legs in the water bath.
IX. Conclusion
Reheating crab legs using these different methods provides different textures and flavors. Choosing the right method depends on available time, equipment, and personal preference. When reheated correctly, crab legs keep their original taste and retain the same tenderness as freshly prepared crab legs. Follow the tips and potential pitfalls for each method to enjoy fresh-tasting crab legs using whatever method you chose.
Suggestions for different situations:
- The microwave method is a swift, time-saving option to reheat your crab legs.
- The grill method is perfect for an informal gathering or BBQ where you want to add an extra smoky flavor to your crab legs.
- The oven and steaming methods work best when reheating multiple crab legs in a single batch.
- The boiling method and sous-vide method work best when reheating limited quantities of crab legs.
- The sautéing method is recommended when you have pre-cooked leftover crab legs.
Final thoughts and advice:
- Follow the recommended cooking times and temperatures for each method to get perfect results every time.
- Always use a timer to avoid overcooking the crab legs.
- Ensure that all equipment is clean and sanitized before starting the cooking process.
- Experiment with different spices and flavors to enhance the taste of the crab legs and make them unique.


