Introduction
Have you ever looked at your shower tiles and noticed that the grout is deteriorating or discolored? This is a common problem in bathrooms with regular use, but it’s also an issue that you can easily fix. This article will provide a step-by-step guide on how to regrout your shower, with expert tips and tricks to make the process easier and more efficient.
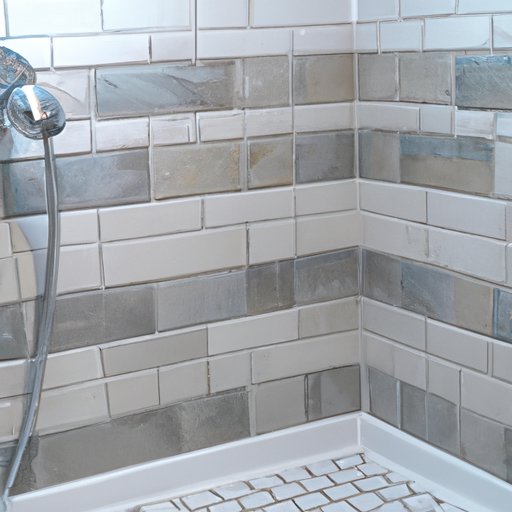
Step-by-Step Guide: How to Regrout Your Shower in 6 Easy Steps
The following steps will guide you through the process of regrouting your shower, from preparation to cleanup:
Step 1: Preparation
Before you begin, you’ll need to gather the necessary tools and take safety precautions. Tools might include a grout removal tool, grout float, mixing paddle, and sponge. Safety precautions might include wearing gloves and goggles to protect your skin and eyes from grout dust.
Step 2: Remove old grout
Using a grout removal tool, remove the old grout from between the tiles. Be sure to take your time and work carefully to avoid damaging the tiles. If you’re having trouble removing the grout, you might need to use a small hammer and chisel to break it up.
Step 3: Clean the tile surface and let it dry
Once you’ve removed the old grout, use a scrub brush and a mix of warm water and vinegar to clean the tile surface. Be sure to remove any debris or dust left from the grout removal process. Allow the tiles to dry completely before moving on to the next step.
Step 4: Mix the new grout
Follow the instructions on your package of grout mix to create the grout mixture. Use a mixing paddle to mix the grout until it’s smooth and free of lumps.
Step 5: Apply new grout to the tiles
Using a grout float, apply the new grout mixture to the spaces between the tiles. Be sure to work in small sections to avoid letting the grout dry too quickly. Use the float to push the grout into the spaces between the tiles, then use a damp sponge to remove any excess grout from the tile surface.
Step 6: Clean up excess grout and let it dry
After you’ve applied the new grout to the entire shower surface, use a damp sponge to clean up any excess grout from the tiles. Allow the grout to dry completely according to the instructions on the package. Once it’s dry, use a dry cloth to buff the tiles and remove any remaining grout haze.
7 Tips and Tricks to Make Regrouting Your Shower a Breeze
These tips and tricks will help make your shower regrouting process more efficient and effective:
Tip 1: Use a grout removal tool
A grout removal tool can make the process of removing old grout much easier than using a hammer and chisel. Choose a tool that is appropriate for the size of your tile and the width of your grout lines.
Tip 2: Protect your bathroom surfaces
Use tape or plastic sheeting to protect your bathroom surfaces from dust and debris generated during the grout removal process. This will also make it easier to clean up once the job is complete.
Tip 3: Use a grout sealant
A grout sealant can help prevent future grout deterioration and discoloration. Apply the sealant according to the instructions on the package after the new grout has dried completely.
Tip 4: Use a pre-mixed grout for convenience
If you’re short on time or don’t want to mix your own grout, consider using a pre-mixed grout. These are available in most home improvement stores and come in a variety of colors.
Tip 5: Work in small sections
Working in small sections will help ensure that the grout doesn’t dry too quickly, which can make the process more difficult and time-consuming.
Tip 6: Be patient and take breaks
Regrouting your shower can be a time-consuming process, so it’s important to take breaks as needed to avoid fatigue and frustration.
Tip 7: Keep a clean workspace
Keep a clean workspace to avoid spreading grout dust and debris throughout your bathroom. Use a dustpan and brush to collect any debris and dispose of it in a trash can.
DIY Regrouting: Save Money and Refresh Your Shower With These Simple Steps
Regrouting your shower yourself can be a cost-effective way to refresh your bathroom without the expense of hiring a professional. By following the steps outlined in this article, you can complete the job quickly and easily with minimal expense.
Avoid Costly Repairs: Learn How to Regrout Your Shower Like a Pro
Neglecting shower grout issues can lead to costly repairs down the road. By regrouting your shower yourself, you can avoid these expenses and keep your bathroom in good condition. Regular upkeep and maintenance can help you avoid costly repairs and keep your bathroom looking its best.
Expert Advice: The Dos and Don’ts of Regrouting Your Shower
Common mistakes to avoid when regrouting your shower include using too much water when mixing grout and failing to seal the grout properly. To ensure that your shower regrouting process goes smoothly, consider consulting with an expert in home maintenance or DIY projects before beginning the job.
Upgrade Your Bathroom: A Complete Guide to Regrouting Your Shower Tiles
Regrouting your shower tiles can give your bathroom a whole new look and refresh. To upgrade your bathroom on a budget, consider adding a new shower head or replacing old fixtures to complete the transformation.
Conclusion
Regrouting your shower can be an easy and cost-effective way to refresh your bathroom and keep it in good condition. By following the step-by-step guide and expert tips outlined in this article, you can complete the job quickly and easily with minimal expense. Take the time to properly care for your shower and enjoy the benefits of a refreshed and updated space.


