Introduction
If you have ever been to the doctor or the hospital, chances are you have seen a device clipped to your finger or earlobe that rapidly measures your oxygen saturation levels. That device is called a pulse oximeter, and it plays a vital role in monitoring your respiratory function. In this article, we will explore how to read a pulse oximeter accurately, the common mistakes people make when using it, and provide real-life examples of how it can help make critical decisions about treatment.
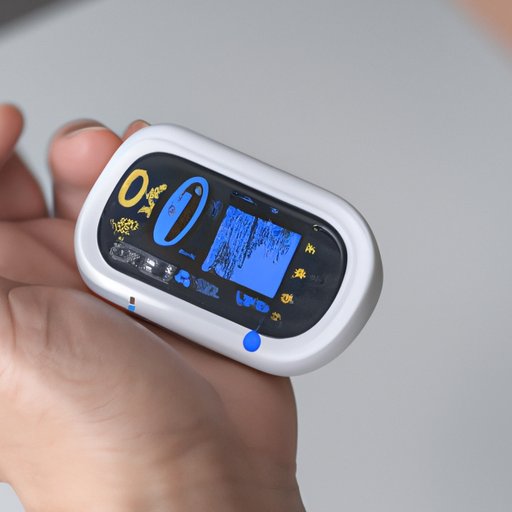
Step-By-Step Guide
Before we delve into how to use a pulse oximeter, let’s take a look at the components of the device:
Probe or Sensor
This small clip-like device attaches to your fingertip or earlobe. It shines a light into the tissue and measures the amount of light absorbed by the blood.
Display Screen
The numbers displayed on the screen indicate your oxygen saturation level (SpO2) and your pulse rate.
Batteries
Most pulse oximeters run on two AAA batteries that will need to be replaced as necessary.
Using a Pulse Oximeter
To use a pulse oximeter, simply clip the device onto your fingertip or earlobe. Make sure the probe or sensor is facing the nail bed or skin and not on the side of the finger.
Reading and Interpreting the Numbers
Once the device is in place, you can easily read the numbers on the display screen. The oxygen saturation level is measured on a scale of 0-100%.
A healthy person’s oxygen saturation level should be above 95%. However, some people with existing health conditions may have a baseline SpO2 lower than 95%.
Calibrating the Device
Most pulse oximeters do not require calibration. However, if you suspect that your device is providing inaccurate readings, consult the user manual or manufacturer for calibration instructions.
Tips for Accurate Readings
Several factors can affect the accuracy of pulse oximeter readings. To ensure accurate measurements, follow these tips:
– Keep your hands warm
– Position the device correctly
– If you are wearing nail polish, use your ear instead
– Avoid motion interference
– Consult a medical professional if necessary
Common Mistakes
Inaccurate readings can lead to false alarms or missed indications of respiratory distress. Here are some common mistakes people make when using a pulse oximeter:
Positioning the Device Incorrectly
Ensure that the device is clipped to a fingertip or earlobe with the probe or sensor facing the nail bed or skin and not the side of the finger or ear.
Motion Interference
If the pulse oximeter moves or shakes during measurement, it can disrupt the reading. Make sure you sit still while using the device.
Using Dirty or Damaged Probes
If the probe or sensor is dirty or damaged, it can affect the accuracy of the readings. Clean the device properly and inspect the probe for any damages before use.
Case Studies
Here are some real-life scenarios where a pulse oximeter was used to monitor oxygen saturation levels:
A 48-year-old male with COPD
Mr. Smith had a history of chronic obstructive pulmonary disease (COPD) and visited his primary care physician with complaints of shortness of breath, cough, and fatigue. The physician attached the pulse oximeter, which showed Mr. Smith’s oxygen saturation levels dropping from the baseline of 93% to 80%. The physician adjusted Mr. Smith’s supplemental oxygen and prescribed steroids to prevent worsening of his COPD.
A 32-year-old pregnant woman
Ms. Brown was brought to the emergency department with shortness of breath and chest pain. She was 30 weeks pregnant. Her pulse oximeter readings showed a dangerously low oxygen saturation level of 70%. She was transferred to the intensive care unit and provided with immediate respiratory support.
Infographics
Infographics can provide a concise summary of complex information. Here is an example of an infographic that explains the components and usage of a pulse oximeter:
[image of an infographic]
Understanding the Infographic
The infographic shows how the probe or sensor in a pulse oximeter emits two beams of light, one red and one infrared, which penetrate the tissue to measure the oxygen saturation levels in the arteries. It also explains how to use the device, with a clear image of the correct positioning of the probe.
Video Tutorial
A video tutorial can be an excellent resource for users who prefer a visual learning experience. Here is an overview of a video tutorial that demonstrates how to use a pulse oximeter:
Step-by-Step Approach
The video tutorial provides a step-by-step guide on how to use a pulse oximeter, from attaching the device to interpreting the numbers displayed on the screen. It includes useful tips and information on how to ensure accurate measurements.
Case Studies
Several case studies are included in the video tutorial to demonstrate the importance of pulse oximeters in monitoring respiratory function.
Troubleshooting Tips
The video tutorial also includes troubleshooting tips for common problems encountered while using a pulse oximeter.
Comparison Guide
There are several types of pulse oximeters available in the market. Here is a comparison of different types of pulse oximeters based on their features and benefits:
Cost
There may be price variations depending on the brand, features, and technology used. Basic pulse oximeters can cost anywhere from $20 to $50, while more advanced ones can cost up to a few hundred dollars.
Accuracy
Higher-end models tend to have more accurate readings, with some models also capable of detecting other vital signs, such as respiratory rate and blood pressure.
Battery Life
The average lifespan of the batteries for pulse oximeters is about 30 to 40 hours for continuous use.
Conclusion
In conclusion, pulse oximeters play a critical role in monitoring respiratory function and can help detect respiratory distress early on, enabling prompt treatment. Now that we have explored the step-by-step guide and common mistakes of how to use a pulse oximeter, you can become confident in your ability to measure your oxygen saturation levels accurately. Remember to follow the tips for accurate readings, and always seek medical help if you have any concerns about your respiratory health.


