I. Introduction
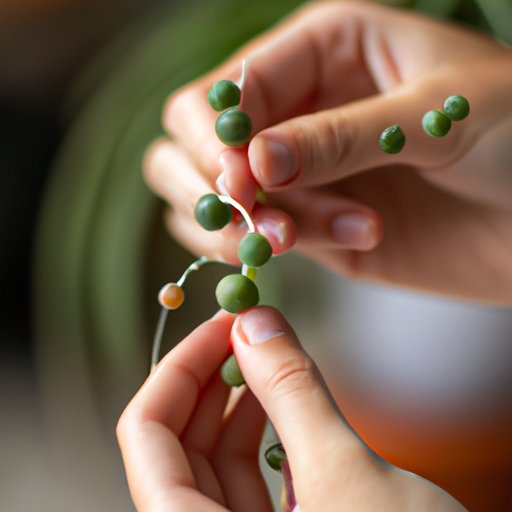
String of pearls is a beautiful and unique plant that adds character to any space it graces. It is a trailing succulent that features small, green, bead-like leaves that resemble the pearls of a necklace. It is also known as senecio rowleyanus, and it hails from South Africa. Propagating string of pearls can be a fun and cost-effective way of expanding your collection or sharing this lovely plant with others.
Importance of propagating string of pearls
Propagating string of pearls is important because it can help you expand your collection, or allow you to share your passion for plants with others. There are also practical reasons for propagating string of pearls: it can save you money, as mature plants can be expensive.
Overview of propagation methods
There are several methods you can use to propagate string of pearls. These include propagation by stem cutting, division, layering, leaf-cutting, root division, and tissue culture. Each method has its advantages, and different gardeners may prefer one method over others. In this article, we will provide you with a step-by-step guide to each method, tips for success, and ways to care for your propagated string of pearls.
II. Propagation by stem cutting
Stem cutting is the most common and simplest way of propagating string of pearls. Here is a step-by-step guide on how to go about it:
- Cut a stem from the mother plant using a sterilized, sharp knife. Look for a healthy stem that is at least three inches long, without any spots or damage.
- Remove the lower leaves carefully with your fingers or scissors, leaving a few at the top.
- Place the cuttings in a well-draining soil mix, and water it gently until the soil is moist.
- Keep the soil moist by misting regularly, but avoid over-watering, which can lead to root rot.
- Within a month, you will begin to see new growth on the cutting, and within two to three months, the cutting should have roots and be ready for potting.
Tips for successful propagation by stem cutting
You can add rooting hormone to speed up the process. Keep the cutting in bright but indirect light, and avoid exposing it to direct sunlight, which can burn it. Also, avoid handling the cutting too much, as this can damage the delicate roots.
III. Propagation by division
Propagation by division involves dividing the mother plant into smaller sections and planting them individually. Here’s how to do it:
- Carefully remove the mother plant from its pot and gently loosen the soil from the root system.
- Gently pull apart the roots, being careful not to damage them too much.
- Divide the plant into smaller sections, making sure each section has a healthy-looking root system.
- Plant each section in a well-draining soil mix, and water it gently until the soil is moist.
- Keep the soil moist by misting regularly, and avoid over-watering, which can cause root rot.
Tips for successful propagation by division
Make sure each section has a healthy rhizome, which is the stem-like structure from which the leaves and roots sprout. Also, avoid dividing the plant when it is too young, as young plants have small root systems and may not survive division.
IV. Propagation by layering
Layering involves bending a flexible stem towards the soil and creating a new plant from it. Here’s how to do it:
- Choose a healthy and flexible stem of the mother plant and gently bend it towards the soil.
- Scratch the bent stem gently with a sharp knife or scissors to help it develop roots more quickly.
- Then, press the part of the stem that has been scratched into the soil, making sure it is covered with soil. Use a toothpick to hold the stem in place, if necessary.
- Keep the soil moist by misting regularly or with a humidity dome to help encourage root growth.
- After a month, the stem will develop roots, and you can cut it from the mother plant.
Tips for successful propagation by layering
Ensure the stem is long enough to bend towards the soil without breaking. Also, make sure the bent stem is in contact with the soil, as this is where the roots will develop.
V. Propagation by leaf-cutting
Propagation by leaf-cutting involves removing a healthy leaf from the mother plant and planting it to grow another plant. Here’s how to do it:
- Remove a healthy leaf from the mother plant, making sure it has a piece of stem attached to it.
- Place the leaf with the stem in a well-draining soil mix, and water it gently until the soil is moist.
- Keep the soil moist by misting regularly or with a humidity dome to help encourage root growth.
- Within a few weeks, you will begin to see tiny roots growing from the stem, and eventually, the leaf will begin to grow new shoots.
Tips for successful propagation by leaf-cutting
Avoid damaging the stem and the leaf when removing the leaf from the mother plant. Also, ensure the soil mix is moist but not waterlogged.
VI. Propagation by root division
Propagation by root division involves separating a healthy section of root from the mother plant and replanting it. Here’s how to do it:
- Carefully remove the mother plant from the pot and gently loosen the soil from the root system.
- Gently pull apart the roots, being careful not to damage them too much.
- Choose a section of root that has healthy-looking tips and replant it in a well-draining soil mix, water it gently until the soil is moist.
- Keep the soil moist by misting regularly, and avoid over-watering, which can cause root rot.
Tips for successful propagation by root division
Ensure that the section of the root you choose has enough healthy, undamaged roots to support the growth of the new plant.
VII. Propagation by tissue culture
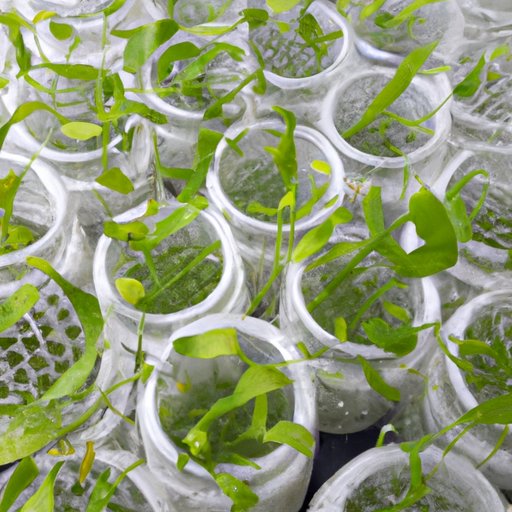
Tissue culture is a complex method of propagation that requires specialized equipment and knowledge. It involves isolating a small section of tissue from the mother plant, and allowing it to grow and develop in a controlled environment.

Tips for successful propagation by tissue culture
If you are interested in propagating string of pearls by tissue culture, it is advisable to seek the guidance of a professional:
VIII. Caring for propagated string of pearls
Once you have successfully propagated your string of pearls, it is essential to take good care of it to ensure its longevity. Here are some tips:
- Water the plant sparingly, as overwatering can lead to root rot. Allow the soil to dry out slightly before watering.
- It requires bright but indirect light. Keep it near a bright window or under grow lights, but avoid exposing it to direct sunlight, which can damage the leaves.
- String of pearls likes warm temperatures. Keep it away from drafty windows or air conditioning vents.
- Feed it every two to four weeks depending on the season. A half-strength fertiliser can be used to boost growth.
Common problems and how to address them
Like all plants, string of pearls is susceptible to a few issues:
- Over-watering can cause root rot and eventual death.
- Underwatering can cause the leaves to shrivel and turn brown.
- Pests such as spider mites can damage its leaves.
IX. Conclusion
Propagating string of pearls is an excellent way to expand your collection or share the plant with friends and colleagues. Whether you choose stem cutting, division, layering, leaf-cutting, root division, or tissue culture, each method has its advantages. Remember, that caring for your propagated string of pearls is essential to maintaining its longevity, and it is important to be aware of common issues and ways to remedy them. With practice and patience, you can be successful in propagating this unique and beautiful plant.


