Introduction
Pressing roses is a time-honored tradition that allows you to preserve the beauty of these delicate flowers for years to come. Whether you want to create a unique piece of art or preserve a memory, pressing roses is a simple, DIY process that anyone can do. This guide is designed for beginners who want to learn how to press roses and includes tips on preserving and using them to create beautiful works of art. With just a few simple steps, you can learn how to press roses like a pro.
7 Simple Steps to Press a Rose Like a Pro
Pressing a rose is a delicate process that requires patience and precision. Here are seven simple steps to follow when pressing a rose:
- Choose the right rose. Select a fresh, unblemished rose that is fully open.
- Prepare the rose. Remove any leaves and trim the stem to 1-2 inches.
- Arrange the rose. Place the rose face down on a piece of parchment paper and arrange the petals as desired.
- Press the rose. Place another piece of parchment paper over the rose, then place a heavy book on top. Leave the rose to press for 1-2 weeks.
- Check the rose. After 1-2 weeks, carefully remove the rose from the parchment paper. If it is not fully dry, replace the parchment paper and continue to press for another week.
- Preserve the rose. Spray the rose with hairspray or a clear acrylic sealer to help preserve its color and shape.
- Store the rose. Place the pressed rose in a protective sleeve or between two pieces of cardboard and store it in a dry, cool place out of direct sunlight.
Remember to handle the rose gently throughout the process to avoid damaging the delicate petals.
The Beginner’s Guide to Preserving Roses: Tips and Tricks
While pressing roses is a popular method of preservation, there are other techniques you can try, such as air-drying and using silica gel. Here are some tips and tricks to help you preserve your roses successfully:
- Air-drying: Hang the roses upside down in a dry, well-ventilated area, such as a closet or attic. The roses will take about two to three weeks to dry completely.
- Silica gel: Place the roses in a container filled with silica gel, which will absorb the moisture from the roses. The roses will take about two to three days to dry completely.
- Pressing: As detailed in the previous section, pressing is a popular method of preservation that can produce beautiful results.
Remember to handle the roses gently throughout the process to avoid damaging them.
Pressed Roses DIY: Create Your Own Wall Art
Pressed roses can be used to create beautiful and unique pieces of wall art. Follow these steps to create your own pressed rose art:
- Press several roses using the method detailed in the first section.
- Once the roses are fully dry, arrange them on a piece of cardstock or canvas in a design of your choosing.
- Glue the roses to the paper or canvas using a clear glue, such as Mod Podge.
- Allow the glue to dry completely before framing or displaying your art.
Experiment with arranging the roses in different patterns and using different colored paper or canvas to create a truly unique piece of art.
How to Press Roses for Greeting Cards and Invitations
If you want to add a special touch to your greeting cards or invitations, consider pressing a rose to include. Here are some tips on selecting the perfect rose and pressing it with the right amount of pressure:
- Choose a small, delicate rose, such as a tea rose or miniature rose. This will ensure that the rose fits comfortably on the card.
- Use a lighter book, such as a dictionary or phone book, to press the rose. This will ensure that the rose is not flattened too much.
- Place the rose on the card or invitation using a clear glue, such as a glue stick or double-sided tape.
Remember to handle the rose gently throughout the process to avoid damaging it.
Preserving Your Memories: Pressing Roses From Important Occasions
Pressing roses from important occasions is a wonderful way to preserve a memory and create a keepsake that will last for years to come. Here are some tips on selecting and preserving the perfect rose:
- Choose a rose that holds special meaning to you, such as a rose from a wedding bouquet or a rose given in memory of a loved one.
- Use a gentle pressing technique to ensure that the rose is not damaged.
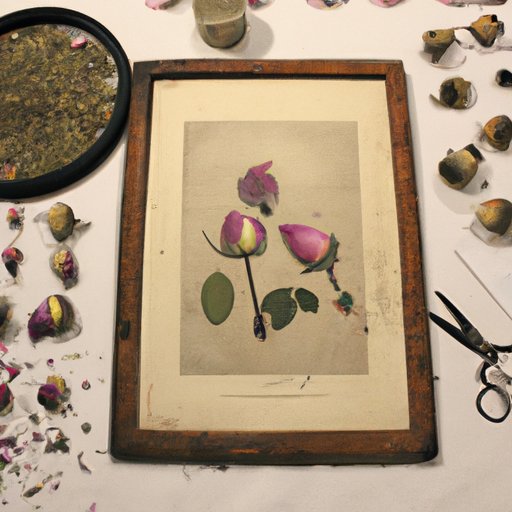
- Consider framing the pressed rose or placing it in a shadow box to display and protect it.
Remember to handle the rose gently throughout the process to avoid damaging it and to keep it in a dry, cool place out of direct sunlight.
Preserving the Beauty: Saving Your Roses for Years to Come
To ensure the longevity of your pressed roses, it’s important to care for them properly. Here are some tips for preserving the beauty of your roses:
- Store the pressed roses in a dry, cool place out of direct sunlight.
- Avoid touching the roses, as they are delicate and can be easily damaged.
- Consider placing the roses in a protective sleeve or between two pieces of cardboard to prevent them from getting crushed.
- If the roses are displayed in a frame, make sure that the frame is not exposed to direct sunlight or humidity.
- Avoid storing the roses in an area that is prone to pests, such as moths.
A Step-By-Step Guide to Creating Vintage-Looking Pressed Roses
If you want to create vintage-looking pressed roses, follow these steps:
- Choose a small, delicate rose, such as a tea rose or miniature rose.
- Place the rose face down on a piece of parchment paper.
- Sprinkle a small amount of cinnamon over the rose. This will give the rose a vintage look.
- Place another piece of parchment paper over the rose and press it using the method detailed in the first section.
- Once the rose is fully dry, gently brush away the excess cinnamon using a soft brush.
Remember to handle the rose gently throughout the process to avoid damaging it.
Conclusion
Pressing roses is a simple and rewarding process that can be used to preserve memories or create unique works of art. By following the steps detailed in this guide, you can learn how to press roses like a pro and experiment with different techniques to create your own unique style. Remember to handle the roses gently throughout the process and to store them in a dry, cool place out of direct sunlight.


