Introduction
Tile can be a defining feature of any bathroom or kitchen space. But what happens when it becomes outdated or just downright ugly? The idea of ripping out and replacing tile can be daunting, not to mention expensive. Thankfully, there is a solution that won’t break the bank—painting it. Painting tile is a cost-effective way to transform your space and create a fresh, modern look. This article will serve as a step-by-step guide on how to paint tile, covering everything from preparation to application, to finishing touches. So, grab a brush and let’s get started!
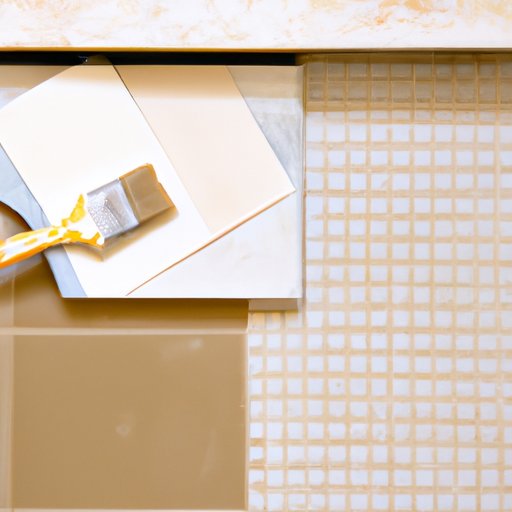
Step-by-Step Guide
Before we dive into the how-to of painting tile, it’s important to discuss the importance of preparation. Preparation is key to any successful paint project, and this is no exception. Start by thoroughly cleaning the tile surface to remove any dirt, grime, or mildew that may prevent the paint from adhering properly. If the tile has a glossy finish, it’s also essential to sand the surface lightly to provide some tooth for the paint to grip. Once the tile is clean and sanded, you’re ready to move on to choosing the right paint.
There are several options for paint when it comes to painting tile. Depending on the surface and intended use, you may choose an epoxy, chalk, or oil-based paint. Epoxy paint is a great choice for high-moisture areas like bathrooms and kitchens because it’s waterproof and durable. Chalk paint, on the other hand, is an excellent option if you’re looking for a low-luster finish with a bit of texture. Oil-based paint provides a high-gloss finish with excellent durability. Whichever you choose, make sure it’s specifically formulated for use on tile surfaces.
Now that you’ve chosen your paint, it’s time to apply it to the tile. Start by using a brush or roller to apply the first coat. Use light, even strokes, and be careful not to apply the paint too thickly, as this can cause drips and puddles to form. Once the first coat is dry, apply a second coat, using the same techniques as before. Depending on the type of paint you’re using, you may need to apply a third coat for full coverage. Be sure to wait the recommended amount of time between coats to ensure a smooth, even finish.
After applying the final coat of paint, it’s time to clean up. Clean your brushes and rollers immediately with soap and water before the paint has a chance to dry. If you used a disposable roller, discard it properly. Be sure to dispose of any leftover paint and materials according to local regulations.
Before and After
The impact of painting tile can be truly transformative. Before and after photos are an excellent way to showcase just how much of a difference a fresh coat of paint can make. Not only is painting tile a cost-effective solution, but it’s also an easy update that can be accomplished in a short amount of time.
To maximize the effectiveness of the before and after photos, it’s helpful to break the project down into sections. For example, you may want to focus on preparation, application, and finishing touches. This will help emphasize the key concepts of each step and give the reader a clear idea of what to expect.
Tips and Tricks
Like any DIY project, there are always tips and tricks that can help you get the best results when painting tile. One essential tip is to use a primer before applying the paint. A primer creates a surface that the paint can adhere to better, ensuring better coverage and durability. Another essential tip is to choose the right brush or roller for the job. A synthetic brush or roller will work best with most paints.
If you’re feeling creative, consider stenciling or creating a patterned design on the tile. This can add a unique touch and elevate the look of any space. If you experience any imperfections, don’t worry, it’s fixable. Wait for the paint to dry, lightly sand the area, and apply another coat of paint until the surface is smooth.
Video Tutorial
While a written guide is helpful, sometimes seeing the process in action is even better. Consider linking to or embedding a video tutorial alongside this article to provide added value for the reader. A video tutorial can break down each step and provide additional tips and information along the way. Consider including commentary to give the reader a deeper understanding of the process.
Q&A with an Expert
Interviewing an expert in tile painting can be a great way to provide further value for the reader. Ask them about their process, any unique tips or tricks, and any challenges they have encountered. Use their answers to inform the article and provide added perspective on the subject matter.
Comparison of Paint Types
Not all paint is created equal, and the same goes for paint used to paint tile. Epoxy, chalk, and oil-based paint are all excellent options, but they each have their own benefits and drawbacks. Epoxy is waterproof and durable, but it can be difficult to apply and has a strong odor. Chalk paint provides a low-luster finish with some texture but may not hold up as well over time. Oil-based paint provides a high-gloss finish but can take longer to dry. Consider the surface you’ll be painting, the level of durability you need, and your personal taste when choosing the right type of paint.
Alternative Uses for Painted Tiles
Once you’ve tackled painting your tile, consider alternative uses for any leftover tiles. Old tiles can be repurposed in many ways, from creating a unique backsplash mosaic to crafting coasters or planters. Let your creativity run wild!
Conclusion
Painting tile is a cost-effective way to transform your space and create a fresh, modern look. Follow these step-by-step instructions for preparation, application, and finishing touches to ensure a smooth and successful project. Whether you’re refreshing your bathroom or updating your kitchen, painting tile can make a dramatic difference without breaking the bank. Be sure to take advantage of additional resources like the video tutorial and expert interview to get the most out of your project.


