Introduction
Painting your ceiling is an effective way of adding an aesthetic touch to your home. However, getting it done correctly and without making a mess can be challenging for most individuals. This article aims to offer tips, tricks, and the necessary steps to help you paint your ceiling like a pro. If you’re eager to give your home a fresh new look, read on for expert advice!
10 Expert Tips for Painting Your Ceiling Like a Pro
Painting a ceiling comes with unique obstacles that can make it tricky to achieve a professional finish. Here are ten expert tips to help you paint your ceiling like a pro:
Tip 1: Preparation is Key
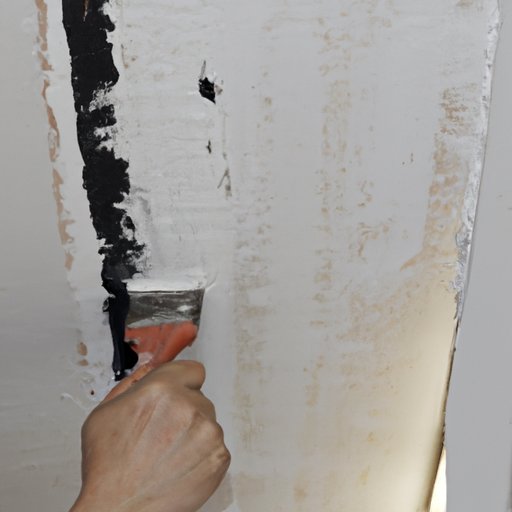
Before you start painting, ensure that you prepare your ceiling for the task ahead. A clean surface makes for a smoother painting experience, so ensure that you dust and wipe down your ceiling surfaces. Fix any cracks or holes found and sand them for an even surface.
Tip 2: Choose the Right Paint and Tools
Choosing the correct paint and tools is essential to a successful ceiling painting job. The most recommended paint is flat or matte finish paints as they prevent glares and hide any imperfections. Quality brushes with long bristles will help you reach all corners of your ceiling easily. An extension pole may be necessary when reaching high ceilings.
Tip 3: Work with the Right Lighting
Painting your ceiling in a well-lit space makes it easier to detect any missed spots or unevenness. Natural light is the preferable option, but if not available, bright adjustable light that offers good coverage will work. Avoid harsh lights that create shadows as they may blind you to certain areas.
Tip 4: Get Help from a Friend or Family Member
If possible, have a family member or friend assist you in your painting project. Someone to hand you tools or hold the ladder while you focus on painting will not only make the project more efficient but also safer.
Tip 5: Protect Your Floor and Furniture
Cover your floors with a drop cloth to avoid paint droplets from damaging your surfaces. Move or cover your furniture that’s too close to the ceiling because the paint may splatter while painting.
Tip 6: Prime Your Ceiling Before Painting
A primer will help the paint adhere to the ceiling surfaces better. Priming seals any stains and marks, making the painting job more effortless and quicker.
Tip 7: Follow a Pattern
Always follow a pattern while painting your ceiling. A zigzag pattern ensures that you cover all spots, yet it’s less likely to make a mess than painting in a straight line.
Tip 8: Paint in Layers
Applying paint in layers will prevent drips and ensure that the paint adheres uniformly. It’s tempting to speed up the process by applying the paint in thick layers, but this is a recipe for disaster.
Tip 9: Take Breaks When You Need Them
Taking a break while painting is crucial. Painting can be tiring, and it’s essential to rest your arms and hands to avoid losing your focus. Frequent breaks also allow you to step back and assess your progress as you go along.
Tip 10: Clean Up Thoroughly
After you’ve finished painting your ceiling, be sure to clean up adequately. Clean your brushes or rollers with the recommended solvent or water as per the paint instructions. Dispose of your drop cloth and tape appropriately.
The Ultimate Guide to Painting Your Ceiling: Step-by-Step
Getting started with painting your ceiling can be challenging. Below is a step-by-step guide to help you ease the process:
Step 1: Choose the Right Time to Paint
Choose a time when the weather is cool and dry. Avoid humid days because it slows down the drying of the paint.
Step 2: Determine How Much Paint You Need
Measure the surface to be painted to determine the amount of paint needed. The calculation for most standard ceilings is 1 gallon per 350 square feet.
Step 3: Clean and Dust Your Ceiling
Thoroughly clean your ceiling with a broom or a dust mop to remove any dust particles. Wipe down the ceiling with a damp cloth to remove any marks present.
Step 4: Cover Up Your Furniture and Flooring
Use drop cloths to cover or move your furniture away from the painting zone. Cover any remaining areas on the floor where you’ll be stepping frequently to avoid any unnecessary dirt or paint droplets.
Step 5: Prime Your Ceiling
Using a roller or brush, apply primer on your ceiling to enhance paint adherence. Let the primer dry before moving on to the painting phase.
Step 6: Start Painting
Dip your brush in paint, wiping excess paint off the brush to avoid creating drips. Paint the edges first using a brush, then go on to the less accessible areas using a roller. Follow your pattern for painting.
Step 7: Let the First Coat Dry
Let the first coat dry for at least 24 hours before applying the second coat. Depending on the size of your ceiling, you may need to allow more time.
Step 8: Apply Additional Coats If Necessary
If needed, apply a third coat to ensure the surface is uniform and smooth. Allow each layer to dry before applying the subsequent one.
Step 9: Touch Up Any Areas if needed
Once the paint is completely dry, check your ceiling for any uneven spots and touch them up with a small brush.
Step 10: Clean Up Completely
Dispose of your drop cloths and tape appropriately. Clean your brushes or rollers with water or the recommended solvent and store them in a cool, dry place.
Ceiling Painting: Everything You Need to Know
Before painting your ceiling, it’s essential to know the right tools and materials, the different paint types available, and the techniques for painting your ceiling. Read on to find out more.
Tools and Materials You Need
To paint your ceiling like a pro, you’ll need the following materials:
- Paint (preferably a matte or flat finish)
- Paintbrushes (high-quality brushes with long bristles)
- Roller (with an extension pole if painting high ceilings)
- Drop cloths to cover furniture and keep your floor dry
- Painter’s tape
- Sandpaper (for patching holes or reducing uneven surfaces)
- Primer to enhance paint adherence
- Ladder (with non-slip feet)
How to Choose the Best Paint for Your Ceiling
Flat or matte finish paints offer an excellent choice for painting ceilings. They efficiently hide minor imperfections and prevent glare or reflections from light sources that other paint types can cause.
Determining the Size of the Ceiling
To determine the ceiling’s size, measure the width and length of each section to get the total area to be painted.
Different Ceiling Paint Types and Their Uses
A flat finish paint is ideal for most ceiling surfaces. However, there are other paint types such as gloss, semi-gloss, eggshell, and satin. Be sure to choose the type that’s ideal for your ceiling surface.
Various Ceiling Paint Finishes and When to Use Them
Gloss Finish is appropriate for bathroom ceilings because of its high durability in humid conditions. Satin Finish is excellent if you want to accentuate features on your ceiling. Eggshell Finish is ideal for spaces with low to moderate traffic or footfall. Semi-gloss finish is a robust and glossy finish that is easy to clean.
Common Precautions when Painting a Ceiling
Always ensure safety when painting any surface. Always use a sturdy and safe ladder when painting above your height limit. Use painter’s tape to mark and protect areas around the ceiling that you don’t want to paint on. Always paint in an area with enough ventilation to avoid suffocation.
DIY Ceiling Painting: Save Money and Improve Your Home’s Look
If you’re looking to save some cash and give your living space a fresh look, painting your ceiling is a cost-efficient way to achieve this outcome. Here’s why:
Explanation of the Benefits of DIY Ceiling Painting
You can save money by doing it yourself instead of hiring a professional painter, plus it’s an excellent way to add your personal touch to your home.
Cost Savings Comparison between Professional vs. DIY Ceiling Painting
The cost of painting a ceiling by a professional painter may vary between $500 to $900, depending on the job’s size and detail. On the other hand, a DIY ceiling painting job may cost as little as $50 or less, depending on the materials used and the extent of the job.
Steps to Painting a Ceiling By Yourself
The steps to painting a ceiling are similar whether done by a professional or you. To DIY and paint your ceiling, you need to have the right tools, follow the correct preparation steps, and follow the appropriate painting techniques.
Tips for Making The Job Easier
Having a quality paintbrush or roller makes the job smoother and quicker. It’s also essential to ensure you’re comfortable with the painting process before getting started.
Necessary Precautions to Follow
Follow the necessary precautions like wearing protective goggles or glasses and having adequate ventilation during the job. Also, avoid painting on wet surfaces, and add ventilation to the area you’re painting.
Less Mess, More Fun: How to Paint A Ceiling Without Making a Mess
Painting a ceiling without creating a mess can be challenging, yet it’s essential if you’re keen on achieving a pro finish. Here are some guidelines on achieving a clean ceiling painting job:
Explaining The Significance of A Clean Ceiling Painting Job
A messy paint job affects the final look and can take up additional time to clean up the mess, thus taking away the painting job’s fun.
Identifying Typical Causes of A Messy Ceiling Job
Cause of messy paint job includes poor masking, sloppy brushwork, and improper handling of the paintbrush, leading to paint splatters on the floor or surrounding walls.
Necessary Materials and Techniques for A Clean Ceiling Painting Job
Painter’s tape helps to mark off the areas you don’t want to paint on, while a good quality brush reduces the chances of creating drips. Using alternate paint mixing methods, including mixing water to thin the paint, allows for easy painting without drips.
Important Precautions To Follow
Always follow safety precautions to avoid inhaling paint fumes or tripping over paint containers. It’s also essential to avoid carrying a loaded paintbrush or roller on the ceiling as it increases the chances of paint droplets scattering everywhere.


