Introduction
Mudding drywall is an essential skill for any DIY enthusiast or homeowner. Whether you’re repairing a hole or adding a new room to your home, mudding drywall helps to create a smooth, professional-looking finish. It’s a skill that can be intimidating for newcomers, but with the right tools and guidance, anyone can learn how to do it. In this article, we’ll take you through step-by-step instructions, highlight common mistakes to avoid and share tips and tricks to make the process of mudding drywall as easy and foolproof as possible. Let’s get started.
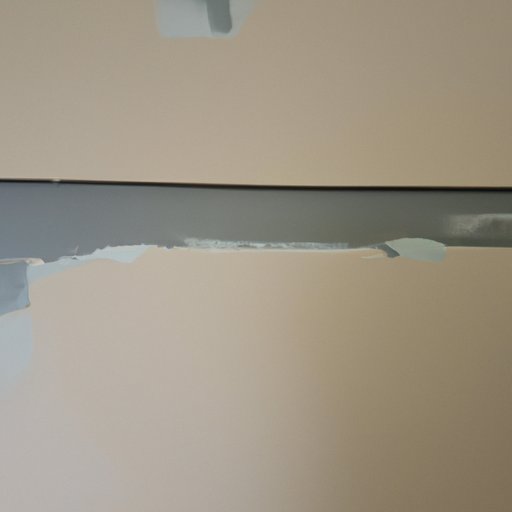
Step-by-Step Guide to Mudding Drywall
Before we get into the nitty-gritty of mudding drywall, let’s start with the basics. Here are the materials you’ll need:
- Drywall tape
- Joint compound/mud
- Mud pan
- Taping knife
- Sanding block/sponge
- Paint or primer
Now that you have your materials let’s move on to the process of mudding drywall:
- Clean the surface: Before mudding, make sure the surface of the drywall is clean and free of dust or debris. This is important to ensure that the mud adheres properly to the drywall.
- Apply the drywall tape: The first step in mudding drywall is to apply the drywall tape to the joints between sheets of drywall. This tape will help to reinforce the joint and prevent it from cracking or separating over time. Start by cutting a piece of tape to cover the entire length of the joint. Then, apply it to the joint, pressing firmly to ensure it sticks.
- Apply the first coat of mud: Using a taping knife, apply a thin layer of mud over the tape, covering it completely. Make sure to feather the mud out on the edges to create a smooth transition between the joint and the surrounding drywall.
- Apply subsequent coats: Depending on the size of the joint, you may need to apply two or three more coats of mud. Each successive coat should be wider than the previous one, feathered neatly at the edges to create a smooth transition. Let the mud dry between coats, following the manufacturer’s instructions for drying times.
- Sand the surface: Once the final coat of mud is dry, use a sanding block or sponge to sand the surface of the joint until it is completely smooth. Be careful not to sand too aggressively, as this can create a depression in the mud or damage the drywall.
- Paint or prime: Finally, once the mud has dried and been sanded, you can paint or prime the surface of the drywall to complete the repair or installation.
While these steps might seem straightforward, there are a few important tips and tricks to keep in mind when mudding drywall:
- Keep your tools clean: Regularly cleaning your taping knives, mud pan, and other tools can help to ensure a smooth finish and prevent the mud from drying out too quickly.
- Don’t apply too much mud: Thick layers of mud can take a long time to dry and may even crack as they dry.
- Use enough pressure: When applying mud, use enough pressure to ensure it sticks to the drywall, but not so much that it creates a depression or dent in the surface of the joint.
Mistakes do happen, and when they do, there are ways to fix them. Here are a few common mistakes and how to correct them:
- Crow’s feet: When applying mud with a taping knife, you may notice small ridges or lines, also known as crow’s feet. Let the mud dry, then sand it down until it is smooth, and apply a new layer of mud.
- Bubbles in the mud: If you notice bubbles in the mud after it has dried, you can usually pop them with a pin or knife, then sand the muddy area smooth and reapply.
- Crumbling mud: If the mud starts to crumble as you sand it, you may need to apply more mud and start again.
Video Tutorial on Mudding Drywall
If you’re a visual learner, or simply want to see mudding drywall in action, there are plenty of great video tutorials available online. We recommend checking out this tutorial from This Old House:
While different tutorials may follow slightly different steps or use different techniques, the fundamentals of mudding drywall remain the same. We suggest using the video tutorial in conjunction with this article, following the steps provided here and using the video to supplement your understanding of the process.
DIY Tips and Hacks for Mudding Drywall
The following tips and hacks can help to make the process of mudding drywall faster, easier, and more foolproof:
- Use setting-type compound: While pre-mixed joint compound is convenient to use, it takes longer to dry and can require more coats. Setting-type compound, on the other hand, dries quickly and requires fewer coats.
- Practice on spare drywall: If you’re new to mudding drywall, practice on a spare piece of drywall before attempting a repair or installation. This will give you a chance to get familiar with the process and work out any kinks before tackling a larger project.
- Apply mud from top to bottom: When applying mud to the joints, start at the top and work your way down. This will help to prevent drips and make the process more efficient.
- Use a damp sponge: When sanding the surface of the joint, use a damp sponge to wipe away dust and debris. This can help to reveal hidden imperfections and make the surface smoother.
Common Mistakes to Avoid When Mudding Drywall
While mudding drywall is a relatively straightforward process, there are a few common mistakes that can trip up first-timers:
- Rushing the process: Mudding drywall takes time, and rushing the process can lead to mistakes and an uneven finish. Take your time, follow the instructions carefully, and plan accordingly.
- Applying too much mud: As mentioned earlier, applying too much mud at once can lead to cracking and a less-than-smooth finish.
- Not feathering the edges: Feathering out the edges of the mud to create a smooth transition is crucial for a professional-looking finish. Make sure to feather the mud out evenly on all sides of the joint.
- Not waiting for the mud to dry: Each coat of mud needs time to dry before you can apply the next. Trying to apply a new coat too soon can cause the underlying coats to shift or crack.
Comparing Mud Types for Drywall
When it comes to mudding drywall, there are two main types of joint compound: pre-mixed and setting-type. Here’s a closer look at the features of each:
- Pre-mixed joint compound: As the name suggests, pre-mixed joint compound comes ready to use straight out of the container. It’s easy to work with and can be used for most drywall applications. Pre-mixed joint compound takes longer to dry than setting-type and may require more coats to achieve a smooth finish.
- Setting-type joint compound: Setting-type joint compound, on the other hand, comes in powder form and needs to be mixed with water before use. It dries much faster than pre-mixed joint compound and requires fewer coats. Setting-type joint compound is better suited for larger projects or when time is a factor.
Fun Project Idea: Designing a Creative Drywall Mud Project
While most of us think of mudding drywall as a necessary but not particularly exciting task, it is possible to get creative with drywall mud. Here’s an idea for creating a unique drywall mud project:
Materials:
- Drywall tape
- Joint compound/mud
- Stencil or template
- Mud pan
- Taping knife
- Sanding block/sponge
- Paint or primer
Instructions:
- Choose a stencil or template that you’d like to recreate using drywall mud. Available designs range from simple geometric shapes to intricate patterns, so choose something that matches your skill level and interests.
- Apply drywall tape to the surface where you’d like to create the stencil or template. Make sure the tape is well pressed down and the edges are smooth.
- Using a taping knife, apply a thin layer of mud to the stencil/template, taking care to follow the contours of the design. Don’t worry about being too precise at this point; the goal is to fill in the stencil with mud.
- Remove the stencil/template carefully, taking care not to smudge the mud. If necessary, use a taping knife or toothpick to clean up any areas that need more definition.
- Let the mud dry according to the manufacturer’s instructions.
- Once the mud is dry, use a sanding block or sponge to sand the surface until it is completely smooth.
- Paint or prime the surface to complete the design.
Conclusion
And there you have it; a complete guide to mudding drywall. By following our step-by-step instructions and tips, you should be able to tackle any drywall project with confidence. Remember to take your time, practice on spare drywall, and above all, have fun with it.


