I. Introduction
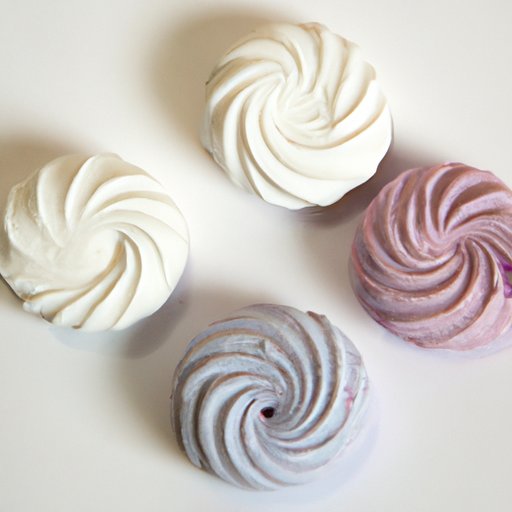
Marshmallows are delicious treats known for their fluffy texture and sweet flavor. Making marshmallows at home may seem daunting, but it’s actually quite simple. This article will provide a step-by-step recipe guide for homemade marshmallows, along with tips and tricks to ensure your marshmallows turn out perfectly every time. We’ll also delve into the history of marshmallows and explore different variations and shapes you can make. By the end of this article, you’ll be a marshmallow-making pro!
II. Step-by-Step Recipe Guide
Before we begin, let’s take a look at the ingredients and equipment you’ll need to make marshmallows:
– 3 packets of gelatin (approximately 21g)
– 1 cup of water, divided into two halves
– 1 1/2 cups of granulated sugar
– 1 cup of corn syrup
– 1/4 teaspoon of salt
– 1 tablespoon of vanilla extract
– 1/2 cup of cornstarch
– 1/2 cup of powdered sugar
You will also need a stand mixer with a whisk attachment, a candy thermometer, a large mixing bowl, a medium saucepan, and a sieve.
Now let’s begin with the recipe:
- Pour 1/2 cup of water into the bowl of a stand mixer and sprinkle the gelatin on top. Allow it to sit for 10 minutes.
- In a medium saucepan, whisk together the granulated sugar, corn syrup, salt, and remaining water. Place the saucepan over medium heat and stir until the sugar is dissolved.
- Attach the candy thermometer to the side of the saucepan and cook the mixture until it reaches 240°F (115°C).
- With the stand mixer on low speed, slowly pour the hot mixture into the gelatin mixture. Turn up the speed to high and beat until the mixture is thick, glossy, and holds stiff peaks. This should take around 10-15 minutes.
- Add in the vanilla extract and beat for an additional minute.
- In a separate bowl, mix together the cornstarch and powdered sugar.
- Dust a 9×13 inch pan generously with the cornstarch mixture. Pour the marshmallow mixture into the pan and smooth the top with a spatula. Dust the top lightly with more of the cornstarch mixture.
- Allow the marshmallows to set for at least 4 hours, or overnight.
- Once set, remove the marshmallows from the pan and cut them into squares. Toss each square in the remaining cornstarch mixture to prevent them from sticking together.
III. Visual Guide with Images
Here’s a visual guide with images to aid you in the marshmallow-making process:
Image 1: Sprinkling the gelatin over water in the bowl of a stand mixer
Image 2: Whisking together the sugar, corn syrup, salt, and water in a medium saucepan
Image 3: Cooking the mixture until it reaches the desired temperature
Image 4: Pouring the hot mixture into the gelatin mixture and beating until thick and glossy
Image 5: Add in vanilla extract and mix for an additional minute
Image 6: Dusting the pan with cornstarch mixture before pouring in the marshmallow mixture
Image 7: Allowing the marshmallows to set for at least 4 hours
Image 8: Cutting the marshmallows into squares and dusting with cornstarch mixture
IV. Variations on the Marshmallow Recipe
One of the great things about making marshmallows at home is the ability to experiment with different flavors and shapes. Here are a few ideas:
– Chocolate Marshmallows: Add 1/2 cup of cocoa powder to the mixture before adding the vanilla extract.
– Caramel Marshmallows: Substitute 1/2 cup of corn syrup with caramel sauce.
– Peppermint Marshmallows: Add 1/2 teaspoon of peppermint extract and a few drops of red food coloring to the mixture before adding the vanilla extract.
You can also experiment with different shapes, such as cutting them into hearts, stars, or even animals. Use cookie cutters to create fun shapes and decorate with frosting or sprinkles.
V. History of Marshmallows
The marshmallow dates back to ancient Egypt, where it was made from the sap of the marshmallow plant. It was considered a delicacy and was reserved for the gods and pharaohs. The marshmallow as we know it today was first created in France in the early 19th century. It was made using egg whites and the sap of the marshmallow plant. In the late 1800s, gelatin was introduced as a replacement for the marshmallow plant sap, making marshmallows easier and less expensive to produce.
Marshmallows have evolved over time, with different flavors and shapes being created. They are now enjoyed all over the world, with unique variations in different countries. In the United States, marshmallows are commonly used for s’mores and hot chocolate, while in Japan, marshmallows are often used in desserts like mochi and dango.
VI. Compare Homemade Marshmallows to Store-Bought
The difference between homemade marshmallows and store-bought ones is like night and day. Homemade marshmallows are softer, fluffier, and have a richer flavor compared to the pre-packaged versions. Additionally, homemade marshmallows do not contain any artificial flavors or preservatives.
VII. Tips for Making Marshmallows
Here are a few tips and tricks for making marshmallows:
– Make sure your bowl and whisk attachment are completely clean and dry before starting.
– Use a candy thermometer to ensure the sugar mixture reaches the right temperature.
– Be patient when whipping the mixture. It should take around 10-15 minutes for it to become thick and fluffy.
– Dust the pan and marshmallows generously with the cornstarch mixture to prevent sticking.
VIII. Conclusion
Making marshmallows at home may seem intimidating, but it’s actually quite easy. With a few basic ingredients and equipment, you can make delicious marshmallows from scratch. Experiment with different flavor variations and shapes to make them extra special. By following these tips and tricks, you’ll be making perfect marshmallows in no time.


