I. Introduction
Concrete is one of the most popular construction materials in the world, used in everything from buildings and bridges to highways and sidewalks. It’s a versatile and durable material that can be molded into a variety of shapes and sizes, making it a favorite among builders and DIY enthusiasts alike. In this article, we’ll take you through the step-by-step process of making concrete, provide tips for DIY projects, highlight common mistakes, and offer guidance on repairing and coloring concrete.
II. A Step-by-Step Guide to Making Concrete
Before we get into the nitty-gritty of making concrete, let’s start with the basics:
- Cement: This is the binder that holds everything together and gives the concrete its strength. Common types of cement include Portland cement and fly ash cement.
- Sand: This provides the bulk of the material in concrete and helps to fill in any gaps. Sand should be clean, free of organic matter, and have a uniform particle size.
- Water: Water is necessary to hydrate the cement and activate the chemical reaction that causes it to harden. The amount of water you use depends on the desired consistency of the concrete. Too much water will make the mixture too runny, while too little will make it too thick.
- Aggregate: This refers to the rocks, gravel, or other materials that are added to the concrete to give it bulk. The size, shape, and texture of the aggregate can affect the strength and appearance of the finished product.
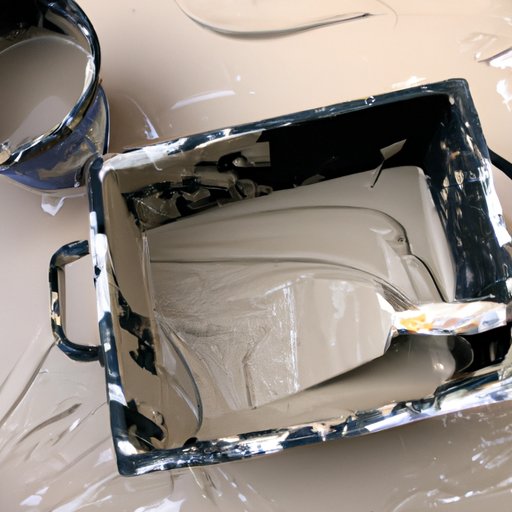
Here are the basic steps for making concrete:
- Measure out the cement, sand, and aggregate in the correct proportions. The exact ratios will depend on the type of cement and the desired strength of the concrete. A typical ratio is one part cement, two parts sand, and three parts aggregate.
- Mix the dry ingredients together in a wheelbarrow or mixing tub. Make sure they are evenly distributed.
- Add water slowly, mixing as you go, until the mixture has the consistency of wet concrete. You should be able to shape it into a ball without it falling apart.
- Pour the mixture into a prepared form, such as a mold or frame. Use a trowel or shovel to spread it evenly.
- Roughly level the surface with a screed board or other flat tool.
- Smooth and level the surface with a float or trowel. Work from one end to the other, making sweeping motions to create a smooth surface.
- Allow the concrete to cure for at least 24 hours before removing the form. Keep it moist by covering it with plastic or spraying it with water periodically.
When pouring and leveling concrete, keep these tips in mind:
- Work quickly but methodically to avoid having the concrete dry out before you’re finished.
- Use a level and a straight board to make sure the surface is even.
- Don’t overwork the concrete, as this can cause it to become weaker. Once it starts to set, leave it alone.
- If you’re working in hot weather, try to pour and level concrete in the early morning or late afternoon when temperatures are cooler.
III. DIY Concrete Projects
In addition to its use in construction, concrete is a versatile material that can be used for a variety of DIY projects. Here are a few ideas to get you started:
- Planters: Create unique planters for your garden by using molds to shape the concrete. Add color or texture to the surface for added interest.
- Bookends: Mold the concrete into book-shaped objects to create bookends for your shelves. Add a layer of felt or cork to the bottom to prevent scratching.
- Furniture: Use forms to create tables, benches, and other pieces of outdoor furniture. Add pigments or stains for a unique look.
When working with concrete for DIY projects, here are a few tips to keep in mind:
- Use molds or forms to control the shape of the concrete.
- Experiment with coloring agents and texturizers to create unique finishes.
- Cover the concrete with plastic to cure for at least 24 hours before removing it from the mold or form.
IV. Common Mistakes to Avoid When Making Concrete
While working with concrete can be rewarding, it’s easy to make mistakes that can compromise the quality of your finished product. Here are a few common mistakes to avoid:
- Using the wrong type of sand: The sand you use should be the right type for your particular application. Beach sand, for example, is too fine and can weaken the concrete.
- Not mixing the ingredients properly: It’s important to mix the dry ingredients together thoroughly before adding water. Failing to do so can cause soft spots or air pockets in the concrete.
- Adding too much water: While it may seem counterintuitive, too much water can actually weaken the concrete by diluting the cement and decreasing its strength. Use only as much water as necessary to achieve the desired consistency.
- Not curing the concrete properly: Curing is a crucial part of the process that involves keeping the concrete moist for a period of time. Failure to do so can cause the concrete to dry out too quickly and become brittle.
As you work with concrete, pay close attention to the details and follow best practices to avoid these and other mistakes.
V. How to Repair Concrete
If you have cracks or holes in your concrete surfaces, you may be able to repair them yourself. Here’s how:
- Filling cracks: Clean the crack thoroughly and fill it with a liquid penetrating concrete sealer or epoxy. Smooth out the surface with a putty knife and allow it to dry for 24 hours.
- Repairing holes: Using a chisel or hammer, chip away any loose or damaged concrete around the hole. Fill the hole with a concrete patching compound and smooth it out with a putty knife. Allow it to cure for at least 24 hours before painting or sealing.
If you’re dealing with a larger or more complicated repair, it’s best to hire a professional concrete contractor who has the tools and expertise to handle the job safely and effectively.
VI. How to Color Concrete
One of the great benefits of working with concrete is the ability to add color and texture to create unique designs and patterns. Here are a few ways to do it:
- Staining: Concrete stain penetrates the surface of the concrete and adds color without covering up the natural variations and textures of the material. It comes in a variety of colors and can be used to create a range of effects.
- Pigments: Pigments can be added to the concrete mix itself to create a consistent color throughout the material. They are available in a range of colors and can be used to create solid colors or variegated patterns.
- Integral colors: Integral colors are added to the concrete mix itself and become part of the material as it cures. They are available in a range of colors and can be used to create a variety of effects, from subtle to bold.
When coloring concrete, it’s important to keep the following tips in mind:
- Experiment with different color combinations and application techniques to achieve the desired effect.
- Always test a small, inconspicuous area before applying color to the entire surface.
- Follow the manufacturer’s instructions carefully when using coloring agents or stains.
VII. The Best Tools for Working with Concrete
Working with concrete requires a few essential tools to get the job done right. Here are some of the most important:
- Mixers: A good mixer is essential for ensuring that your concrete is thoroughly mixed and evenly distributed. Choose from electric, gas-powered, or hand-operated models.
- Trowels: Trowels are used to smooth and level the surface of the concrete. Choose from a variety of sizes and styles to match your particular job.
- Float pans: Float pans are used to create a smooth, polished surface on top of the concrete. They come in a variety of sizes and styles, and can be used with or without handles.
When buying tools for working with concrete, keep the following tips in mind:
- Invest in quality tools that are designed for the specific job you’re doing.
- Choose tools that are comfortable to use and that fit your particular strength and skill level.
- Clean and maintain your tools regularly to ensure their longevity.
VIII. How to Finish Concrete Surfaces
Finishing concrete surfaces is all about creating a smooth, polished look that enhances the appearance of the material. Here are a few techniques for achieving that look:
- Power troweling: Power troweling involves using a machine with rotating blades to smooth and level the surface of the concrete. This is best done by professionals with experience handling the equipment.
- Hand troweling: Hand troweling involves using a trowel to smooth and level the surface of the concrete manually. This is best done by those with experience and a good eye for detail.
- Sealing: Sealing the concrete with a clear sealer protects it from stains and adds a glossy finish to the surface. This is especially useful for outdoor concrete surfaces.
To achieve the best results when finishing concrete surfaces, keep the following tips in mind:
- Choose the technique that’s best suited to your particular job and skill level.
- Ensure that the surface is clean and dry before you begin.
- Pay close attention to detail to create a smooth, even surface.
IX. Conclusion
Making concrete is an accessible and rewarding DIY project that can also be used for larger construction projects. By following best practices and avoiding common mistakes, you can create strong, durable, and attractive concrete surfaces. Whether you’re using concrete for DIY projects or as a construction material, you can customize it with colors and finishes to achieve the desired effect. By using the right tools and techniques, and following proper procedures, you can achieve a professional-looking finish every time.


