The Ultimate Guide on How to Make a Paper Airplane
Have you ever struggled to make a paper airplane that flies well? Look no further! This article will provide you with step-by-step instructions, video tutorials, and information on the history and science of paper airplanes to help you master the art of paper folding. Whether you want to create a classic design or impress your friends with a unique creation, this guide has got you covered. Let’s get started!
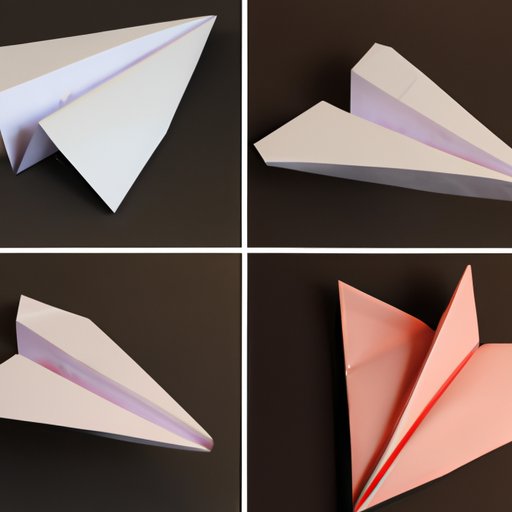
Step-by-step instructions
The first thing you’ll need is a piece of paper. Any rectangular sheet of paper will do, but for best results, use a standard 8.5-inch by 11-inch sheet.
Follow these simple steps to create a paper airplane:
- Start with the paper face down (white side up).
- Fold the paper in half horizontally, crease the fold, and unfold it.
- Next, fold the top corners down to the center crease. The top of your paper should look like a triangle now.
- Now fold the two corners on the bottom of your paper up to the center fold.
- Fold the paper in half vertically so that the folded edges are facing outwards, and crease the fold.
- Finally, fold down the wings to make the paper airplane’s body, crease, and voila! Your paper airplane is complete.
Be sure to adjust the wings and tail to create a balanced plane that flies well.
Video tutorial
If you prefer visual learning, check out some tutorials on how to make a paper airplane from popular video-sharing platforms. These videos provide clear and concise instructions to demonstrate how to fold and adjust different parts of a paper airplane to create the perfect design. Using video tutorials are a great supplement to written instructions, and they can be especially helpful for visual learners.
History and science of paper airplanes
Paper airplanes have been around for centuries, but the modern design of the paper airplane was invented in the late 19th century. In 1871, Samuel Langley invented the first modern paper airplane and flew it over 100 feet. Since then, paper airplanes have been used as simple toys for children, as well as teaching tools for aerodynamics and engineering.
There are different types of paper airplanes, including straight and swept-wing designs, dart planes, and stunt planes, designed to perform acrobatic moves. They all have unique features to help them fly, such as wing flaps, tails, and body shapes. Understanding the science behind paper airplanes can help you develop your skills and create planes that fly well.
Creative designs
If you want to take your paper airplane skills to the next level, try making planes that resemble animals or other objects. By adding a few extra folds or cuts, you can create a paper airplane that looks like an elephant, a bird, or even a spaceship. The possibilities are endless, and it’s a great way to impress your family and friends. There are plenty of templates and tutorials available online to help you create unique and creative designs.
Competition tips
The art of paper airplane folding isn’t just a fun activity, but it can also be a popular sport. If you want to compete in a paper airplane competition, prepare well in advance. Try different designs, folds and measurements for the perfect airplane. You can also focus on creating an airplane that can stay in the air longer, or you can strive to fly the plane as far as possible. Remember that good accuracy is key in throwing a successful paper plane.
Best materials to use
Choosing the right materials is another essential factor in making the perfect paper airplane. Different types of paper produce different results due to various factors, including weight, texture, and flexibility. Experiment with different types of paper to see which work best for your purposes. For example, standard copy or printer paper is light, and it can fly a long distance. If you want to create a more durable plane that can withstand multiple throws, try using heavier paper such as cardstock or construction paper.
Problem-solving
Even the most experienced paper airplane makers encounter problems and make mistakes. If you’re new to the world of paper airplane making, here are some common issues you may encounter:
- Your plane isn’t balanced: If your plane is lopsided, try adjusting the wings and tail to create a more balanced design.
- Your plane doesn’t fly well: If your plane isn’t flying or isn’t advancing on a straight path, try adjusting the wings and tail, so they’re aligned correctly to create a more stable plane.
- Your plane isn’t stylish: If you want to create a more stylish plane, try adding some creative cuts or folds to the design of your plane.
- Your plane’s wings or tail won’t stay folded: The paper airplane design requires creases, which can wear over time, making the wings or tail lose their shape. You can reinforce your plane by adding tape or by using a sturdier type of paper.
Conclusion
Making paper airplanes is an enjoyable activity that has the potential to become a lifelong hobby. Regardless of whether you’re creating a classic design or experimenting with a new design, it’s essential to have fun in the process. Follow the steps listed in this article to create a beautiful plane, or see a dimensional view via one of the many video tutorials available online. Be creative, keep experimenting, and try making different designs to find your favorite. Don’t forget to consider sharing your creations with your friends or joining a paper airplane competition.


