Introduction
Have you ever lost your ID card or keys? Or have you ever needed to keep something secure while still keeping it accessible? That’s where lanyards come in handy! A lanyard a simple cord or ribbon that can be worn around the neck to hold an ID card, keys, or other small items. In this guide, we’ll show you how to make a lanyard yourself, with step-by-step instructions, pictures, and creative ideas.
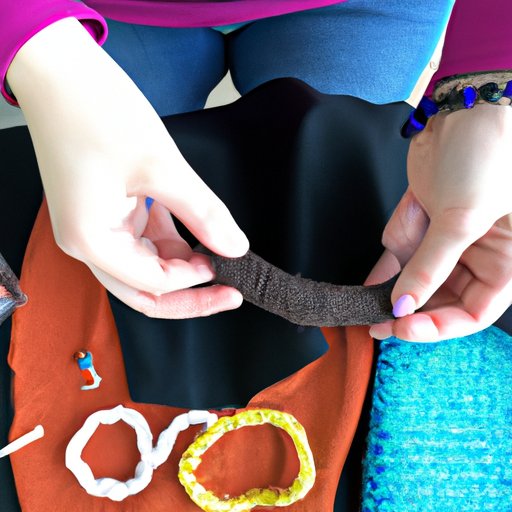
Step-by-Step Guide: Creating a Simple Lanyard for Beginners
Before you start, gather these materials and tools:
- Cord or ribbon (preferably 1/8-inch wide)
- A swivel clasp or hook
- A jump ring
- A pair of scissors
- A lighter or a clear nail polish
Now, follow these steps:
- Cut your cord to the desired length. Generally, a lanyard is around 36 inches long, but you can customize it to your needs.
- Attach the jump ring to the center of your cord by folding the cord in half and threading the jump ring through it, then securing it in place with a knot.
- Take one end of your cord and thread it through the clasp or hook, then knot it securely in place. Repeat this step with the other end of the cord.
- Trim any excess cord and use a lighter or clear nail polish to seal the ends of the cord to prevent fraying.
Congratulations! You’ve made your first lanyard!
10 Creative Lanyard Patterns and Designs to Try Today
If you want to take your lanyard-making skills to the next level and experiment with different patterns, materials, and designs, here are ten creative ideas to get you started:
- The Chevron Lanyard:
- The Spiral Lanyard:
- The Beaded Lanyard:
- The Macrame Lanyard:
- The Ribbon Lanyard:
- The Chain Lanyard:
- The Tassel Lanyard:
- The Leather Lanyard:
- The Neon Lanyard:
- The Pearl Lanyard:
A timeless pattern that involves interweaving two different colored cords in a zigzag or chevron-like pattern.
A fun and whimsical pattern that involves wrapping and knotting multiple strands of cord around a central core.
A stylish and sophisticated design that features threaded beads in between the cords for an added touch of elegance.
A classic design that involves knotting cords in various intricate patterns, such as square knots, half-hitch knots, or spiral knots.
An eye-catching design that involves using a thin ribbon instead of a cord and attaching decorative trinkets, such as feathers or flowers, for a feminine touch.
A modern design that involves using metal chains or links instead of cords and attaching a pendant or charm for added flair.
A bohemian-inspired design that features multiple tassels at the end of the lanyard for a playful and fun look.
A rustic and stylish design that involves using thin leather cords and braiding them in various patterns, such as fishtail or herringbone.
A vibrant and colorful design that features neon-colored cords woven in a geometric pattern.
A sophisticated and classy design that features pearls or faux pearls strung in between the cords for added elegance.
For each of these designs, you’ll need different types of materials and tools. Be sure to gather them before starting the project, and follow the step-by-step instructions carefully. We’ve included pictures for each design to make it easier for you to follow along.
Make it Unique: Personalizing Your Own Lanyard with Beads and Charms
If you want to personalize your lanyard and make it truly unique, try adding beads and charms to an existing lanyard. Here are some tips and ideas:
- Choose beads and charms that are complementary in style, color, and texture to the lanyard.
- Purchase high-quality beads and charms that won’t fall off or break easily.
- Use pliers to attach the beads and charms to the lanyard. You can also use jump rings or wire to connect them.
- Experiment with different patterns and combinations to create a one-of-a-kind lanyard that reflects your personality and style.
Remember to balance the weight and distribution of the beads and charms evenly so that the lanyard can still hold its intended contents.
Eco-Friendly Crafting: Using Recycled Materials to Create Your Lanyard
If you’re passionate about sustainability and want to reduce waste, try using recycled materials to make your lanyard. Here are some ideas:
- Use old shoelaces, fabric scraps, or ribbon instead of new cords.
- Use wire or metal scraps to make decorative trinkets or clasps.
- Decorate your lanyard with found objects, such as shells, stones, or beads from an old necklace.
- Experiment with natural materials, such as hemp or jute, to make an earthy and organic-looking lanyard.
Be sure to clean and sanitize the recycled materials before using them and be mindful of the weight and durability of each material.
Expert Tips for Choosing the Right Materials and Tools for Your Lanyard
The key to a successful lanyard-making project is choosing the right materials and tools for the job. Here are some expert tips:
- Choose a cord that is sturdy, flexible, and light-weight, such as nylon, polyester, or cotton.
- Choose a clasp that is easy to use, secure, and appropriate for your intended use, such as a swivel clasp or keyring.
- Choose the right tools for the job, such as scissors, pliers, needles, and measuring tape.
- Choose embellishments and decorations that complement the style and function of the lanyard, such as beads, charms, or trinkets.
Investing in high-quality materials and tools may be more expensive in the short term, but it will pay off in the long term with a durable and attractive lanyard.
Lanyard Hacks: Innovative Ways to Use Your Lanyard Beyond Identification
Did you know that you can use your lanyard for other purposes besides identification? Here are some innovative hacks:
- Turn your lanyard into a camera strap by attaching camera clips or hooks to the ends.
- Turn your lanyard into a bag handle by attaching it to a purse or tote bag.
- Turn your lanyard into a keychain by attaching a keyring or extra clasp to the end.
- Turn your lanyard into a fashion accessory by wearing it as a necklace or a bracelet.
With a little creativity, your lanyard can be transformed into a versatile and multi-functional item that goes beyond its original purpose.
Conclusion
By now, you should have a good understanding of how to make a lanyard from scratch, how to personalize it according to your preferences, how to use eco-friendly and recycled materials to make a statement, and how to choose the right materials and tools for the job. We’ve also provided you with creative ideas and hacks on how to use your lanyard beyond identification. Making your own lanyard can be a fun and rewarding project that combines creativity, functionality, and practicality. So, go ahead and give it a try! We’d love to hear about your successes and failures, so be sure to share them with our community.


