Introduction
Are you tired of losing important papers or struggling to find them in a mess of clutter? Do you want to take control of your organization and create a system that works for you? Making your own folder at home can be a great solution. In this article, we provide a step-by-step tutorial on how to make a folder, as well as some fun and creative DIY ideas. We’ll also explore how folders can improve organization and provide tips for using them effectively.
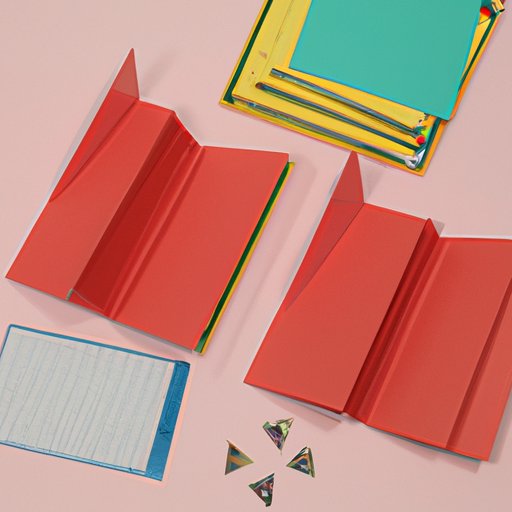
Step-by-Step Tutorial
To make a basic paper folder, you’ll need some materials on hand:
- Letter or legal-sized paper
- Ruler
- Pencil
- Eraser
- Scissors
- Glue (stick or liquid)
Follow these steps:
- Take your paper and fold it in half vertically, with the edges meeting in the center. Press down to create a crease.
- Open up the paper and fold the bottom edge up to the center crease. Press down to create a crease.
- Repeat step two with the top edge of the paper, folding it down to the center crease.
- Now, fold both sides in towards the center crease. The edges should meet in the middle again. Press down to create creases along these folds.
- Close the folder and fold it in half along the center crease.
- Apply glue along the bottom edge of the folder and press the sides together to seal them. You can also apply glue on the outer edges of the folder for added reinforcement.
- If desired, add pockets to the inside of the folder by cutting out strips of paper and gluing them to the sides. You can also use a hole punch to create small holes on the sides and weave ribbon or string through them to create a closure.
- Reinforce the corners of the folder by cutting small squares of paper and gluing them to each corner. This will prevent the folder from tearing or weak spots forming over time.
Including diagrams and photographs can be helpful for following along with the tutorial. To make the process easier and more efficient, here are some useful tips:
- Use a bone folder (a unique tool that can be purchased at art or craft supply stores) for extra crisp folds.
- Use a ruler and pencil to mark your measurements before folding.
- Cut your paper down to size if you want a smaller folder. This works great for organizing receipts or coupons.
- Use colorful paper or patterns to add personality to your folder.
Ingenious DIY Folder Idea
If you want to try something unique, a great idea is to use recycled materials to make your folder. Old cereal boxes, magazines or cardboard can be transformed into a creative folder. Here’s how:
- Select your material and cut it down to the desired size.
- Decorate the material with paint, markers, or collage materials to add your individual style.
- Choose one side of the material to be the inside and place it face down on your work surface.
- Fold the bottom edge up to the center and press down to create the first crease.
- Take the top edge and fold it down to meet the bottom edge. Press this edge down to create the second crease.
- Open the material and fold the bottom edge up to meet the first crease. Press down to create the third crease.
- Repeat with the top edge and fold it down to meet the second crease. Press down to create the fourth crease.
- Take each of the sides and fold them inwards to meet the third and fourth creases.
- Glue the flaps in place, and allow the folder to dry.
- Attach pockets or reinforcements just as you did with the paper folder.
Show off your creativity and use this DIY folder for personal expression.
Organizing with Folders
Creating a folder can be a small step towards improving organization in your life. Here are some tips on how to use folders:
- Color coding. Assign colors to different categories of documents and use folders of that same color to file them.
- Labeling. Label your folders with the name of the category or title of the document inside.
- Categorizing. Use folders to help group papers by subject matter or chronological order.
Folders can be used for everyday tasks, such as organizing bills or to-do lists, or for more extensive projects. For instance, folders can be very useful in creating a filing system at work.
Fun with Origami
Origami is a beautiful art form, and it can also be practical! Here are some origami folds that can be used to create folders:
- Accordian Fold. A popular and functional fold, similar to what is used in store-bought folders.
- Waterbomb Fold. A fun and creative way to build a folder with a three-dimensional look.
- Book Fold. Another popular option that results in a paper folder that opens from the top rather than the side.
Play around with different papers and patterns to create unique and personalized designs.
Folder-Making for Kids
Kids can also benefit from learning how to make their folders. Here are some tips:
- Use templates. Print out templates for kids to follow along when making their folder. You can find a variety of great printables online.
- Make it fun. Let kids use stickers, markers, or other decorative elements to make the folder their own.
- Teach the importance of organization. Use this opportunity to teach kids the benefits of being organized and how folders can help them in school or other activities.
Conclusion
Learning how to make a folder can be a quick and easy solution to your organizational needs, with the added bonus of showcasing a bit of creativity. Use the step-by-step tutorial, the innovative DIY ideas, and tips and tricks for organization to create a system that works for you. Whether it’s for personal use or a group project, making a folder can help simplify a chaotic life.


