I. Introduction
Cones are a simple yet versatile object that can serve a variety of purposes. Whether you’re using them for crafting, decoration, food presentation, or packaging, cones can add an element of visual interest and functionality to your projects. This guide is intended for beginners interested in learning how to make cones, whether for practical or creative purposes.
II. Step-by-Step Guide to Crafting a Cone: The Ultimate Tutorial for Beginners
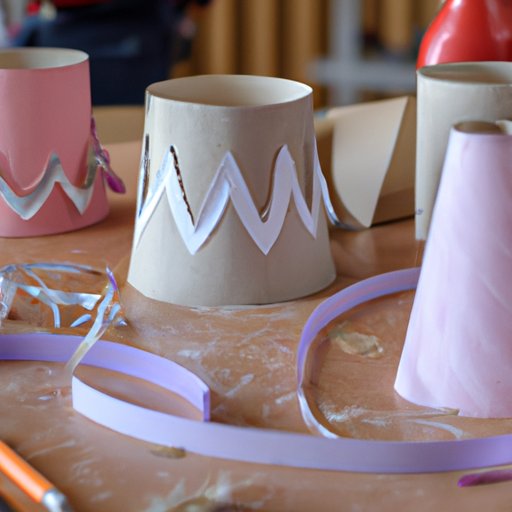
The first step in making a cone is gathering the necessary materials. You will need a template for the size and shape of your cone, scissors, a ruler, and a material of your choice. Common materials for making cones include paper, cardboard, felt, fabric, and plastic.
To make a cone from scratch, follow these steps:
- Take your template and measure the longest side to determine the length of your material. Cut a rectangular piece of material to the appropriate length and width.
- Using a ruler, draw a line from the top left corner of the rectangle to the bottom right corner, creating a diagonal line.
- Take the bottom left corner of the rectangle and fold it up to meet the top edge, creating a triangle shape.
- Use scissors to cut along the diagonal line, separating the excess material from your triangle.
- Open up the triangle to reveal your cone shape. Use scissors to trim the top edge to achieve your desired height for the cone.
- Overlap the edges of the cone at the bottom and secure with glue or tape to hold the shape in place.
When making a cone, it’s important to ensure that the edges are well-sealed and the shape is symmetrical. One tip is to use a strong adhesive or sewing machine if using thicker materials to ensure a sturdy structure.
III. DIY Cone-Making: Tips and Tricks for a Perfectly Structured Cone
While the above tutorial is a great starting point for beginners, there are many techniques and tricks for making cones out of different materials and achieving unique shapes and sizes. Some common materials used for cone-making include:
- Paper: This is a great option for making cones at home due to its accessibility and affordability. To create a sturdier cone, consider using cardstock or origami paper.
- Cardboard: This material is a great choice for larger cones due to its durability. Use a box cutter or scissors to cut cardboard into a triangular shape before folding into a cone.
- Felt: Felt is a soft material that can create a cozy and warm look if used as a cone covering. Before cutting into a felt sheet, measure twice and cut once to ensure your cone is the proper size.
- Fabric: Fabric cones can create a unique and elegant look for decoration or gift packaging. Use a sewing machine or fabric glue to secure the edges together and achieve a seamless look.
- Plastic: Clear plastic cones can be used for food presentation or packaging purposes. Use a plastic cone template to trace onto plastic sheets and then cut into the desired shape.
When making cones out of different materials, it’s important to consider the thickness and flexibility of the material. For instance, plastic cones will need to be scored before folding, while felt cones will need to be trimmed and shaped to prevent fraying or unraveling.
Common mistakes to avoid when making cones include cutting the material too short or too long, not sealing the edges properly, and creating an uneven or lopsided shape. To avoid these mistakes, be sure to measure twice before cutting and take your time when folding and shaping the cone.
For those interested in creating a cone with unique shapes and sizes, consider experimenting with different angles, cuts, and folds. For example, cones can be shaped to have a flat bottom for stability or flared top for decoration.
IV. Creative Cone-Shaping: How to Make a Cone for Food and Decoration Purposes
Cones aren’t just for crafting – they can also serve practical purposes in food presentation or packaging. For example, cones can be used to hold snacks, candies, or party favors. To make a cone for food purposes, follow the same process as outlined in Section II, but use food-safe materials such as paper or plastic.
For decoration purposes, consider adding decorative accents to your cones such as ribbons, beads, or glitter. Use a glue gun or fabric glue to attach these accents to the cone while ensuring the edges remain sealed and sturdy.
V. Upcycling Household Items: A Guide to Making Cones from Everyday Materials
Upcycling is a great way to make use of household items that would otherwise go to waste. When it comes to cone-making, there are many unexpected household items that can be transformed into cones.
Some examples of household items that can be used to make cones include:
- Toilet paper rolls
- Magazine pages
- Aluminum foil
- Greeting cards
- Newspaper
When using these materials, it’s important to consider the same factors as making cones out of traditional materials. For example, newspaper cones will need to be sealed properly to prevent ink from transferring, while toilet paper roll cones may need to be reinforced with glue to ensure stability.
In addition to being a creative way to reuse household items, upcycling also has environmental benefits by reducing waste and promoting sustainability.
VI. Expert-Sourced Cone-Making: Insights and Tips from Professional Crafters
To gain even more insight into the world of cone-making, we’ve interviewed expert crafters for their tips and tricks. Here’s what they had to say:
“When it comes to making cones out of fabric, be sure to choose a lightweight fabric with some stiffness to hold the shape. You can also use an iron-on stabilizer to reinforce the material.” – Amy, textile artist
“If you’re making paper cones, try experimenting with different textures and finishes such as metallic or glossy paper to create an eye-catching and elegant look.” – John, papercraft artist
“When making a cone out of plastic, consider using a heat gun to score the material before folding. This will ensure a more precise and even shape.” – Sarah, packaging designer
These expert tips demonstrate the many possibilities and nuances when it comes to cone-making, proving that even those with experience can continue to learn and improve their skills.
VII. Conclusion
Overall, making cones can be a fun and rewarding activity for both beginners and experienced crafters. Whether you’re using traditional materials or upcycling household items, there’s no limit to the unique shapes and sizes you can create. We hope this guide has provided a helpful starting point for making your own cones and inspired you to experiment with different techniques and materials.


