Knitting a Cozy Hat: A Beginner’s Guide
Learning how to knit a hat can be a fulfilling and rewarding experience. Not only can you create a cozy head covering for yourself or loved ones, but you’ll also develop a new skill that promotes relaxation and creativity. In this article, we’ll provide a comprehensive guide on how to knit a hat. From basic knitting materials to customizing your hat, we’ll cover everything you need to know to start your knitting journey.
A Beginner’s Guide to Knitting a Cozy Hat
Before we delve into the step-by-step instructions, let’s start with the basics. Here’s what you’ll need:
- Knitting needles
- Yarn
- Scissors
- Darning needle
It’s important to pick the right materials for your project. Choose a yarn that is soft, durable, and easy to work with. The weight of the yarn will determine the size of the needles you’ll need, so make sure to check the yarn label for needle size recommendations.
Next, let’s get familiar with some common knitting terminology:
- Cast on: the starting row of stitches.
- Stitch: a loop of yarn that is wrapped around the needle.
- Knit stitch: inserting the needle into the stitch and pulling the yarn through.
- Purl stitch: inserting the needle into the stitch from the opposite side and pulling the yarn through.
- Decreasing stitches: knitting two stitches together to make one.
Now that we’ve covered the essentials, let’s start knitting!
How to Cast On Knitting Stitches
The cast-on is the first row of stitches that form the base of your hat. Here’s how to cast on stitches:
- Make a slipknot by forming a loop and placing the working yarn over the top.
- Insert the needle into the loop and tighten the knot onto the needle.
- Hold the needle with the slipknot in your right hand and the working yarn in your left hand.
- Loop the working yarn counterclockwise around the left thumb, bring the needle down under the left-hand yarn, and pull it towards you through the loop.
- Take the right hand needle and insert it into the new stitch from left to right, catching the left-hand yarn.
- Slide the new stitch onto the left-hand needle.
- Repeat steps 3-6 until you have the desired number of stitches.
How to Knit Basic Stitches
Now that you have your stitches cast on, it’s time to start knitting. Here’s how to do the basic knit stitch:
- Hold the needle with the stitches in your left hand and the empty needle in your right hand.
- Insert the right-hand needle from front to back into the first stitch on the left-hand needle.
- Wrap the working yarn clockwise around the right-hand needle.
- Using the right-hand needle, pull the stitch through the loop of the left-hand needle.
- Slide the stitch from the left-hand needle to the right-hand needle.
- Repeat steps 2-5 until you’ve knit all the stitches.
How to Decrease and Shape the Hat
Now that you know how to knit basic stitches, it’s time to decrease and shape your hat. You’ll need to decrease stitches as you near the top of the hat in order to close it off. Here’s how to decrease stitches:
- Identify the two stitches you want to knit together.
- Insert the right-hand needle through both stitches from left to right.
- Wrap the yarn around the right-hand needle as if you were knitting a regular stitch.
- Pull the resulting stitch through both loops on the left-hand needle.
- Slide the resulting stitch onto the right-hand needle, and continue knitting in this manner until your desired size is reached.
Tips for Finishing the Hat
When you have reached the desired length of your hat, cast off the remaining stitches to create a neat seam. Cut the yarn with a pair of scissors, leaving a long tail. Thread the tail of the yarn through a darning needle and weave it through the remaining stitches. Pull the needle through to tighten the yarn and tie a knot to secure the end.
Step-by-Step Instructions for Knitting a Warm Winter Hat
Now that you know the basics let’s get started with a step-by-step guide to making a warm winter hat. Here are our instructions:
How to Choose the Right Yarn and Needle Size
For a warm winter hat, choose a bulky yarn and a thick needle. Look for a yarn that is soft, warm, and easy to work with. Check the label for recommended needle sizes.
How to Knit the Brim and Body of the Hat
- Cast on the desired number of stitches for the brim of your hat.
- Knit in a rib stitch, alternating between a knit stitch and a purl stitch, for about two inches to create the brim of your hat.
- Continue knitting in a stockinette stitch (knit one row, purl one row) for the body of the hat. Repeat until the hat measures the desired length.
How to Decrease Stitches to Make the Crown of the Hat
- When you’ve reached the desired length of your hat, it’s time to decrease stitches to create the crown of the hat.
- Knit two stitches together to decrease the number of stitches in each row. Repeat until you have four or six stitches left on your needle.
- Cut the yarn and use a darning needle to weave the tail through the remaining stitches. Pull the needle through to tighten the yarn and tie a knot to secure the end.
Tips for Finishing the Hat
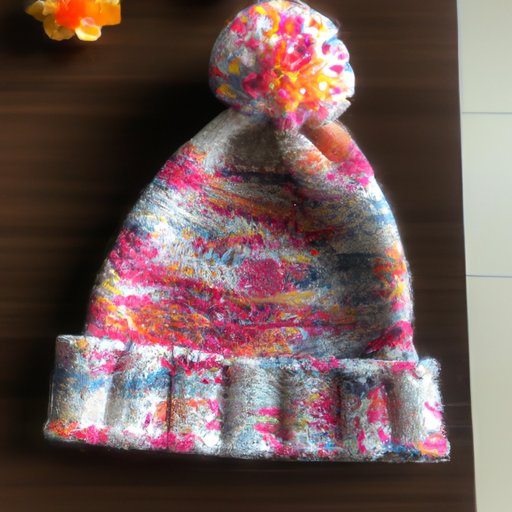
Now that you have completed the hat, it’s time to add some finishing touches. You can add a pom-pom or attach earflaps to customize your hat. To make a pom-pom, cut two circles of cardboard and wrap yarn around them. Tie the yarn in the center, cut the loops, and trim the ends. Sew the pom-pom to the top of the hat. To add earflaps, create two triangles with your leftover yarn, and stitch them onto the sides of your hat.
5 Easy Hat Knitting Patterns for Beginners
If you’re looking for some inspiration, here are five easy knitting patterns for beginners:
Pattern 1: Basic Beanie
This pattern is perfect for beginners. Cast on the desired number of stitches, knit in a stockinette stitch for the body of the hat, and decrease stitches to form the crown. Add a pom-pom to the top for a finishing touch.
Pattern 2: Slouchy Hat
This pattern is perfect for a cozy and casual look. Cast on extra stitches and knit in a rib stitch for the body of the hat. Decrease stitches to make the crown and attach a pom-pom if desired.
Pattern 3: Earflap Hat
This pattern is perfect for keeping ears warm on a chilly day. Create earflaps by knitting two triangles and attach them to the sides of your hat. Knit the body of the hat and decrease stitches to form the crown.
Pattern 4: Pom-Pom Hat
This pattern is perfect for a fun and playful look. Knit the body of the hat in a basic stitch and attach a large pom-pom to the top.
Pattern 5: Striped Hat
This pattern is perfect for adding some color to your hat. Use two different colored yarns and alternate between them to create stripes. Knit in a basic stitch and decrease stitches to form the crown.
Tips for Following Knitting Patterns
When following a knitting pattern, make sure to read the instructions carefully. Pay attention to the stitch count and the recommended needle size. Keep track of your progress by marking your rows with a stitch marker or a scrap of yarn. And don’t be afraid to ask for help or clarification if you need it.
How to Customize Your Knitted Hat: Adding Pom-Poms, Earflaps, and More
A great thing about knitting your own hat is that you can customize it to your liking. Here are some ways to add a personal touch to your hat:
How to Make and Attach Pom Poms
Pom-poms are a fun and easy way to add some flair to your hat. To make a pom-pom, cut two circles of cardboard and wrap yarn around them. Tie the yarn in the center, cut the loops, and trim the ends. Sew the pom-pom to the top of the hat.
How to Add Earflaps to the Hat
Earflaps are perfect for keeping your ears warm on a winter day. Create earflaps by knitting two triangles separately. Attach them to the sides of your hat by sewing them on with a darning needle and leftover yarn.
Other Ways to Customize Your Hat
There are many other ways to customize your hat, such as adding buttons, tassels, or embroidery. Get creative and experiment with different techniques to make your hat truly one of a kind.
Choosing the Best Yarn for Your Knitted Hat Project
Choosing the right yarn can make all the difference in your hat knitting project. Here are some factors to consider when selecting yarn:
- Softness: Look for yarn that is soft and easy to work with. This will ensure that your hat is comfortable to wear.
- Warmth: For a cozy winter hat, choose a yarn that is thick and warm.
- Sustainability: Consider using yarn made from sustainable materials or recycled fibers.
Some popular yarns for hat knitting include wool, alpaca, and acrylic. Check the label for recommended needle sizes and washing instructions.
Why Knitting a Hat is a Great DIY Project for Stress Relief and Relaxation
Knitting can be a great way to reduce stress and promote relaxation. Studies have shown that knitting can have therapeutic benefits, such as reducing anxiety and depression and promoting a sense of well-being. In addition to the therapeutic benefits, knitting a hat can be a source of self-care and creative expression.
Conclusion
In this beginner’s guide to knitting a hat, we covered everything you need to know to get started on your knitting journey. From the basics of knitting terminology to step-by-step instructions for making a warm winter hat, we hope you feel confident enough to try making your own hat. Remember to pick the right materials, follow knitting patterns carefully, and have fun customizing your hat to make it truly one of a kind.


