Introduction
Kneading dough is an essential skill for any baker. Whether you’re making bread, pizza, or pastries, the kneading process is crucial for developing gluten and achieving the desired texture and consistency. In this article, we’ll guide you through the step-by-step process of kneading dough and explore the science behind the technique. We’ll also provide tips and techniques for specific types of bread and discuss the benefits of hand kneading versus stand mixers. By the end of this article, you’ll have all the knowledge you need to master the art of kneading dough!
Step-by-Step Guide
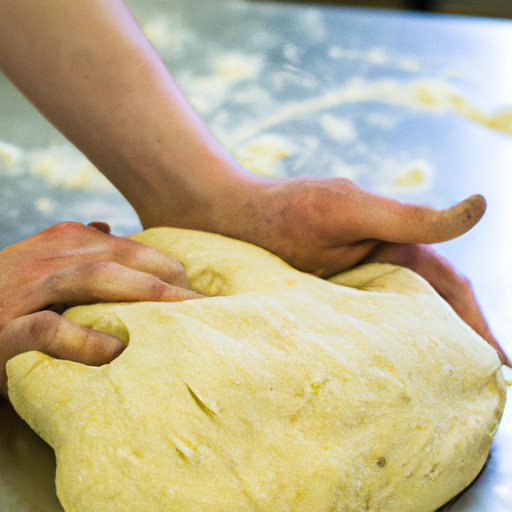
The first step in kneading dough is to mix the ingredients together until well combined. This can be done by hand or with a stand mixer. Once the ingredients are combined, it’s time to start kneading. Follow these steps:
- Lightly flour a clean work surface.
- Place the dough on the surface and press it down with your hands to flatten it slightly.
- Fold the dough in half and press down with the heels of your hands.
- Rotate the dough 45 degrees and repeat the folding and pressing process.
- Continue this process for 10 to 15 minutes, until the dough is smooth and elastic.
Throughout the process, you may need to add more flour to prevent the dough from sticking to your hands or the work surface. Remember to use your body weight to apply pressure to the dough, rather than relying solely on your hands.
The Science of Kneading
Kneading dough is not just about achieving the right texture; it’s also about encouraging biochemical reactions to occur. When you knead dough, gluten, a protein found in wheat flour, develops. This gluten allows the dough to stretch and rise when baked and gives bread its chewy texture. Gluten development is particularly important for bread, where the structure of the dough is crucial for achieving a good rise.
To achieve optimal gluten development, it’s important to knead the dough thoroughly. However, over-kneading can lead to tough bread and should be avoided. You can test the gluten development by performing a windowpane test. This involves taking a small piece of dough and stretching it until it’s thin enough to see through. If the dough holds its shape and becomes translucent, it’s ready for proofing.
Kneading Techniques for Specific Types of Bread
Not all breads are created equal, and different types of dough require different kneading techniques. Here are some examples:
- French bread is typically made with a wet, sticky dough that requires a gentle touch when kneading. Instead of folding and pressing, try a technique called slap and fold. This involves slapping the dough onto the work surface and folding it over itself.
- Sourdough bread requires a longer kneading time to encourage gluten development. Try folding the dough every 30 minutes for the first few hours of fermentation.
- Focaccia has a high moisture content and should be kneaded for a shorter amount of time than other breads. Try a method called stretch and fold, where you stretch the dough out and fold it on top of itself.
Experiment with different kneading techniques to find the one that works best for each type of bread. Remember to be gentle with wet dough and more vigorous with drier dough.
Benefits of Hand Kneading vs. Stand Mixer
Hand kneading and stand mixers are both viable options for kneading dough, but each has its advantages and disadvantages:
- Hand kneading allows you to feel the dough and adjust the process accordingly. It’s also a good workout for your arms! However, it can be time-consuming and tiring.
- Stand mixers are great for large batches of dough and are much faster than hand kneading. They also provide a consistent kneading action, which is important for achieving even gluten development. However, they can be expensive and take up a lot of counter space.
Choose the method that works best for your needs and preferences. If you’re unsure, try both methods and see which one you prefer.
Quick Kneading Hacks for Busy Bakers
If you don’t have a lot of time, there are some shortcuts you can take when kneading dough:
- Use a food processor: Simply pulse the dough until it comes together, then knead by hand for a few minutes to achieve the desired texture.
- Add extra yeast: A higher yeast content can help the dough rise quickly, reducing the kneading time.
- Use a warm environment: Placing the dough in a warm spot can encourage fermentation and gluten development, reducing the kneading time.
Remember that these shortcuts may not always lead to the same results as traditional kneading methods, so adjust your expectations accordingly.
Common Kneading Mistakes and How to Avoid Them
Here are some common mistakes people make when kneading dough:
- Adding too much flour: This can lead to dry, tough bread. Remember to use only as much flour as necessary to prevent sticking.
- Under-kneading: If the dough is not kneaded enough, gluten development will be insufficient, leading to a dense texture. Make sure to knead the dough until it is smooth and elastic.
- Over-kneading: Over-kneading can lead to tough, dry bread. Test the gluten development frequently to avoid over-kneading.
To avoid these mistakes, follow the kneading process carefully, use the right amount of flour, and adjust your kneading time based on the texture of the dough. Don’t be afraid to experiment and make mistakes; this is all part of the learning process!
Conclusion
Kneading dough is a crucial skill for any baker, but it can seem intimidating at first. By following our step-by-step guide and learning about the science behind the technique, you’ll be well on your way to kneading perfect dough every time. Experiment with different kneading techniques, choose the method that works best for you, and don’t be afraid to make mistakes.


