Introduction
Hanging pictures correctly is an essential task to add a decorative and aesthetic touch to any room. From family portraits to artwork, the right placement of images on a wall can transform an entire space. However, hanging pictures can be a frustrating task if you don’t have the correct tools and knowledge to complete it properly.
This article aims to provide you with the ultimate guide to hanging pictures, offering expert tips and tricks, a DIY tutorial guide, creative ways to display photos, and the dos and don’ts of hanging artwork. So, whether you are an experienced DIY’er or a novice, you will learn everything you need to know to hang pictures like a pro.
The Ultimate Guide to Hanging Pictures: Expert Tips and Tricks
Tools and Materials Required for Hanging Pictures
Before we begin, let’s gather the essential tools and materials you’ll need to hang pictures:
– Measuring tape
– Pencil
– Picture hooks
– Screws
– Wall anchors
– Hammer
– Level for accuracy
– Stud finder (for pictures that weight more than 20 pounds)
How to Measure and Mark the Wall for Picture Placement
The first step in hanging pictures is to find the perfect spot to hang them. It’s essential to ensure the pictures are at the right height and distance from each other for an aesthetically balanced look.
Use a measuring tape to determine the picture’s height and distance from nearby furniture, such as a couch or bed. Determine the midpoint of the picture and mark it with a pencil. Use a level to confirm the placement, and remember to mark each picture’s top position.
Choosing the Right Hanging Hardware
Choosing the right hardware depends on the picture’s size and weight. If the photo weighs less than 20 pounds, use a picture hook and a screw. If the picture is over 20 pounds, use a wall anchor. There are several types of wall anchors on the market to choose from, including toggle bolts, molly bolts, and anchor screws.
How to Level and Hang the Picture
To ensure that the picture is hanging straight, use a level. Place it on the top of the image and adjust it until the bubble is in the center. Next, hang the picture on the hook or anchor and adjust it as necessary until it sits perfectly straight.
DIY Picture Hanging: A Step-by-Step Tutorial for Any Skill Level
The Benefits of DIY Picture Hanging
Hanging pictures yourself can save you money and allow you to customize the layout of each image. Additionally, creating your own picture gallery can be a fun and creative process.
Creating a Hanging Template
To ensure that your pictures are precisely placed and balanced, create a hanging template using kraft paper. Trace each photo onto the paper, then label the top and bottom of each one. Cut out each picture template and arrange them on the wall until you find the perfect grouping.
Step-by-Step Tutorial on How to Hang Pictures
1. Prepare the wall and measure the height.
2. Create a hanging template using kraft paper.
3. Tape the templates to the wall.
4. Measure and mark the midpoint and top of each image.
5. Install the hooks or anchors.
6. Hang the picture on each corresponding hook or anchor.
Fixing Mistakes
If you’ve already hung a picture and realize that it’s not at the right height or angle, don’t worry. Simply remove it from the hook or anchor, adjust it until it’s perfect, and reinstall.
5 Creative Ways to Display Your Favorite Photos on a Wall
Gallery Walls
Creating a gallery wall by hanging pictures in a grid or cluster is an excellent way to display a collection of images. To achieve this, select a group of photos that share a common theme, such as family portraits or travel shots.
Photo Ledges
Another creative way to display photos is by using photo ledges. These are specially designed shelves that hold photo frames, making them easy to swap around or update. They are perfect for renters or those who don’t want to put holes in the wall.
Mixed Media
Mix up your picture display by combining different media, such as framed photos with textiles or prints. This technique can add color and texture to a room, creating a unique and vibrant ambiance.
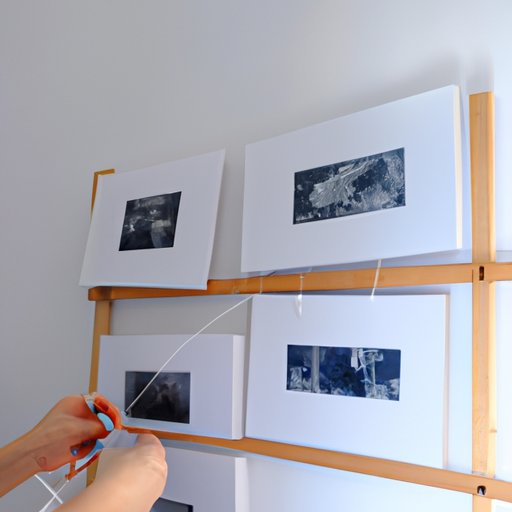
Hanging Strings
Hanging strings and clips are another trendy way to hang photos. Simply attach your favorite pictures to the strings and create a cascading effect. This method works well for a bedroom or children’s playroom.
Collage of Similar Colors
Create a picture display with a curated color theme for a cohesive look. The photos in a square or rectangular format can build a harmonious atmosphere through similar colors. From bright yellows to moody greys, choose a scheme that suits your room.
The Dos and Don’ts of Hanging Artwork: A Comprehensive Guide
Don’t Hang Artwork Too High or Low
The correct height of artwork is a crucial factor in displaying pictures. It should not go too high or too low. As a general rule, the picture’s center should be at eye level.
Do Hang Artwork in a Grouping
Hanging a group of pictures makes a more significant impact than just one. Therefore, try to create a grouping of 3 or more pieces and hang them as a cluster or linear configurations.
Do Consider the Weight of the Picture
Extreme spacing and heavy hanging hardware can make a big difference, depending on the picture’s weight. When hanging an image that weighs more than 20 pounds, consider using a wall anchor and trying to reach the studs behind the drywall.
Do Hang Picture Pairs Symmetrically
When hanging picture pairs or sets, it’s advisable to consider symmetry and balance. An equal distance between the pictures and its position in the room ultimately creates a more substantial atmosphere.
Make Your Walls Pop: How to Hang Pictures Like a Pro
Creating a Cohesive Picture Display
To create a cohesive picture display, try to keep the wall’s theme in mind. If you have a minimalist decor, consider displaying black-and-white or sepia tones photos. For a more colorful ambiance, color photos that reflect the room’s color palette are the best bet. The arrangement, the common or similar sense of the framing, is an essential factor for creating a cohesive picture display, creating a plan that complements the wall.
Using Color, Size, and Shape
Suppose you have a full area of wall to work with. In that case, the ideal way to create the most impressive look is to use a variety of colors, sizes, and shapes in your picture display. Larger sizes dominate the space, and smaller sizes balance it. A combination of different colors, including whites and blacks, add depth to your picture display.
Conclusion
Hanging pictures correctly can enhance your decorating style drastically. Following our ultimate guide to hanging pictures, you should have a better understanding of the tools, materials, and techniques required to hang pictures successfully. Whether you are using gallery walls, photo ledges, hanging strings and clips, or using creative picture displays or artwork arrangements, this article has everything you need to make your walls pop with your unique personality and style. Be creative and make your home an extraordinary place.


