I. Introduction
There’s nothing quite like a perfectly distressed pair of jeans. But achieving that look can be a challenge if you’re not sure where to start. Fortunately, fraying your jeans is a simple process that can be done with a few household items. In this article, we’ll walk you through the step-by-step process of fraying your jeans and offer tips and tricks for achieving the perfect distressed look.
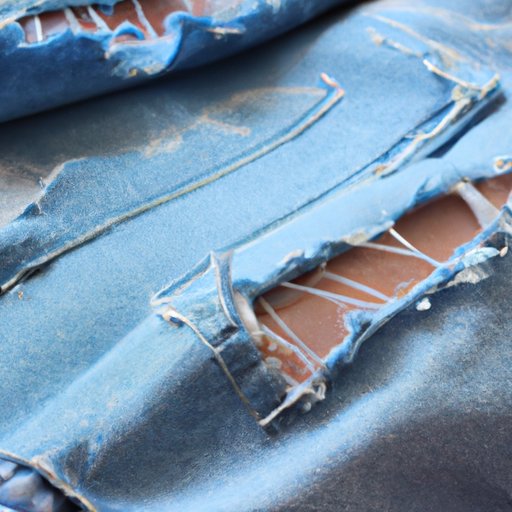
II. Step-by-Step Guide
The first step in fraying your jeans is preparing them for distressing. Start by washing and drying your jeans to ensure they are clean and free of wrinkles. Then, mark where you want to cut by using chalk or a pen.
Next, choose your cutting technique. You can use scissors for a more blunt edge, sandpaper for a natural fade, or a razor blade for a more precise cut. Cut along the mark, being careful not to cut too much.
Once you’ve cut the jeans, it’s time to distress them. You can use tweezers to pull out individual threads or use sandpaper or a pumice stone to rough up the edges. Be sure to distress both the front and back of the jeans to achieve a consistent look.
III. Video Tutorial
If you’re a visual learner, check out this video tutorial for a step-by-step guide:
https://www.youtube.com/watch?v=8zJU3H3dtDA
To recap, the key steps in the video are: preparing the jeans, cutting them along the mark, and then distressing them using tweezers, sandpaper or a pumice stone.
IV. DIY Project
If you’re ready to try fraying your own jeans, here’s what you’ll need:
- A pair of jeans
- Scissors, sandpaper, or a razor blade
- Tweezers
- Chalk or pen
- Pumice stone (optional)
Once you have your materials, follow these steps:
- Wash and dry your jeans to ensure they are clean and free of wrinkles.
- Mark where you want to cut using chalk or a pen.
- Choose your cutting technique and cut along the mark.
- Distress the jeans using tweezers, sandpaper or a pumice stone.
Finally, share your finished product on social media using the hashtag #frayedjeans to join the community of DIY enthusiasts.
V. Troubleshooting Common Issues
If you’re having trouble achieving the right amount of distressing, try distressing a small area first to get an idea of how much pressure to use. You can also experiment with different cutting techniques to achieve your desired look. Be patient and don’t be afraid to make mistakes – this is a learning process!
VI. Style Tips and Tricks
Once you’ve frayed your jeans, it’s time to pair them with the perfect outfit. For a casual look, pair them with sneakers and a basic t-shirt. To dress them up, try adding a blazer or a statement necklace. And don’t forget to experiment with tailoring options – you can trim the length of your jeans or cut off the hem for a trendy cropped look.
VII. Conclusion
Fraying your jeans is a fun and easy DIY project that can give you a new wardrobe staple. By following these steps and experimenting with distressing techniques, you can achieve the perfect frayed look.


