Introduction
Framing a door is one of the essential skills for anyone interested in DIY home improvement projects. Whether you are renovating your entire house or just installing a new door, knowing how to frame a door correctly will save you money, time, and headaches. In this article, we will provide you with a step-by-step guide that will help you frame a door like a pro, offer you some tips and tricks to make the process easier and faster, and compare different methods to help you choose the best option for your project.
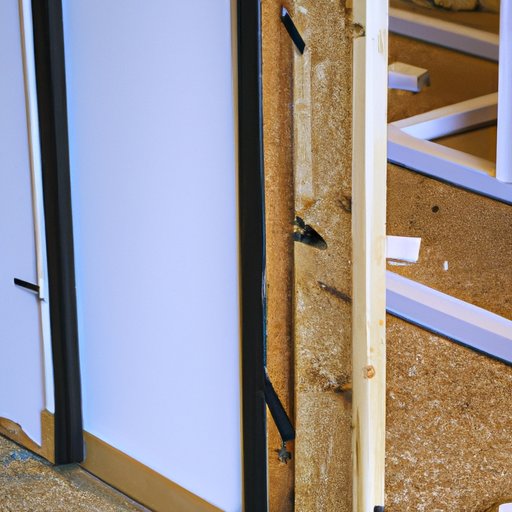
Step-by-Step Guide
Before you start framing a door, you need to gather the following tools and materials:
– Tape measure
– Circular saw or handsaw
– Hammer
– Nails
– Wood shims
– Wood glue
– Level
– Safety glasses and ear protection
Once you have all the required tools, follow these steps:
1. Measure and Cut the Frame Components
Start by measuring the height, width, and depth of the door opening. Add 2 inches to the height and 1 inch to the width to ensure a snug fit. Next, measure and cut four pieces of lumber to the same height as the door opening, two for the sides and two for the top and bottom.
2. Assemble the Frame
Lay the top and bottom pieces of lumber on a flat surface and nail them together to form a rectangle. Then, attach the sides to the top and bottom pieces using nails and wood glue. Make sure all the corners are square and the frame is level.
3. Install the Frame
Lift the frame into the opening and secure it with shims to ensure a tight fit. Check the frame for level and square, and make any adjustments if necessary. Then, nail the frame to the studs using 16d nails, starting at the corners and working your way to the middle.
4. Finish the Door
After the frame is secure, you can hang the door and install any hardware, such as doorknobs, hinges, and locks.
Remember, mistakes can happen, but here are some tips to help you avoid common ones:
– Measure twice, cut once.
– Use wood shims to make adjustments and ensure a tight fit.
– Cut all the frame components at once to ensure they are the same length.
– Check for level and square at every step.
Tips and Tricks
Framing a door can be tricky, but these tips and tricks will help you get the job done faster and with better results:
– Use a reciprocating saw to remove any excess wood and make the frame fit snugly.
– Apply wood glue to the joints before nailing to reinforce the frame.
– Paint or stain the frame before installing the door to avoid getting paint or stain on the door.
Video Tutorial
For visual learners, we found this great video tutorial that shows you how to frame a door step-by-step:
[insert video link here]
To make the most out of this video tutorial, here are some tips:
– Watch the entire video before starting your project to have a general idea of the process.
– Pause the video after each step and follow along with your own project.
– Take notes or bookmark the video to refer back to if you get stuck.
Comparing Different Methods
There are different methods for framing a door, and each has its own pros and cons. The two most popular methods are using a pre-hung door and building the frame from scratch.
A pre-hung door comes with the frame already attached to the door, making the installation faster and easier. However, it can be more expensive, not as customizable, and require more space.
Building the frame from scratch is more affordable, customizable, and requires less space. However, it can be more time-consuming, require more skills, and need more tools and materials.
Other methods for framing a door include using adjustable steel frames or pocket frames, which have their own benefits and drawbacks. It is up to you to decide which method is best for your project based on your budget, skills, and preferences.
Case Studies
To inspire you and show you what is possible, here are some real-life examples of successful door framing projects:
– [Insert case study 1]
– [Insert case study 2]
– [Insert case study 3]
In each case, the DIY homeowners or contractors used different methods, overcame various challenges, and achieved beautiful results.
Conclusion
Framing a door might seem intimidating at first, but with the right tools, materials, and instructions, anyone can do it. We hope that this step-by-step guide, tips and tricks, video tutorial, and case studies have empowered you to take on your next DIY project with confidence. Remember to take it slow, double-check your measurements, and enjoy the process.


