I. Introduction
Folding money into intricate designs is an art that has been passed down for centuries. In recent years, it has become increasingly popular for its unique and creative way of presenting money as a gift or impressing family and friends. Knowing how to fold money provides a great opportunity to showcase your creativity and add a personal touch to everyday items.
II. 5 Creative Ways to Fold Money: Impress Your Friends and Family
Here are five unique folding techniques that can turn an ordinary bill into a creative masterpiece:
1. The Shirt and Tie
This classic design is perfect for a gift for a groom or father. It also makes a great way to give cash for a graduation gift.
To create this design, start by folding the bill in half lengthwise. Then fold it in half again, so that there are four even sections. Open it up and fold each of the top corners down to meet the central crease to create a triangle.
Next, fold the bottom edge up to where the two triangles meet at the center crease. Take the corners of the triangle on top and tuck them behind the folded bill to create the collar and sleeves. Finally, fold up the bottom edge to create the tie.
2. The Money Rose
A money rose is perfect for a romantic occasion such as Valentine’s Day or as a creative way to give cash as a wedding gift.
Start by folding the bill in half lengthwise, and then in half again. Fold the corners down to create a triangle. Then fold the two ends upwards so that they meet in the middle crease to create a diamond shape.
Next, fold the bottom edge of the diamond upwards so that it forms a triangle. Fold the top and bottom points of this triangle and tuck them inside the folds. Finally, shape the remaining paper into a rose shape by rolling it up and tucking the end of the bill beneath the rest of the rose.
3. The Heart
A heart is one of the simplest and most popular money folding designs. It’s perfect for Valentine’s Day or could even be used as a unique way to present money to your significant other.
Start by folding the bill in half lengthwise, creating a central crease. Next, fold the sides of the bill towards the center crease so that their edges meet along the central crease.
Then, fold the top of the bill down to create a triangular shape at the top. Finally, fold the bottom edges up to create a heart shape.
4. The Butterfly
A butterfly is a whimsical and fun way to fold money. It’s ideal for a child’s birthday or a graduation gift.
Start by folding the bill in half lengthwise. Next, fold the corners down to the middle crease to create a triangle. Then, fold the bill in half so that the triangle is on the outside, tucking in the sides.
Next, fold the top of the bill down in half, creating a rectangle shape on the top of the bill. Fold the bill in half one more time so that the rectangle is folded in the middle, creating butterfly wings.
5. The Money Tree
A money tree is perfect for a wedding, housewarming, or as a thoughtful way to give cash to a tree lover.
Start by folding the bill in half lengthwise, then in half again. Fold the corners down to create a triangle. Turn the bill around and roll the two sides towards the center of the triangle to create a trunk.
Next, fold a second bill the same way and attach it to the first with tape to create a ‘Y’ shape with the bills. Repeat with four other bills to create the ‘branches.’ Finally, fold additional bills in half and tape them to the ‘branches’ to create the leaves.
III. The Art of Folding Money: A Step-by-Step Guide
To create more complex designs with money folding, it’s important to first understand the basic techniques. Here’s our step-by-step guide:
1. Choose Your Bill
Begin by selecting the bill you want to fold. Different bill sizes can create different effects, so keep that in mind when selecting your bills.
2. Smooth Out the Bill
Lay the bill on a flat surface and smooth it out with your hands. Try to remove any visible bends or folds.
3. Fold the Bill in Half Lengthwise
Fold the bill in half lengthwise, making sure the edges align.
4. Create a Central Crease
Unfold the bill and then fold it in half the other way, creating a central crease. Unfold the bill once again.
5. Create Angular Folds
Fold the top edge of the bill down to meet the central crease. Repeat with the bottom edge of the bill. You should now have a small rectangular section at the top and bottom.
6. Fold the Corners
Fold the top corner of the bill down to meet the central crease. Repeat with the bottom corner of the bill.
7. Fold the Bill in Half Again
Fold the bill in half lengthwise again, so that the triangular sections are on the outside.
8. Smooth Out the Folds
Smooth out all the folds to ensure they are clean and precise.
IV. Simple Money Folding Techniques for Kids and Adults
Folding money is a fun and simple activity that both kids and adults can enjoy. Here are some basic designs to get you started:
1. The Bow
A bow is a great way to dress up a gift card or money for any occasion. Start by folding the bill in half lengthwise. Next, fold the two ends towards the middle to form a bow shape. Finally, wrap a small strip of paper or ribbon around the center of the bow to complete the look.
2. The Envelope
An envelope is a classic way to present money as a gift. To create an envelope, start by folding the bill in half lengthwise and then in half widthwise. Next, fold the bottom edge of the bill up to create a flap. Finally, tuck the top edge of the bill into the flap to secure the envelope.
3. The Star
A star is a festive design that’s perfect for the holidays or for a child’s birthday. Start by folding the bill in half lengthwise, and then in half again. Next, fold the bill diagonally in half to form a triangle. Finally, fold each of the three edges again to make the points of the star.
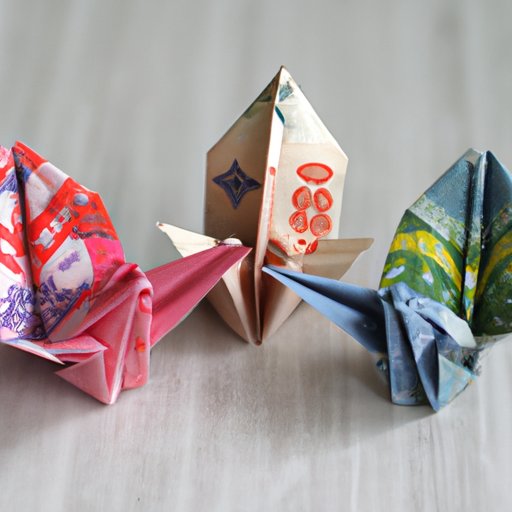
V. Money Origami: How to Turn Your Bills into Works of Art
Money origami is the art of folding money into intricate designs to create stunning works of art. Here are some popular designs to try:
1. The Koi Fish
This design requires two bills – one for the body and one for the fins. Start by folding the body bill in half lengthwise, then fold it in half lengthwise again. Next, fold the top corners down to the central crease to create a triangle. Repeat with the bottom corners of the bill.
To create the fins, fold the second bill in half lengthwise and then in half again. Fold the corners in to create a triangle shape. Fold the remaining edges under to form a fin shape.
Attach the fins to the body with tape or glue.
2. The Dragon
To create a dragon, start by folding the bill in half lengthwise and then in half again. Fold the top corners down to the central crease to create a triangle. Repeat with the bottom corners of the bill.
Fold the bill in half widthwise to create the head of the dragon. Next, fold the top edge down to create the dragon’s nostrils. Fold the bill back up to create a neck and head.
Fold additional bills to create the legs and tail of the dragon. Attach all the parts with tape or glue.
VI. Mastering the Money Fold: Tips and Tricks from a Pro
To successfully fold money, here are some tips and tricks to keep in mind:
– Practice makes perfect. Keep practicing to improve your technique and develop your style.
– Use a flat and clean surface to fold your money to create precise creases and folds.
– Be patient and take your time, especially when creating more complex designs.
– Experiment with different bill sizes and colors to create unique effects.
VII. Folding Money for Gift Giving: A Unique and Thoughtful Presentation
For a unique and thoughtful gift presentation, try folding money into a decorative design. Here are some popular designs:
1. The Money Bouquet
A money bouquet is perfect for weddings, graduations, or any special occasion. Start by folding bills in half lengthwise and then in half again. Roll the bills tightly and tape them to a skewer or floral stem. Shape the bills to look like flowers and arrange them in a vase.
2. The Money Tree
As mentioned before, a money tree makes an excellent gift and centerpiece at parties. Fold bills into a tree shape and attach them to a foam base. Add fake leaves or garland to complete the look.
3. The Money Jar
A money jar is a fun way to give cash as a gift. Use a clear jar and fold dollar bills into accordions. Attach the bills to the inside of the jar and fill it with small gifts or treats.
VIII. Conclusion
Folding money is an excellent way to showcase your creativity and add a personal touch to any gift or occasion. Whether you’re a beginner or a pro, these designs are easy to follow and will impress anyone who sees them. Remember to have patience, practice, and most of all, have fun exploring the art of money folding.


