How to Fix Drywall: A Step-by-Step Guide
Drywall, also known as gypsum board or plasterboard, is a popular building material used in construction projects. It’s a cost-effective and versatile material that’s easy to install. However, over time, it’s inevitable that drywall will become damaged and require repair. Knowing how to fix walled is an essential skill for homeowners and renters alike. It can save you money and ensure that your home looks its best. In this article, we will provide you with a step-by-step guide on how to fix drywall.
Step-by-Step Guide
The first thing you need to do is make sure you have the necessary tools and materials ready. Here are the items you will need:
- Drywall screws
- Drywall joint compound
- Sandpaper (medium-grit and fine-grit)
- Utility knife
- Putty knife
- Drywall tape (paper or fiberglass)
- New drywall panel
Now that you have all of the tools and materials required, it’s time to start fixing your wall.
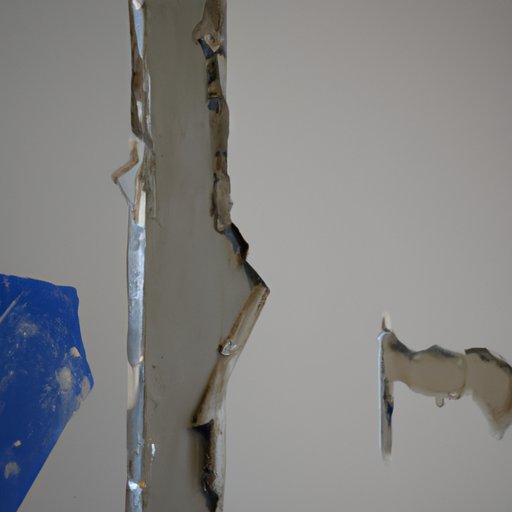
Step 1: Cut Out the Damaged Drywall
The first step is to cut out the damaged drywall. Using a utility knife, carefully cut along the edges of the damaged area to remove any loose or crumbled drywall. Once you have removed the damaged parts, use a square to mark the area to be replaced with a new drywall panel.
Step 2: Install a New Piece of Drywall
Next, measure the size of the hole and cut a new piece of drywall to fit. Place the new piece of drywall into the hole, making sure it’s flush with the surrounding wall. Secure the new piece with drywall screws. Be careful not to over-screw, as this can cause the drywall to crack.
Step 3: Tape and Mud the Seams
Using drywall tape, cover the seams where the new drywall meets the existing wall. Apply a thin layer of joint compound over the tape with a putty knife. Make sure to remove any excess compound by scraping the putty knife over the tape at a slight angle. You should apply three thin layers of joint compound. Once you’ve applied the final layer, let it dry completely before proceeding to the next step.
Step 4: Sand and Paint the Patched Area
Once the joint compound has dried, use medium-grit sandpaper to smooth out any rough or raised areas. Then, use fine-grit sandpaper to make the surface smooth. Finally, paint the patched area. Make sure to match the color of the existing wall to ensure a seamless finish.
Video Tutorial
If you prefer a visual demonstration, there are plenty of video tutorials available online. Watching a video tutorial can be helpful if you’re a visual learner who needs step-by-step instructions and live demonstrations. You can find videos on popular sites like YouTube, Vimeo, or DIY websites. Watching a professional perform the steps can provide a clear picture of what you need to do when repairing your drywall.
Here are the key takeaways to remember:
- Measure the damaged area.
- Cut a new piece of drywall to fit the hole.
- Secure the new piece of drywall with drywall screws.
- Cover the seams with drywall tape.
- Apply three thin layers of joint compound.
- Sand the surface and smooth out any rough areas.
- Paint the patched area to match the existing wall color.
Troubleshooting Tips
Most drywall repairs are straightforward, but from time to time, issues may arise. Here are some common issues that you may encounter when repairing drywall:
- Uneven seams
- Bubbles under the tape
- Cracks in the joint compound
If you encounter any of these issues, here’s what you can do:
- Uneven seams – apply another layer of joint compound and sand after each application until the surface is smooth.
- Bubbles under the tape – remove the tape, apply more joint compound, and re-tape.
- Cracks in the joint compound – sand the area and apply more joint compound.
Common Mistakes to Avoid
Here are some common mistakes that you should avoid:
- Using too much joint compound.
- Not allowing enough drying time.
- Not sanding properly.
- Not using a primer before painting the repaired area.
- Over-screwing the drywall when securing it to the wall.
- Not using goggles, gloves, or other protective gear when working.
To avoid these mistakes, make sure to follow the instructions carefully and take your time when repairing your drywall.
DIY vs. Hiring a Professional
Deciding whether to fix drywall yourself or hire a professional depends on your skills, experience, and the extent of the damage. Small areas of damage can generally be fixed by DIY enthusiasts with the right tools and materials. If you’re unsure about how to fix your drywall or the damage is extensive, it’s best to hire a professional.
When you hire a professional, they can quickly identify the problem and fix it. However, keep in mind that hiring a professional can be expensive. If you’re on a tight budget, doing it yourself is a cost-effective option.
Conclusion
Fixing drywall can be an easy and straightforward process if you know the steps to follow. We’ve provided you with a step-by-step guide, troubleshooting tips, and common mistakes to avoid. Remember to work slowly and methodically. By following these tips and being cautious, you can get your walls looking their best in no time. However, if you’re unsure whether you can handle the task, it’s always better to hire a professional. Drywall repair done right can be a source of satisfaction and pride but getting over your head can be a source of regret.


