Introduction
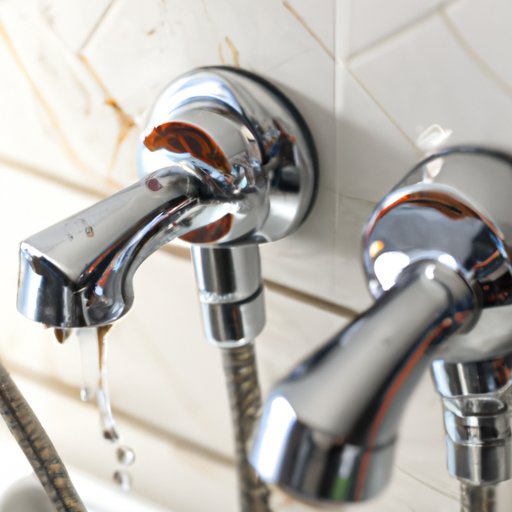
A leaky shower faucet is an annoying and wasteful problem that can be easily fixed with a little know-how. A dripping faucet can waste gallons of water and increase your utility bills, and it can also damage your fixtures and cause mold growth. In this article, we will go over the steps to fix a leaky shower faucet, common mistakes to avoid, a troubleshooting guide, and different methods to fix the faucet.
Writing a Step-by-Step DIY Guide
Before you start fixing your faucet, it’s important to have the appropriate tools, including a screwdriver, an adjustable wrench, Teflon tape, and replacement parts, if needed. Follow these steps to fix your shower faucet:
1. Turn off the water supply – Before you get started, turn off the water supply to your home or the specific valve for the shower. This will prevent water from spraying out while you’re working on the faucet.
2. Remove the faucet handle – This is usually done by removing a screw under the decorative cap on the handle. Once the screw is removed, you can gently pry off the handle.
3. Remove the cartridge or spindle – This part is located behind the handle and controls the flow of water. Use pliers to remove the cartridge or spindle, depending on the type of faucet you have.
4. Inspect the cartridge or spindle – Check for any visible damage or wear and tear. Replace the cartridge or spindle if necessary.
5. Replace the cartridge or spindle – If you’re installing a new cartridge, make sure to put it in the correct position. Secure it in place with the appropriate mounting hardware.
6. Reassemble the faucet – Put the faucet back together in the reverse order you disassembled it. Make sure to replace any O-rings or washers that might be worn or damaged.
7. Test the faucet – Turn the water supply back on and test your faucet to ensure it’s working properly and not leaking.
It’s important to follow the manufacturer’s instructions when installing replacement parts and to use Teflon tape on the threads of any metal parts to prevent leaks.
Highlighting Common Mistakes People Make When Fixing a Leaky Shower Faucet and How to Avoid Them
While fixing a shower faucet is not a difficult task, there are several common mistakes people make that can result in a worse leak or damage to the faucet. Here are some mistakes to avoid:
– Over-tightening the faucet – Tightening the faucet too much can cause it to crack or become damaged, leading to a potentially worse leak. Make sure to tighten the faucet just enough to stop the leak.
– Using the wrong tools – Using the wrong tools can damage your faucet or make it difficult to remove certain parts. Always use the recommended tools or seek guidance from a professional.
– Not inspecting replacement parts – It’s important to check the condition of any new parts you’re installing to make sure they’re not damaged or defective.
A Troubleshooting Guide for Fixing a Leaky Shower Faucet
If your shower faucet is still leaking after attempting to fix it, it might be due to a different problem. Here are some possible issues and solutions:
– Leaky showerhead – If your showerhead is leaking, it might be caused by a worn or damaged washer inside the showerhead. You can replace the washer by removing the showerhead and replacing it with a new one.
– Constantly running water – If water is constantly running from your showerhead, the issue might be with the valve or the water pressure regulator. You can replace these parts or call a plumber for assistance.
– Low water pressure – If your water pressure is low, it might be a problem with your water supply or the showerhead itself. Check your water supply or replace the showerhead if necessary.
Comparing Different Methods of Fixing a Leaky Shower Faucet
There are several different methods to fix a leaky shower faucet, including replacing the cartridge or spindle, replacing the entire faucet, or using a faucet repair kit. Each approach has its own advantages and disadvantages based on the level of expertise, cost, and time required. Consider the following factors when deciding which method to use:
– Expertise – If you are not comfortable working with plumbing fixtures, it’s best to call a professional.
– Cost – Replacing the entire faucet can be more expensive than just replacing the cartridge, but it might be necessary if the faucet is old or damaged.
– Time – Replacing the cartridge or spindle is usually a quick fix, but replacing the entire faucet can take more time.
Highlighting the Benefits of Fixing a Leaky Shower Faucet
Fixing a leaky shower faucet has several benefits, including cost savings and environmental impacts. Here are some of the benefits:
– Cost savings – Fixing a leaky shower faucet can save you money on utility bills by reducing water waste.
– Environmental benefits – Conserving water is not only good for your wallet but also benefits the environment by reducing water usage and protecting natural resources.
– Importance of maintaining the property – Proper maintenance of your home’s fixtures and systems can prevent costly repairs and prolong the life of your property.
Conclusion
Fixing a leaky shower faucet can seem daunting, but it’s a manageable task with the right tools and knowledge. By following the step-by-step DIY guide and avoiding common mistakes, you can successfully fix your shower faucet and save money on your utility bills. Additionally, it’s important to consider the environmental and cost-saving benefits of fixing your faucet, as well as properly maintaining your property. With these tips and strategies in mind, you can enjoy a leak-free shower and a more sustainable home.


