Introduction
There’s nothing worse than settling into bed for a good night’s sleep on your air mattress, only to wake up the next morning, deflated and sore. A hole in your air mattress can quickly turn a peaceful night into a restless one. Luckily, finding and fixing a hole in your air mattress doesn’t have to be a daunting task. In this article, we’ll provide you with the ultimate guide to finding and fixing holes in your air mattress so you can get back to a good night’s sleep.
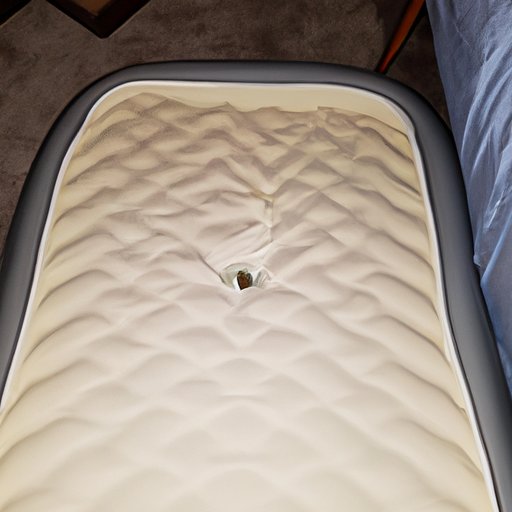
Why You Should Check for a Hole in Your Air Mattress and How to Do It
Regularly checking for holes in your air mattress is essential to ensure you get the best night’s sleep possible. Even a small hole can quickly turn into a larger one, leaving you sleeping on the hard ground. Here are a few tips for checking for leaks:
– Listen for hissing sounds: Inflate your mattress and listen for any hissing sounds which may indicate a leak.
– Use soap and water: Mix soap and water in a spray bottle and spray it on the mattress. If there’s a leak, bubbles will form where the hole is.

The Ultimate Guide to Finding and Fixing Holes in Your Air Mattress
Now that you’ve identified a hole, it’s time to fix it. Here is a step-by-step guide to help you:
1. Deflate the mattress completely
2. Locate the leak by running your hands over the mattress feeling for any air escaping
3. Once the hole is found, mark it with a pen or marker
4. Clean the area around the hole with rubbing alcohol to ensure the patch adheres to the surface
5. Use a patch kit or duct tape to cover the hole
6. Test the mattress by inflating it and listening for any leaks
7. If the leak is still there, repeat the process or try another method
It’s essential to use the right materials when patching your air mattress. Store-bought patch kits or duct tape are the best options for patching holes.
When it comes to finding leaks in different types of air mattresses, the process varies. For built-in pump air mattresses, check the pump for any obvious leaks. If the leak isn’t near the pump, follow the steps outlined above. For self-inflating air mattresses, inflate and deflate the mattress a few times to identify the location of the leak.
DIY Guide: How to Detect and Repair a Leak in Your Air Mattress
There are a few DIY methods you can use to detect and repair a leak in your air mattress:
– Listening for leaks: Inflate your mattress and listen for any air escaping.
– Disconnect the pump: If you’re using a pump, disconnect it and place your ear over the valve.
– Use flour or paper: Inflate the mattress and sprinkle flour or lay paper over the surface. Any escaping air will cause the flour or paper to move, indicating the location of the leak.
– Use a flashlight: Inflate the mattress and shine a flashlight over the surface. Any holes should be visible, allowing you to mark them.
– Use repair patches: Apply a repair patch over the hole, as already outlined above.
Sleep Soundly: Tips for Locating the Leak in Your Air Mattress
Identifying the location of the leak is crucial when repairing an air mattress. Here are a few tips to keep in mind:
– Use a flashlight: Shine a flashlight over the surface of the air mattress to identify the hole and mark it with a pen or marker.
– Place the mattress in water: Inflate your air mattress and place it in water. Bubbles will form where the hole is, indicating its location.
– Use compressed air cans: Use compressed air cans to inflate the mattress, and listen for any hissing sounds which may indicate a leak.
– Differentiate between small and large leaks: Small leaks can be repaired quickly, but bigger holes may require more time and effort to fix.
Don’t Sleep on It! How to Find and Fix a Hole in Your Air Mattress
Here are a few additional tips to keep in mind when finding and fixing holes in your air mattress:
– Check the valve: Ensure the valve is closed entirely.
– Use compressed air: Use a compressed air gun to inflate the mattress.
– Troubleshooting: If the leak cannot be found or fixed, it may be time to replace the mattress.
The Importance of Finding and Fixing Holes in Your Air Mattress
Sleeping on a deflated air mattress can be uncomfortable and lead to back pain. Leaky air mattresses are also hazardous to your health, as they can harbor mold growth and electrical hazards. Therefore, it’s essential to find and fix holes in your air mattress as soon as possible.
Mastering the Art of Patching an Air Mattress: Tips and Tricks
Patching an air mattress correctly is essential for a good night’s sleep. Here are a few tips and tricks to keep in mind:
– Use scissors to cut the patch material to the right size. This helps ensure that the patch fits appropriately.
– Apply adhesive to the patch and not the mattress.
– Different types of repair materials are available, including vinyl repair kits and duct tape, but store-bought patch kits usually provide the best results.
Conclusion
Do not let a hole in your air mattress ruin your night’s sleep or your back. Follow the tips and steps outlined above to find and fix any leaks in your air mattress. Remember to take care of your air mattress and regularly check it for any holes or leaks.


