Introduction
Oranges are one of the most beloved fruits around the world, with their sweet, tangy flavor and juicy texture. But did you know that you can also dry orange slices for both decorations and snacks? Dried orange slices have a longer shelf life compared to fresh ones, and can be used in a variety of ways. In this article, we’ll explore how to dry orange slices in detail, from the benefits of drying them to specific instructions for each step of the process. Get ready to add some zest to your life!
Step-by-Step Guide: How to Dry Orange Slices for Decorations and Snacks
The process of drying orange slices is relatively simple, but it does require some time and attention. Here are the basic steps:
- Preheat your oven to 200 degrees Fahrenheit, or turn on your dehydrator as per instructions.
- Cut your oranges into thin slices, about 1/4 inch thick.
- Remove any excess moisture from the orange slices with a paper towel.
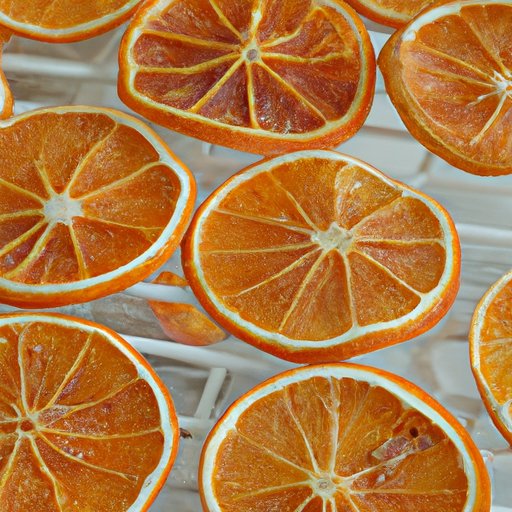
- Arrange the orange slices on a baking sheet lined with parchment paper, making sure they do not overlap each other.
- Place the baking sheet in the oven or dehydrator for 2-3 hours, checking every 30 minutes or so to prevent burning or over-drying.
- When the orange slices are dry and slightly crisp, remove them from the oven or dehydrator and let them cool completely.
- Store the dried orange slices in an airtight container until ready to use.
It’s important to note that drying times can vary depending on the thickness of your orange slices, the humidity and temperature of your environment, and the method you use. Keep that in mind and use your senses to check on the oranges as they dry.
Additionally, you can use a few different techniques to make your dried orange slices even more attractive and sophisticated. For example, you can sprinkle cinnamon or other spice mixes on the slices before drying them, or dip them in chocolate or sugar after they’ve cooled down. You can also experiment with different types of oranges to see which ones create the most appealing visuals or flavor profiles. The sky’s the limit!
Benefits of Dried Orange Slices and Tips to Get Them Right
In addition to their visual appeal, dried orange slices offer a number of other benefits that make them worth trying out. For one thing, they have a longer shelf life compared to fresh oranges, which means you can enjoy them over a longer period of time. They are also versatile: you can use them as garnishes for cocktails, decorations for gifts and centerpieces, or even as ingredients in your cooking or baking.
To get the best possible results when drying your orange slices, here are a few tips to keep in mind:
- Choose firm, fresh oranges that are at their peak ripeness level. Soft or overripe oranges will not yield the best results.
- Use a sharp knife to cut the slices as evenly as possible. This will ensure that they dry at a similar rate and create a consistent end result.
- Blot the orange slices dry before placing them in the oven or dehydrator to prevent excess moisture from slowing down the drying process.
- Avoid overcrowding the baking sheet when arranging the slices, as this can cause uneven drying and lead to suboptimal texture and color.
From Garden to Kitchen: A Simple Process to Dry Your Orange Slices
The journey from garden to kitchen when it comes to drying oranges is fairly straightforward, and doesn’t require much in terms of specialized equipment. Here’s how you can do it:
- Harvest your oranges when they are at their peak ripeness, and wash and dry them thoroughly before preparing them for drying.
- Cut off the ends of the oranges and slice them into rounds about 1/4 inch thick. Remove any seeds or excess pith, if necessary.
- Place the orange slices on a paper towel and pat them dry gently to remove any excess moisture.
- Arrange the slices on your baking sheet, making sure they do not overlap. If using a dehydrator, follow instructions for loading the trays.
- Place the sheets or trays in the oven or dehydrator and let them dry for 2-3 hours, checking on them regularly to ensure they don’t burn or over-dry.
- Once the orange slices are completely dry, let them cool down to room temperature before transferring them to an airtight container for storage.
When it comes to preserving the flavor and color of your oranges during the drying process, there are a few key things to keep in mind:
- Avoid using metal utensils or equipment, as these can cause the orange slices to brown or develop off flavors.
- Consider adding an acid like lemon juice to your oranges to improve their flavor and help to preserve their color, although this is optional and not necessary for every recipe or use.
- Store your dried orange slices in a dry, cool location that is not exposed to sunlight or dampness. This will help them maintain their texture, flavor, and appearance for longer.
Creative Ways to Use Dried Orange Slices in Your Culinary and Decorative Adventures
Dried orange slices are a versatile ingredient that can be used in all sorts of ways to add flavor, texture, and visual interest to your culinary and decorative pursuits. Here are just a few suggestions to get you started:
- Add dried orange slices to your favorite winter tea blends for a festive and flavorful twist.
- Use dried orange slices as a garnish for cocktails, or muddle them with herbs and simple syrup for a citrusy and aromatic mixer.
- Decorate your holiday gifts with dried orange slices by attaching them to ribbons or strings, or using them as tags or labels.
- Make delicious and visually appealing orange zest cookies using dried orange slices and only a few other ingredients.
- Combine dried orange slices with cloves and cinnamon sticks to create a natural, fragrant potpourri that can be used to scent your home.
Essential Tools and Techniques for Perfectly Drying Your Orange Slices at Home
If you decide to dive into the world of dried orange slices, you’ll need a few basic tools and supplies to create the best possible result. Here’s what you should have on hand:
- A sharp knife or mandoline slicer to cut the orange slices evenly and cleanly.
- A baking sheet lined with parchment paper, or a dehydrator with trays.
- A paper towel to remove excess moisture from the orange slices before drying them.
- Airtight containers for storing the dried orange slices.
Additionally, there are some other techniques you might find helpful when it comes to perfecting your orange-drying skills:
- Use the right kind of oranges for your needs. For example, thin-skinned navel oranges are often used for decorative purposes, while thicker-skinned Valencia oranges work well for snacking or cooking.
- Consider slicing your oranges horizontally instead of vertically (i.e. across the equator instead of from stem to end). This can create a more visually interesting result for some applications.
- If using the oven, you can prop the door open slightly with a wooden spoon or other utensil to help air circulate more easily and reduce the risk of burning.
Conclusion
Drying orange slices is an interesting and useful skill to have for anyone who enjoys cooking, crafting, or decorating. Whether you’re using them to add some pizzazz to your holiday table, or to jazz up your favorite baked goods, the variety and versatility of dried orange slices makes them a great ingredient to have on hand. By following the tips and techniques outlined above, you’ll be able to create perfectly dried orange slices in no time.


