Introduction:
If you have ever been fascinated by lizards and wanted to draw them, then this is the perfect article for you. This article is designed to help students, beginners, and hobbyists alike to learn how to draw lizards from scratch. From basic lizard anatomy to creating lizard characters, we’ll guide you through every step of the process. Whether you’re looking to add some diversity to your character designs or just want to practice your skills, this article has everything you need to get started on your journey towards mastering the art of drawing lizards.
A Step-by-Step Guide to Drawing a Lizard for Beginners:
Before drawing lizards, it’s important to have an understanding of basic lizard anatomy. Lizards come in a variety of shapes and sizes, but they all share certain distinguishing features. These include a long tail, two legs, and a triangular-shaped head with a mouth full of sharp teeth. Once you get a basic grasp of these features, you’ll be ready to dive into drawing.
To start drawing lizards, you will need basic materials, including paper, pencils, erasers, and rulers. You may also want to invest in a set of variously-sized pens and watercolors for later on.
First, we will go over how to draw a simple lizard. Start with the head, which should be a triangle pointing towards the ground, with a rounded tip for the nose. Next, add two small circles for the eyes on either side of the head, and a small semicircle for the ear. Draw a long, thin neck connecting the head to the body. The body should consist of three parts: the front legs, the torso, and the back legs. Draw two short, curved lines for the front legs, a rounded belly for the torso, and two longer, curved lines for the back legs. Finally, add a long, curved tail with pointed scales.
Mastering Lizard Anatomy: Tips and Tricks for Accurate Drawing:
After you have mastered the basics, it’s time to move on to more detailed lizard anatomy. Lizards have a lot of complex parts. So, be sure to study multiple references before trying to draw them from memory. The more you know about a lizard’s physical features, the more accurate and realistic your drawing will be.
As you become more experienced, you will start to notice common mistakes. The most common mistakes that beginners make tend to be with proportions. For example, drawing a lizard with a head that is too large or body that is too short. Remember to take your time and double-check your work throughout the drawing process. Make sure to use hatch lines to signify depth and shadow, and to create an illusion of texture.
From Sketch to Final Lines: How to Perfect Your Lizard Drawings:
Once you have a solid base sketch down, the next step is to refine your lines and details. It’s important to have a firm understanding of your subject matter before you start. Thumbnails are very important in establishing composition, lighting, and different angles for your sketch to capture the best features of your lizard.
Once you are content with your base sketch of the lizard, you should begin refining the lines and committing to your final draft. This is a process of addition and subtraction which will result in a more refined and polished drawing. Try to introduce the illusion of depth and the play between positive and negative space.
Using Colors and Textures to Bring Your Lizard Drawings to Life:
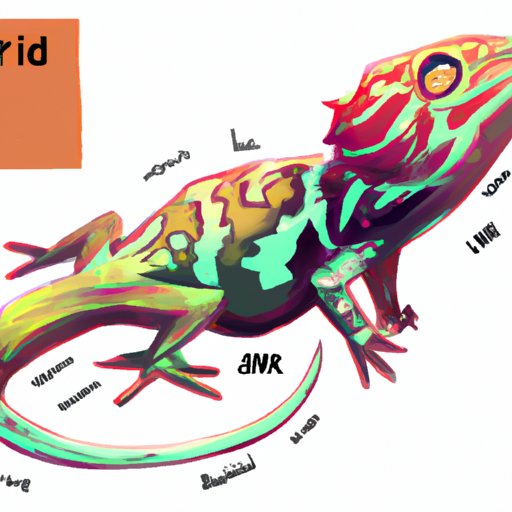
Lizards come in a vast range of natural color ranges, which if not applied well would throw off the realism of the drawing. Before getting paralyzed with options, it’s important to understand color theory. For instance, green colors imply safety and leafy camouflage, brown colors imply roughness and the earth, and more exciting colors like crimson signify intimidation and rebellion. You may want to add different textures to the layers of color, like stippling, dry brush, and pencil pressure for rocky or sandy textures.
Drawing Lizards with Different Attitudes: Exploring Expression and Emotion:
Once you have developed a sense of style and confident in your ability to draw lizards, It’s important to study how lizard behavior complements their body language. Since we are anthropomorphizing the lizards, we can introduce attributes like timidity, aggression, annoyance, and stoicism to enrich our lizard characters. Emotions can be conveyed in various ways, from the curvature of the lizard’s brows, to the set of their jaw, or how they hold their body. Trying to avoid getting too caught up in the details, remember that less is more, and minimalism is the key to stronger and more nuanced expressions.
Creating Lizard Characters: Drawing Inspiration from Real-Life Reptiles:
To take inspiration for creating unique and diverse lizard characters, you need to study different species of lizards and the environments they live in. Pay close attention to patterns, color schemes and textures of lizards. Using their unique physical feature, add to the lizard’s characteristics, to give them a distinct personality. This can prove to be an excellent project for character design, to practice creative writing and character development.
Conclusion:
In conclusion, drawing lizards is a great way to bring a new set of diverse characters in your artwork. Mastering lizard anatomy, understanding their behavior and body language, and creatively applying colors and textures will transform your lizards from basic drawing to lifelike and dynamic representation. With the help of the guidelines discussed in this article, you will be on your way to drawing your unique and expressive lizard characters. Don’t forget the most important thing, keep practicing, and have fun.
Additional resources for lizard drawing tutorials and inspiration can be found online on websites like Artstation, and DeviantArt.


