Introduction
Drawing teeth can be intimidating, but it doesn’t have to be! As an important feature of any portrait or character design, teeth can make or break the overall image. Having a solid understanding of tooth anatomy and shading techniques is key to creating a realistic and accurate drawing. In this article, we will focus on how to draw teeth, step-by-step instructions, shading and highlighting techniques, different styles, various perspectives, common mistakes, and inspiration.
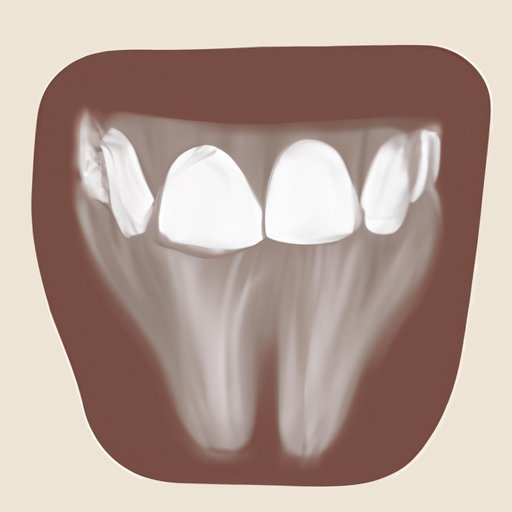
Focus on the Anatomy of Teeth
Before diving into drawing teeth, let’s discuss the structure of a tooth. A tooth has three layers: the enamel, the dentin, and the pulp. The enamel is the hard and shiny outer layer that covers the tooth. The dentin is the second layer and is softer than the enamel. And finally, the pulp is the innermost layer and contains the blood vessels and nerves.
When approaching a tooth drawing, it’s essential to analyze the shape, size, and position of each tooth. Pay attention to the height, length, and width of each tooth, as well as the overall arch of the teeth. For realistic drawings, strive to create symmetry between the top and bottom teeth.
When drawing a tooth, it’s essential to indicate the texture and details with techniques such as cross-hatching, stippling, or using a series of short lines. Use light lines to map out the overall shape and add darker lines to show the contours.
Step-by-Step Instruction
Here’s a step-by-step tutorial on how to draw teeth.
Step 1: Start by drawing the gum line. Use a light touch to determine where the top and bottom teeth will go.
Step 2: Map out the teeth’ shape by drawing the outlines of each tooth. Be mindful of the teeth’ size and shape, ensuring they look proportional.
Step 3: Draw the details of the teeth by using a series of short, vertical lines to indicate texture. Use darker lines to emphasize the ridges of the teeth.
Step 4: Draw the shadows and highlights of the teeth. Observe how the light source hits the teeth, creating shadows on one side and highlights on the other side.
Techniques for Shading and Highlighting
When it comes to shading, use a variety of pencils to create depth and contrast. HB and 2B pencils work well for lighter shadows, while 6B and 8B pencils are more suitable for darker shadows.
To create realistic highlights, use a white pen or marker. Alternatively, you can use an eraser to remove the graphite to show the white of the paper. This technique works best on teeth that are in the light source’s direct pathway.
When blending, use a blending tool such as a blending stump or cotton swab to create a seamless transition between the shadows, mid-tones, and highlights.
Discuss Different Styles for Drawing Teeth
There are various styles for drawing teeth, from realistic to caricature-style teeth. Realistic teeth are ideal for portraits, whereas caricature-style teeth suit cartoon characters. When drawing realistic teeth, take reference photos or study the teeth of real people. When drawing caricature-style teeth, feel free to exaggerate and add personality by manipulating the size, shape, and position.
Show Teeth in Different Perspectives
Drawing teeth in different perspectives can be challenging. Remember to use perspective lines to show the depth and height of each tooth. Keep in mind that teeth closer to the viewer will appear larger than those that are further away. Observe the angle of the light source and adjust the shadows and highlights accordingly.
Discuss Common Mistakes and How to Avoid Them
It’s common for beginners to make mistakes when drawing teeth, so here are some tips to help you avoid them. One of the significant mistakes people make is failing to recognize the shape and size of each tooth. It’s important to observe the unique shape of each tooth in the mouth and not to make them all the same size.
Another mistake is drawing teeth that are too white. Teeth are not pure white but have yellowish or grayish tones. Observe the lighting and shadows when choosing the colors to use.
Offer Inspiration from Different Artists
Looking at other artists’ artwork is a great way to get inspired and learn new techniques. Study the artwork of different artists to see how they utilize shading, create texture, and position teeth in different perspectives.
Conclusion
Drawing teeth can be fun and exciting, especially when you have the necessary skills to create realistic and accurate teeth. Remember to analyze the tooth’s shape and size, pay attention to the shadows, and use various shading techniques to add depth and dimension. Practice and experiment with different styles and perspectives to enhance your artwork.


