Introduction
Are you a beginner artist looking for a new and exciting challenge? Have you ever considered drawing mushrooms? Mushrooms are not only fascinating creatures to study, but also a beautiful and versatile subject for drawing. In this article, we will provide you with a beginner’s guide to drawing mushrooms step-by-step. Whether you’re looking to add a new skill to your artistic toolbox or simply want to draw something fun, read on to learn more.
A Beginner’s Guide to Drawing Mushrooms
Before we start drawing different types of mushrooms, let’s first go through some general tips and techniques to make sure your drawings look realistic and detailed.
Pay attention to shape
Mushrooms come in all shapes and sizes, so it’s important to observe carefully and identify the basic forms of the mushrooms you want to draw. Most mushrooms have a cap, a stem, and gills underneath the cap where spores are produced. Other parts of a mushroom may include a veil or ring, which are thin and delicate structures that can add visual interest to your drawings.
Texture is key
After you’ve identified the basic shapes of a mushroom, it’s time to focus on texture. Mushrooms come in a variety of textures and can change depending on their stage of growth. Some mushroom caps are smooth, while others may be rough or covered in bumps or warts. Some stems are slender and straight, while others are thicker and bulbous at the base. Be sure to look for these distinctive elements and incorporate them into your drawings.
Think about color
Finally, consider the colors of the mushroom you want to draw. Some mushrooms are brightly colored, while others are more subdued. You can choose to use a realistic color scheme or experiment with unusual colors to create a more imaginative and expressive style.
Step-by-Step Instructions for Drawing Various Types of Mushrooms
Now that you have some basic tips in mind, let’s dive into step-by-step instructions for drawing some common types of mushrooms.
Button Mushroom
- Start by drawing a circle for the cap shape.
- Draw a stem underneath the cap by drawing a straight line down from the center of the circle.
- Add some texture to the cap by drawing small lines pointing towards the center.
- Add shading to create dimension by darkening the area closest to the stem.
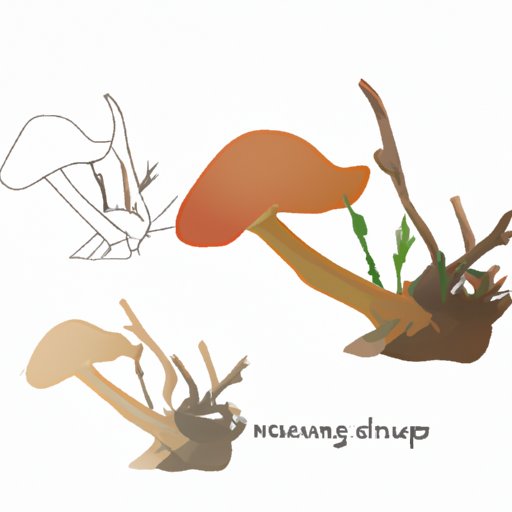
Maitake Mushroom
- Draw a large, clustered shape for the head of the maitake mushroom. This doesn’t need to be perfect – in fact, the irregularity of the shape can add visual interest.
- Draw the stems and branches coming off the head. Use a series of thin and thick lines to create different widths, and follow the natural curve of the mushroom.
- Begin to add color and texture to the stems and branches by adding small bumps and lines.
- Create depth and dimension by adding shading in areas where stems overlap or are in shadow.
Fly Agaric Mushroom
- Begin with a circle for the cap, with a small stem at the bottom.
- Draw the distinctive cap pattern of a fly agaric by creating a series of half-circles around the perimeter of the cap.
- Add spots or white speckles to the cap, and draw the stem with lines that curve outward at the bottom.
- Finally, add shading to create depth and dimension, particularly around the stem and the curved areas of the cap pattern.
Get Creative with Your Mushroom Drawings
Drawing realistic mushrooms is a great skill to have, but don’t be afraid to experiment and add your own unique style to your drawings. Here are some ways to do just that:
Try Unusual Materials
Use different tools and materials to create interesting textures and patterns. Use a toothbrush to spray paint for a natural splatter effect or find some real mushrooms to create a spore print by placing them on a piece of paper, covering them with a bowl, and leaving them overnight.
Emphasize Whimsical Aspects
Give your mushroom drawings a playful, cheerful vibe by exaggerating some of their features. Draw extra fuzzy stems or outlandishly colored caps to add visual interest.
Combine with Other Drawing Styles
Explore combining mushrooms with other styles. Integrate mushrooms into cute, kawaii-style drawings or combine them with bold, graphic elements for a more modern look.
Mushroom Drawing Challenge
To test and hone your mushroom drawing skills, why not take on a challenge? Whether it’s drawing a new type of mushroom every day or entering a competition, challenges can push you to be more creative and grow your skills.
Helpful Resources
If you’re looking to take your mushroom drawing skills even further, there are plenty of resources to help. Check out online tutorials, workshops, or local art classes to improve your skills.
The Importance of Shading in Mushroom Drawing
One of the most effective ways to make your mushroom drawings look more realistic and three-dimensional is to add shading. Here’s how to do it:
Start Light
Start by drawing your mushroom in pencil, using light lines to create the basic shapes and details. Once you have your foundation, begin to add shadows and shading, darkening the areas that are furthest from the light source and creating a gradual gradient of shade and light.
Balance Light and Dark
When shading mushrooms, try to balance light and dark tones for a more nuanced and lifelike look. Too much dark shading can create an overly dramatic or unrealistic effect, while too little shading can make the mushroom look flat and two-dimensional.
Drawing Mushrooms in Nature
Another way to get inspired and improve your mushroom drawing skills is to draw them outside in their natural habitat. Here are some tips for doing so:
Find the Right Spot
Choose a quiet and peaceful spot in nature where you can find plenty of different types of mushrooms in different stages of growth.
Bring the Right Tools
Bring all the necessary tools to draw outside, including a sketchbook and pencils or pens. You may also want to bring a light source, such as a lamp or flashlight, to shed light on your subject.
From Sketchbook to Canvas
Finally, once you’ve mastered the art of mushroom drawing, you may want to take it to the next level by turning your sketches into more finished work. Here are some ideas:
Transfer onto Canvas
Transfer your sketch onto canvas or paper and use paint or other materials to add color and depth.
Experiment with Mediums
Experiment with different mediums such as ink or watercolor to create unique and beautiful pieces of art.
Get Creative with Collage
Use your mushroom drawings to create an original collage by cutting up your sketches and arranging them in a creative way.
Conclusion
Drawing mushrooms is not only a fun and creative way to hone your artistic skills but a great way to connect with nature. With the right techniques and tools, anyone can learn how to create beautiful and realistic mushroom illustrations.


