Introduction
Drawing a realistic mouth can be a challenging but rewarding experience for beginners and experienced artists alike. A well-drawn mouth can add depth, realism, and emotion to your artwork. However, it’s also one of the most difficult features to get right. In this article, we’ll explore in-depth how to draw a realistic mouth, including tips and tricks for mastering the art, the anatomy of the mouth, common mistakes to avoid, and more.
Step-by-Step Guide: A Beginner’s Guide to Drawing the Mouth
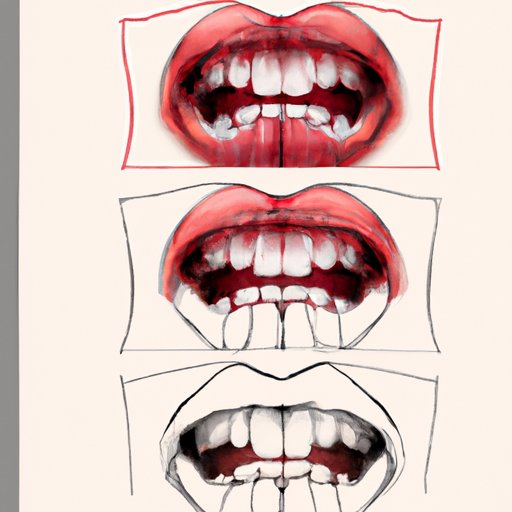
Before you dive into drawing the intricate details of a mouth, it’s important to break it down into basic shapes. The mouth can be broken down into two main shapes: the upper lip and the lower lip. To begin, draw a straight line to mark the center of the mouth where the two lips meet. Then, draw a curved line for the upper lip and a U-shaped line for the lower lip.
Once you have the basic shapes, it’s time to add more detail. Start by adding shadows and highlights to give depth to the lips. Pay attention to the position of the light source to create realistic shadows and highlights. Add more detail by drawing the shape of the teeth and the tongue behind the lips. Finally, add some texture to the lips by adding small lines to represent wrinkles, creases, and contours.
Tips and Tricks: Mastering the Art of Drawing the Mouth
Observing real-life references or models can greatly improve your skills in drawing a realistic mouth. Study the shape and texture of teeth, gums, and lips to get an idea of how they look in real life.
When drawing teeth, focus on the shape and position of each tooth. Remember that not all teeth are the same size or shape. Add shadows around the base of each tooth to give them depth. To create the illusion of translucence, add highlights to the tips of each tooth.
For the tongue, draw its shape and position behind the teeth. Use shades of pink to represent the muscles. Add some lines to represent its texture, and small bumps to represent the taste buds.
To create a 3D effect in the mouth, pay attention to the positioning of the teeth and tongue behind the lips. Create a sense of depth by adding highlights and shadows around the edges of both lips.
Anatomy of the Mouth: Understanding Different Parts of the Mouth for Better Drawing
To improve your mouth-drawing skills, it’s important to have a basic understanding of the different parts of the mouth. The teeth are responsible for cutting and chewing food. The tongue helps to taste, swallow, and speak. The lips are responsible for forming speech sounds, and are also important for kissing and expressing emotions. The gums help to anchor the teeth in place.
When drawing the teeth, it’s important to understand their shape and function. There are four different types of teeth: incisors, canines, premolars, and molars. Each tooth has a specific shape and function, which should be accurately depicted in your artwork.
The tongue is another important part of the mouth to understand. It’s responsible for taste, touch, and temperature detection. It’s also essential for swallowing and speech. When drawing the tongue, pay attention to its position behind the teeth, its shape, and its texture.
The lips are an important feature for expressing emotions. Pay attention to their shape, size, and texture. Draw them to match the expression of the face, whether it’s a smile, frown, or neutral expression.
Practice Makes Perfect: How to Practice Drawing Mouth Over and Over Again
To improve your mouth-drawing skills, practice is essential. Dedicate some time each day to practicing drawing different mouths. Start with basic shapes and work your way up to more intricate details.
To improve your shading and highlighting skills, try drawing different mouth positions under different light sources. This will help you understand how light and shadow affect the appearance of the mouth.
Remember, practice isn’t about creating perfect artwork every time. It’s about improving your skills and developing your own unique drawing style.
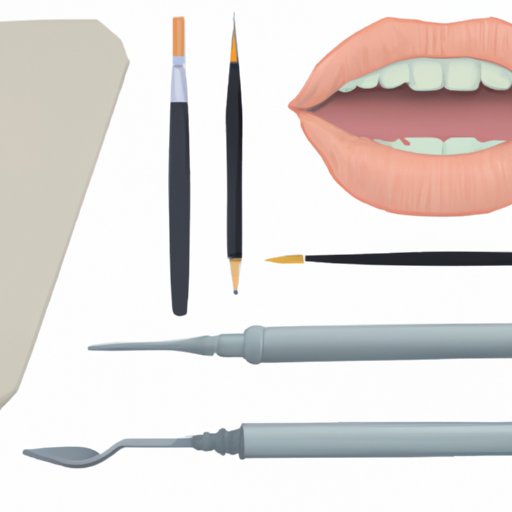
Materials and Tools: The Essential Tools Needed to Draw a Realistic Mouth
To draw a realistic mouth, you’ll need a few essential tools. These include pencils, erasers, paper, and a blending tool. Use a range of pencil grades to create different shades and tones.
When selecting paper, choose one that’s suitable for drawing. You can also use sketchbooks or drawing pads if you prefer. Experiment with different types of paper to find one that suits your style.
A blending tool can be used to create smooth transitions between shades and tones. This can be a blending stump, tortillon, or a cotton swab.
Common Mistakes: What to Avoid When Drawing a Mouth and How to Fix Them
Common mistakes beginners make when drawing a mouth include not paying attention to the shape and position of the teeth, lips, and tongue; using too much or too little shading; and not practicing enough.
To avoid these mistakes, pay close attention to real-life references and models. Practice drawing mouths under different lighting conditions to improve your shading and highlighting skills. Finally, don’t be afraid to make mistakes. Learn from them and use them to improve your skills.
Style and Expression: Drawing the Mouth in Different Styles and Expressing Emotions
The mouth can be drawn in different styles, including cartoon, hyper-realism, and abstract art. To create a specific style of mouth, pay attention to the shape, texture, and position of the mouth. Experiment with different shading techniques to create a unique style.
The mouth is also an important feature for expressing emotion. A smile can represent happiness, while a frown can represent sadness. Pay attention to the different shapes of the lips and the position of the teeth to accurately depict each emotion.
Conclusion
A realistic mouth can add depth, realism, and emotion to your artwork. By following these tips, tricks, and techniques, you can improve your skills in drawing the mouth. Remember to practice regularly, observe real-life references, and don’t be afraid to make mistakes. With time and dedication, you can master the art of drawing a realistic mouth.


