I. Introduction
Drawing grass can be a challenge for many artists. The intricacies of drawing individual blades can be overwhelming. However, learning how to draw grass is essential for creating realistic landscapes. In this article, we will provide a comprehensive guide on drawing realistic grass, including tips for creating movement and depth. By the end of this tutorial, you’ll be able to create stunning grass drawings that look like they’re blowing in the wind.
II. Step-by-step guide on drawing realistic grass
Before we dive into the steps for drawing realistic grass, let’s first gather the necessary materials for the tutorial. You’ll need a drawing pad, pencils of varying hardness, an eraser, and any shading tools you prefer.
The first step in drawing grass is to sketch the basic outline. Start by drawing a horizon line and lightly sketching in the area where you want to draw the grass. Then, sketch the basic shape of the grass, creating a general outline of the blades.
Next, it’s time to add details and texture. Start adding individual blades of grass using different pencil hardness to create depth. Vary the angles of the blades to create a more natural look. Use an eraser to add highlights and create contrast.
Finally, add the final touches to make your grass look even more realistic. Use shading tools to create shadows and highlights. Add a few blades scattered on top of the rest to create a more natural look.
III. 5 tips for drawing grass that looks like it’s waving in the wind
To create the illusion of movement, start by understanding the direction and motion of grass. Notice how the blades sway in the wind and follow the movement.
When drawing blades of grass, vary the angles to simulate movement. Drawing blades at different angles will create a more dynamic effect. Use short, quick strokes to create a wind-swept look.
Emphasize the direction of the wind by drawing the blades in the direction of the wind. Add shadows and highlights to create depth and make the drawing more realistic.
Practice accuracy to create a dynamic effect. Focus on the details of the individual blades of grass to create a more realistic effect.
IV. How to add depth and dimension to your grass drawings
One of the most important things to consider when drawing grass is shading. Shading helps create depth and dimension in your drawing.
When choosing the right shades of green, consider the lighting conditions you want to create. Use a darker shade for areas that will have shadows, and lighter shades for areas with more light.
Use shadows and highlights to create a more realistic effect. Pay attention to where the light is coming from and create shadows accordingly. Add highlights where the sun would be shining on the grass.
Creating contrast is also important for a dramatic effect. Use lighter shades of green for areas that are receiving more light, and darker shades of green for areas with less light.
V. The importance of shading when drawing grass
Shading is an essential element when drawing grass. There are different shading methods that you can use, including crosshatching, stippling, and blending.
When filling in individual blades of grass, use a technique called “feathering.” This technique involves using light strokes to create a soft, blended effect.
Shadowing techniques can be used to create contrast and depth. Use the same pencil hardness for the shadows as you did for the blades of grass, and add shadows in the areas that would naturally be receiving less light.
Shading adds dimension to your drawing, creating a more realistic effect. By paying attention to where the light is coming from, you can create shadows and highlights that give your grass drawing depth.
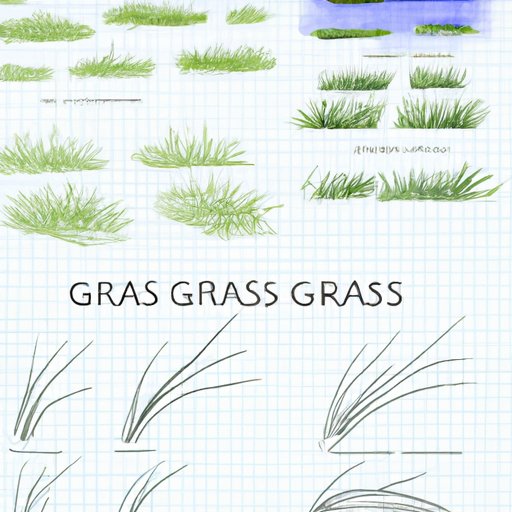
VI. Drawing grass up close: capturing texture and detail
When drawing grass up close, it’s essential to pay attention to the details. Capture the unique texture and direction of the individual blades to create a more realistic effect.
Rendering individual grass blades can be time-consuming, but it’s worth the effort. Use different pencil hardness to create depth and pay attention to the direction of each blade.
Map out the direction of the grass before you start drawing. This will help you create a more natural look and make your drawing more realistic.
Texture techniques can be used to add even more realism to your drawing. Try using a toothbrush or other textured tools to create a more natural look.
VII. Creating a landscape: drawing different types of grass
Different types of grass can be found in landscapes, and understanding the differences between them can help you create more realistic drawings.
For example, long grass has a different texture and direction than short grass. Paying attention to these details can help you create a more natural look.
When drawing different types of grass, capture the unique details of each type. Use different shades of green to create depth and texture.
VIII. Mixing media: using colored pencils and markers to draw grass
Using different media, such as colored pencils and markers, can help you create even more depth and dimension in your grass drawings.
Using colored pencils can add layers of color, creating a more textured and layered look. Marker pens can be used to create strong, bold lines that stand out against the other elements in the drawing.
Layering colors can create a more complex and nuanced look. Start by sketching the basic outline in pencil, then layer on different shades of green using colored pencils. Finally, use markers to add bold lines and create contrast.
IX. Conclusion
Drawing grass can be a daunting task, but with the right techniques, anyone can create stunning and dynamic grass drawings. Remember to pay attention to the details and use shading to create depth and dimension.
By using our comprehensive guide to draw realistic grass, you’ll be able to create visually striking landscapes that are sure to impress. With practice, you’ll become more comfortable with the techniques and be able to create even more stunning drawings.


