Introduction
Drawing fur can be a challenging task for many artists. However, with the right set of tips and techniques, anyone can learn how to master drawing realistic fur. In this article, we will cover various approaches to draw realistic fur, from the right tools to use to creating highlights and textures that bring the fur to life.
Techniques for Drawing Fur
When it comes to drawing fur that looks realistic, there are specific techniques that artists can use to achieve the desired effect. Here are five key tips that artists should keep in mind for drawing realistic fur:
Tip 1: Use Short Strokes
One of the most critical tips for drawing fur is to use short strokes. Using shorter lines instead of long strokes is much more effective in creating fur-like textures. By using short, overlapping lines, artists can achieve the look and feel of fur without having to worry about the lines appearing too harsh.
Tip 2: Vary Your Shading
Another crucial tip for drawing fur is to vary your shading. Fur is a three-dimensional entity with texture and depth. Integrating different shading patterns into your drawing helps achieve that level of texture and depth. You can use a variety of techniques, such as hatch marks or cross-hatching, to creating believable shading patterns.
Tip 3: Create Multiple Layers
Fur has individual strands or hair, and creating multiple layers provides depth to your drawing. Multiple layers help integrate the fur and make it look denser and more realistic. You can use light strokes, building up multiple layers to create a sense of thickness and volume.
Tip 4: Observe Real-Life Fur
It’s important to study real-life examples when you’re drawing fur. This will give you a better understanding of the texture and patterns present in fur and how to capture them. By studying the fur of animals, you can see how different light can reflect in the strands of fur, creating real depth and texture.
Tip 5: Maintain Consistency
Maintaining consistency is essential. You should make sure your strokes are consistent throughout your drawing, even as you switch between different positions and angles. This is important in creating a sense of symmetry to the fur and avoiding clumps or overemphasis on certain areas.
Step-by-Step Guide for Drawing a Fur Texture
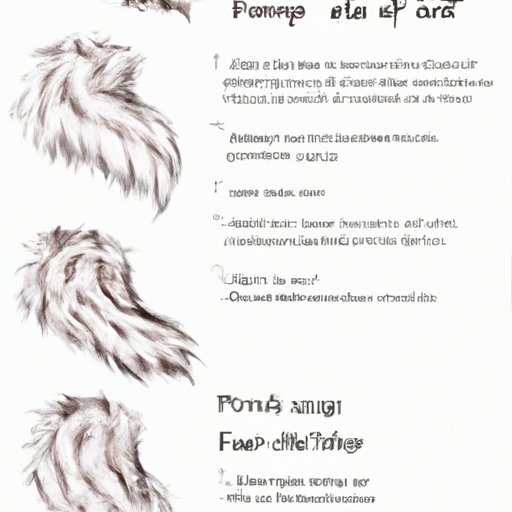
To achieve a realistic texture, you should consider following a step-by-step process for drawing fur. Here is a simple guide that can help you draw a fur texture:
Step 1: Draw Your Base Sketch
Start with a base sketch by lightly drawing the shape of the object you’re trying to illustrate. You can use a mechanical pencil or any other light-drawing instrument.
Step 2: Create the Fur Texture
Now, create the fur texture by sketching out the fur in the direction of growth of the hair. Use light, short strokes that overlap one another to create density.
Step 3: Add Layers
After you’ve created the initial fur texture, add layers to give the fur depth and volume. Using softer licks, you can build up layers of softness and texture.
Step 4: Create Shadows and Highlights
Next, build up the shadows and highlights. Use the reference image to see where these occur naturally within the fur and use hatch marks, or cross hatching to create shading.
Tools Required for Drawing Fur
Here are some of the essential tools you will need when drawing fur:
Pencils
Pencils are essential tools when drawing fur. It’s best to use pencils that are softer, such as 2B, 4B, or 6B, and commonly referred to as sketching pencils.
Paper
When drawing fur, be sure to use textured papers to get the most out of the medium. Textured paper offers a surface that grabs the graphite and allows for better shading.
Erasers
Finally, having an eraser handy is important in correcting mistakes. A soft eraser helps take out the lines that you don’t want quickly.
Bringing Fur to Life
When drawing fur, bringing it to life means creating depth and texture that exists within real fur. Here are some tips to help you bring fur to life:
Define Highlights and Shadows
Define the highlights and shadows upfront as this will give you some context to work from. Use your shading techniques to define the direction of the light source, and implement them consistently across your drawing.
Adjust Pencil Pressure
To create texture and depth, adjust the pressure on the pencil. This technique creates softer, darker lines that help bring the fur to life and create more contrast within your drawing.
Exploring Color Palettes in Fur Depictions
When it comes to the colors of fur, there is a wide range that you can use. Consider using a gradient approach to incorporate color in your drawing. Dark colors at the base of the fur, followed by some lighter ones in the middle, and finish off with some light colors at the fur’s peak.
Conclusion
Drawing realistic fur requires a combination of techniques, tips, and tools. By using short, overlapping lines, varying your shading, and creating multiple layers, you can achieve a realistic texture. Ensure you maintain consistency and observe real-life fur, and pay attention to the materials and tools you use. Try to incorporate shadows and highlights, adjust pencil pressure, and experiment with color palettes to create an overall vivid, realistic look.


