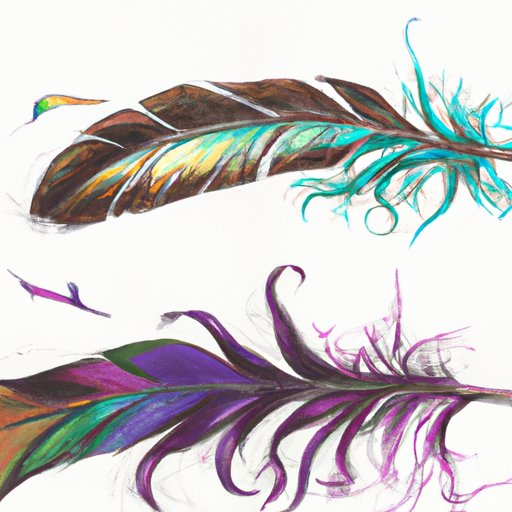
The Art of Drawing Feathers: Tips and Techniques
Feathers are a popular subject in the world of art. Whether you’re creating a nature-inspired piece, designing an intricate costume, or simply adding texture to a portrait, mastering the art of drawing feathers can add a unique and eye-catching element to your work. In this article, we’ll explore the various techniques and tips for drawing feathers, suitable for artists of all levels.
A step-by-step guide on drawing feathers
Before we begin, you’ll need a few tools: a sketchpad, pencils with different lead grades, a kneaded eraser, a small liner brush, and a ruler. Now, let’s get started.
- Step 1: Start by sketching the quill. This will form the central part of the feather. Use light strokes to create the basic form.
- Step 2: Add the rachis, which is the stem that supports the feather. Draw two parallel lines on either side of the quill. Use a ruler to keep them straight, and make sure the rachis is the same length as the quill.
- Step 3: Sketch the vane. This is the part of the feather that gives it shape. Draw a rough outline of the vane, keeping in mind the overall shape and size of your feather.
- Step 4: Add barbs to the vane. Barbs are the smaller extensions that give the feather its characteristic texture. Draw lines that start from the rachis and extend outwards in a fan-like pattern.
- Step 5: Detail the barbs. Draw smaller extensions called barbules on either side of the barbs. These will give the feather a more realistic look.
- Step 6: Shade the feather to give it depth and texture. Use a light touch to create a sense of subtle shading, and focus on making your shading consistent with the direction of the feathers.
The different types of feathers and how to depict them in art
Nature provides us with a variety of feather types, each with its unique characteristics and texture. Being able to recreate the different feather types, whether it is the sleek and smooth texture of a swan’s feather to the fluffy and soft appearance of an owl’s feather in your artwork would add to the beauty of your masterpiece. Let’s explore some ways to depict each type of feather and tips to achieve their look.
- Contour Feathers: These are the most common type of feathers found on birds. They are lightweight, flexible, and enable birds to fly. To achieve the look of contour feathers, start with the feather’s central rachis and add the barbs and barbules. Shade the individual barbs to create a sense of depth and texture.
- Down Feathers: These are the soft, fluffy feathers often found underneath a bird’s contour feathers, helping to insulate and keep the bird warm. To depict down feathers, use lots of short, feathery strokes to create a soft, cushiony effect. Use different pencil grades to create lighter or darker shading to bring out the texture.
- Bristle Feathers: These are specialized feathers found around a bird’s eyes or beak. They are short and stiff, and their primary function is to provide sensory feedback. To create bristle feathers like this, use shorter strokes and firm pressure when arranging the barbs. Add fine details such as small curved tips or bulb-shaped bases to bring out their unique texture.
- Flight Feathers: These are the larger feathers that allow birds to fly, located on their wings and tails. To create flight feathers, begin with a wider base and add a tapered tip. Draw individual barbs and barbules to create a feather-like texture. Use a variety of shading techniques to show depth, shadows, and highlights.
Tips and tricks on using shading to create feather textures
Shading is a crucial technique when it comes to drawing feathers. Proper shading can help you create the appearance of depth, texture, and contrast. There are various ways to shade feathers, but these three techniques are a great place to start:
- 1. Cross-hatching: This is a technique in which you draw intersecting lines to create shading. Start with light lines, and as you build up your shading, use less space between the lines and make them darker and closer together. This will create a solid and textured appearance to the feathers.
- 2. Stippling: Stippling is a technique where you use dots to create shading. By using more or fewer dots, you can create light and dark areas that will give your feathers a realistic textured effect.
- 3. Blending: Blending is a technique that involves using a blending tool or your finger to smudge the graphite or color pigments on the paper. This helps you create a smooth and soft texture that naturally blends and fades the shading of the different feathers together.
A beginner’s guide to drawing feathers
If you are a beginner, don’t worry. You can follow these simple steps to start creating beautiful feathers quickly and with ease:
- Draw a straight line for the quill and a curved line below it representing the vanes.
- Add barbs coming protruding out of the vanes. Start drawing long strokes with flicked ends to represent their shape.
- Make the barbs shorter with each row as you move outwards
- Use a pencil to darken the central line of each barb in a central direction to represent veins.
- Add texture by using light strokes to draw small lines on the surface of each barb.
- Choose light shading to cover the feather’s base, moving more into the center of the feather and each barb. This shading should always follow the direction of the feathers.
Design inspiration: A showcase of feather art from different cultures and art styles
Feathers have held cultural and spiritual significance for many cultures across the world for centuries, and we can see their artistic influence in various forms of art. Feathers have consistently played a part in modern and contemporary art, too—take inspiration from the following art styles and mediums:
- Indigenous Art: Across different cultures, feathers have held significant meaning. Indigenous art incorporates the symbolism of feathers into their artwork as a gesture of respect for our natural world. Their artworks showcase elaborate and intricate designs, with most having some significant cultural or spiritual importance behind them.
- Photorealism: Photorealism is the practice of creating a painting or drawing that is indistinguishable from a photograph. Feathers are a popular subject in photorealistic pieces due to their detail, texture, and the light interacting with them. The outcome emphasizes both the similarity and the contrasts between art and photography.
- Watercolor: Watercolor art requires delicate and controlled touches and is perfect for creating bright and playful feather art pieces. It is popular amongst beginners and advanced artists alike, and used correctly, it can create impressive and innovative pieces.
How to draw feathers in different mediums
While we’ve focused on graphite pencils, artists can draw feathers using various mediums. Here are the tips to achieve feathers in various mediums:
- Coloured Pencils: With colored pencils, layer the colors gradually to achieve a gradient look, creating light shades coming then into darker shades represents contrast and texture in the feather.
- Watercolor: With watercolor, start with lighter colors and gradually add in stronger hues. Make use of wet-on-wet blending to create an excellent fusion effect that emphasises the feathers’ various textures.
- Charcoal: With charcoal, you will get a more dramatic result with the shading and textures. Thus, adding white charcoal can highlight the feather’s texture, and by shading lightly over the raised texture, you will have a more realistic outcome.
Conclusion
Drawing feathers is a beautiful and intricate art form that requires patience and dedication, but the final result is worth it. With the tips, techniques, and approaches outlined in this article, you’re now set to add feather-drawing to your artistic portfolio. Never be afraid to experiment, improvise, and let your creativity shine through.


