Introduction
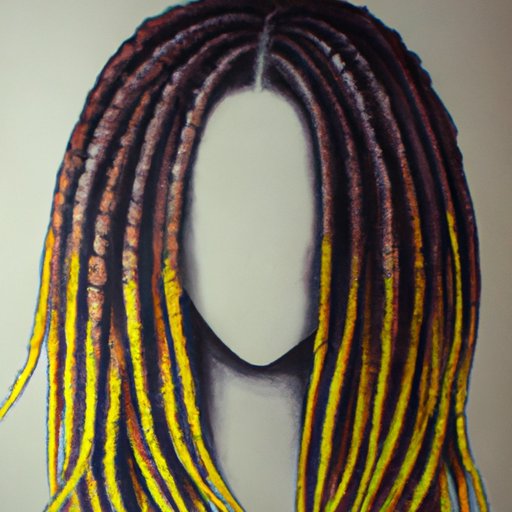
For centuries, dreadlocks have been a symbol of cultural identity and self-expression. As an artist, you may want to capture the texture, movement, and personality of this unique hairstyle in your drawings. This comprehensive guide will teach you how to draw realistic dreads, as well as provide tips and tricks for stylizing your artwork and avoiding common mistakes. Whether you’re a beginner or an experienced artist, you can use these techniques to bring your dreadlock drawings to life.

7 Easy Steps to Drawing Realistic Dreads
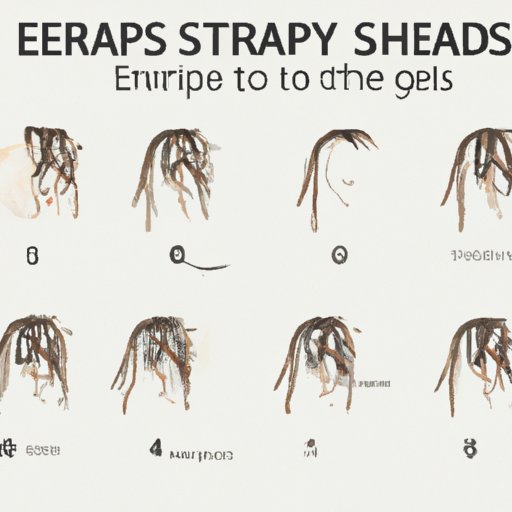
Drawing dreads may seem intimidating at first, but with these seven easy steps, you can create a realistic and engaging hairstyle in no time.
Step 1: Make a rough sketch
Before you start adding details, it’s important to sketch out the basic shape of your dreadlocks. Use light lines to create a rough outline of the hair and the head it’s attached to. This stage is all about blocking in the overall shape, so don’t worry about making everything perfect just yet.
Step 2: Define your dread’s shape and size
Once you have your rough sketch, it’s time to add some definition. Draw the distinct shape and size of each dreadlock, paying attention to the direction it’s flowing and any twists or turns it may have. Depending on the style you’re going for, the dreads may be thin or thick, long or short, so use your references as a guide.
Step 3: Draw the individual strands
Now it’s time to add some texture to your dreads. Using small, wavy lines, draw the individual strands of hair that make up each dreadlock. These lines don’t have to be perfectly straight or uniform – in fact, some variation can add to the naturalistic feel of the drawing. Keep in mind the direction of the hair as you draw the strands, and try not to make them too thick or too thin.
Step 4: Add texture to the dreadlocks
To make your dreads look even more realistic, you need to add some texture to the base. Using short, curved lines, add some bumpy texture at the base of each dread. You can control the amount of texture based on how smooth or rough you want your dreads to look.
Step 5: Create highlights and shadows for depth
Now it’s time to add some dimension to your dreads. Using a 2B or 3B pencil, add some highlights and shadows to each dread. This will help give them a sense of depth and roundness. Make sure to draw the highlights and shadows in the right places – for example, the highlights should be on the parts of the dreads that are catching the light, and the shadows should be in the areas that are hidden or in shadow.
Step 6: Refine your drawing
Once you have all the basic elements of your dreadlocks roughed in, it’s time to refine the drawing. Clean up any lines that are too messy, add additional texture and definition as needed, and make any other necessary adjustments. This stage is all about fine-tuning your drawing and making sure everything looks the way you want it to.
Step 7: Add finishing touches
Finally, it’s time to add any finishing touches that will really make your dreadlocks pop. You can add some shine to the hair by drawing a few small, light lines along each dread, or add a few unique accessories such as beads or braids.
Tips and Tricks for Drawing Dreads that Pop
Now that you know the basics of drawing dreads, here are some tips and tricks to take your artwork to the next level.
Pay attention to lighting and shadow placement
When drawing dreads, lighting and shadow placement can make a big difference in how realistic they look. Consider the light source and how it would affect the appearance of the hair. Shadows can add depth and dimension, while highlights can create a sense of shine and texture.
Use color to create contrast and interest
Dreadlocks come in many different colors and shades, so don’t be afraid to experiment with color in your artwork. You can use different shades of brown or blonde to create subtle contrast and interest, or go bold with bright colors such as purple or blue.
Consider the thickness, length, and curliness of the dreads
When drawing dreads, keep in mind the different characteristics that can affect their appearance, such as thickness, length, and curliness. Thicker dreads may have fewer individual strands, while longer dreads may have more weight and movement. Curly dreads may be harder to define, but can add a lot of personality to a drawing.
Experiment with different stylization techniques
While drawing realistic dreads is great, don’t be afraid to experiment with different stylization techniques. For example, you can create more stylized, cartoonish dreads by emphasizing certain aspects such as the thickness or texture, or by utilizing different line weights or shapes.
Utilize references for inspiration and accuracy
To draw dreads that look accurate and realistic, it’s important to use references. This could be photographs of real people with dreadlocks, or artwork by other artists who have mastered the style. Use these references as a guide, but don’t be afraid to add your own creative twist to your artwork.
Master the Art of Drawing Dreads with These Techniques
If you want to master the art of drawing dreads, here are some additional techniques and tips to keep in mind.
The importance of observation and practice
The more you observe dreadlocks and practice drawing them, the better you will become. Take the time to really study how they move and how the hair strands interact with one another. Practice drawing dreads from different angles and perspectives, and try to capture different styles and shapes.
How to create dynamic and expressive dreads
To create more dynamic and expressive dreads, try varying the thickness, texture, and curliness of the individual strands. Play around with different angles and perspectives, and think about how the hair would move and flow based on the character’s movements or expressions.
Incorporating braids and beads into your dreads
Braids and beads are common accessories worn with dreadlocks, and can add a lot of personality to your artwork. Try incorporating different types of braids or beads into your dreadlocks to create unique and interesting designs.
Alternative styles and variations of dreadlocks
While there are many different styles of dreadlocks, such as natural or synthetic, there are also variations such as extended or sisterlocks. Research different styles and experiment with drawing them to add variety to your portfolio.
Tips for drawing dreads on different head shapes and angles
Depending on the shape and angle of the head, drawing dreadlocks can be challenging. To draw dreads on different head shapes, you may need to adjust the size and placement of the individual locks. Don’t be afraid to sketch out multiple drafts to get the look just right.
Drawing Dreads: A Beginner’s Guide
As a beginner, drawing dreads can seem overwhelming, but with practice and patience, it can become second nature. Here are some basic techniques and tips to get you started.
Basic techniques for drawing dreads
Start by sketching out the basic shape of the dreads, then add texture and definition with individual strands and highlights. Pay attention to lighting and shadow placement, and don’t be afraid to use references for inspiration and accuracy.
Common mistakes to avoid as a beginner
One common mistake that beginners make is not paying enough attention to the shape and size of the individual locks, or not considering how the dreads will look from different angles. Another mistake is overworking the drawing, and adding too many unnecessary details. Try to keep it simple and clean.
Tips for starting your dread drawing journey
Start small and work your way up to more complex drawings. Experiment with different stylization techniques, and don’t be afraid to make mistakes. The more you practice, the better you will become.
Recommended materials for drawing dreads
To draw dreads, you will need a pencil, eraser, and paper. You can also experiment with different coloring materials such as markers or watercolors, depending on your style and preference.
Get Creative with Your Dreads Drawing: Ideas and Inspiration
There are many different ways to get creative with your dread drawing, such as incorporating unique styles and accessories into your artwork.
Drawing a character with unique dread styles
Try drawing a character with a unique dread style, such as multiple colors or exaggerated thickness. This can add a lot of personality to your artwork and make it stand out.
Experimenting with colorful dreadlocks
Colorful dreadlocks can be eye-catching and fun to draw. Experiment with different color combinations, such as ombre or pastels, to create unique and interesting designs.
Incorporating dreads into a larger artwork
Dreadlocks can be incorporated into larger pieces of artwork, such as illustrations or comics. Use your creativity to come up with unique designs and styles that are true to your vision.
Creating a series of dread-focused illustrations
Create a series of dread-focused illustrations that explore different styles and techniques. This can be a great way to practice your drawing skills and build your portfolio.
Expert Advice on Drawing Curls and Twists in Your Dreads
Dreadlocks can come in many different shapes and sizes, including curls and twists. Here are some expert techniques for drawing these unique styles.
How to create realistic curly dreads
To create realistic curly dreads, pay close attention to the texture and shapes of each strand. Use small, wispy lines to create the curls, and make sure to vary the thickness of the individual locks.
Techniques for drawing twisted dreads
Twisted dreads are all about creating unique shapes and textures. Experiment with different twists and turns, and pay attention to how the individual strands interact with each other.
Examples of artists who excel in curly and twisted dreadlock drawings
Some artists who excel in drawing curly and twisted dreadlocks include LavenderTowne, Loish, and Kristina Webb. Study their techniques and incorporate them into your drawing practice.
Drawing Dreads: Common Mistakes to Avoid and How to Fix Them
Even experienced artists can make mistakes when drawing dreads. Here are some common errors to watch out for, and how to fix them.
Common errors in dread drawing and what causes them
Common errors in dread drawing include misshapen locks, incorrect lighting and shadow placement, and messy or overworked lines. These can be caused by a lack of observation or practice, or not paying close attention to the details of the hair.
Solutions for fixing proportion and perspective issues
If you have proportion or perspective issues in your dread drawing, try adjusting the size and placement of the individual locks, or redrawing the hair from a different angle. Use references and take the time to observe the hair closely in real life.
Tips on how to improve your dreadlock drawings
To improve your dread drawing skills, take the time to observe and practice different styles and shapes of hair. Try different stylization techniques, use references for accuracy and inspiration, and don’t be afraid to make mistakes.
Conclusion
Drawing dreads can seem daunting, but with practice, patience, and attention to detail, you can create beautiful and engaging artwork. From the basic techniques to creative stylization, there are many ways to make your dreadlock drawings stand out. Remember to observe, practice, and have fun with your artwork.


