I. Introduction
Anime hair is an incredibly important part of the appeal of anime characters. They come in a wide variety of shapes, sizes, and colors that reflect the personality of the character and add a unique flavor to their overall look. For beginners, the process of drawing anime hair can be quite daunting, but with a little guidance and practice, anyone can master the technique.
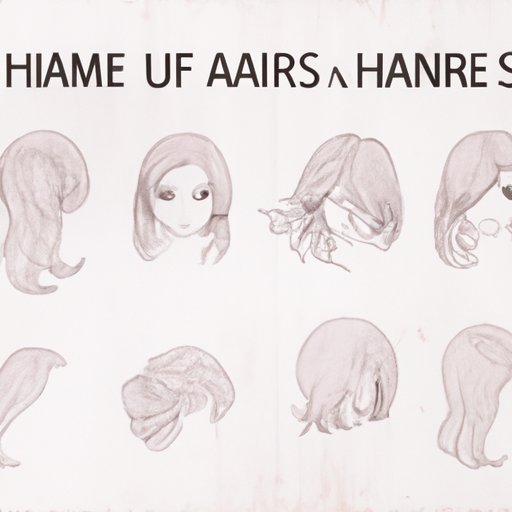
II. Step-by-Step Tutorial
Before we delve into the details of drawing anime hair, let’s understand the basic anatomy of anime hair. Most anime hairstyles follow a similar structure where the hair is made up of basic shapes like ovals and triangles. The guidelines such as the hairline and the parting line provide a basic concept of how the hair flows and where it ends.
Now, let’s focus on drawing different types of anime hairstyles. Below we have a step-by-step tutorial on how to draw some popular hairstyles:
- Spiky Hair: Anime characters with spiky hair are often portrayed as rebellious and cool. To draw spiky hair, you need to draw angled lines that taper towards the ends. These angled lines define the tips of each strand. Adding details like hair strands using a pencil can enhance the overall look of the hairstyle.
- Long Hair: Long hair is a staple among female anime characters. To draw long hair, start by drawing the basic shape of the head and then draw the outline of the long hair. A good tip is to make these outlines flow in smooth wave-like motions. Once you have the shape of the hair in place, you can add details like strands of hair or highlights to make the hair look more realistic.
- Short Hair: Short hair is a great option if you want to create a more boyish or sporty look. When drawing short hair, you need to pay careful attention to the texture and direction of the hair. Typically, short anime hair has a smooth flow with the hair parted to one side.
III. Video tutorial
Videos are a great source of information for beginners. They can visualize each step and the techniques used to draw anime hair. When practicing with videos, pause and replay the video multiple times to get a clear idea of each step. Below is a step-by-step video tutorial on how to draw different anime hairstyles:
IV. Top Ten Hairstyles
Below, we have a list of the top 10 anime hairstyles with a brief description and step-by-step instructions on how to draw them.
- Chise’s Bob Cut: This hairstyle is perfect for a sweet and innocent character. Start by framing the face with a “U” shape and then add a few lines for the hair strands.
- Goku’s Spiky Hair: This hairstyle is the definition of cool. To draw it, start by drawing the outline of Goku’s head and then draw a few pointed spikes.
- Naruto’s Spiky Hair: Naruto’s spiky hair is iconic. To draw this hairstyle, create spiked hair using a few angled lines. Use fine details to create the raised tips to add a more layered look.
- Hinata’s Long Hair: Hinata’s hair is long and luscious, providing a lot of room for detailed strands. Begin by drawing the outline of the face, and then sketch out the strands as they fall from the head.
- Saitama’s Bald Head: Yes, you read that right. Even a bald head can be iconic in anime. To draw Saitama’s signature bald head, draw a basic round circle with facial features.
- Kanna’s Pigtails: Kanna’s twin pigtails are an embodiment of childlike innocence. Start by creating two looped hair shapes above the head and then add details by drawing strands and marks on them.
- Yugi’s Bedhead: Yugi’s hair is a disheveled mess, but it’s part of his charm. Begin by drawing the outline of the head, including the bangs, and then darken the bang portion.
- Kagome’s Ponytail: Kagome’s hairstyle is simple yet elegant. Start by drawing the outline of Kagome’s head and then draw a simple ponytail that sits at the nape of the neck.
- Lelouch’s Crowned Hair: Lelouch’s hairstyle shows his royal personality. Start by drawing the outline of the head and then sketch out a curve on the top of the head.
- Kira’s Messy Bangs: This hairstyle’s twists and turns show how determined Kira looks in Death Note. Begin by drawing the outline of the head and then add bangs with a bit of texture, making it look disheveled
V. Manga Artist Tips
Professional manga artists have countless insights into what makes an anime hairstyle stand out. Following the advice of a master can take your work to the next level. Below are some tips from professional anime artists to give you a better understanding of how to draw anime hair using visual examples:
- Katsura Hoshino advises sketching a lot and says that one should draw as much as possible and learn how to present hair from various angles.
- Shojo Manga artist Arina Tanemura says that the key to getting hair right is to draw a lot of attention to the person’s scalp.
- Yana Toboso suggests that one should learn how to draw hair that looks alive and feels like it is internally moving. Drawing multiple lines instead of straight lines can help give a more natural look.
VI. Different Textures
Anime hair comes in different textures, and it’s essential to understand how to add texture and details to your drawings. There are three primary textures; wavy, straight, and curly. To add shine and volume, using different strokes of a pencil is important. Below are some pictures with examples on how to add texture to the different types of hair:

VII. Create Your Own Character
Creating your anime character is an exciting process, but getting the hairstyle right is paramount. To create your characters, follow these simple steps:
- Decide on your character’s personality and name.
- Define the basic structure of their face, head, and body parts.
- Choose a hairstyle based on their personality, interests, and backstory.
- Sketch out the hairstyle, using the guidelines to ensure the hair’s flow and overall look are right.
- Once you are happy with the hair’s structure, finalize the details, like shading and texture.
VIII. Conclusion
Drawing anime hair can be a challenging process, but with a little guidance and practice, anyone can master the craft. We hope by following these steps, and tips from professional manga artists, aspiring anime artists can take their drawing skills to the next level. The key to getting the hair right is to understand the different textures, shapes, and textures and then apply them to your unique characters.


