Introduction
Octopuses have long been a popular subject among artists and nature enthusiasts due to their unique and captivating appearance. With their flexible, tentacled arms and bulbous heads, these creatures are both beautiful and intriguing. Drawing an octopus can seem like a daunting task, but with the right tools and techniques, anyone can create a stunning work of art. In this article, we will provide a step-by-step guide for beginners looking to draw an octopus, including important supplies, techniques, and tips.
The Step-by-Step Guide to Drawing an Octopus: Explanation of Supplies and Techniques
Before diving into the drawing process, it’s important to gather all of the necessary supplies. You’ll need paper, pencils (preferably with varying levels of hardness), erasers, and a blending tool such as a stomp or tortillon. For those looking to add color to their drawing, colored pencils or markers can also be used.
When it comes to techniques, one of the most important things to remember is to start with light sketch lines and build up to darker, more defined lines. This allows for more control and makes erasing any mistakes easier. It’s also important to pay attention to the texture of the octopus’ skin, as this can add depth and dimension to the drawing. Experimenting with different pencil pressures and blending techniques can help achieve this effect.
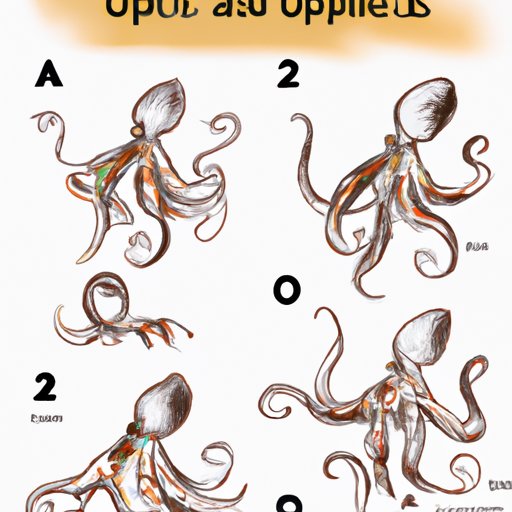
How to Draw an Octopus in 5 Easy Steps: A Simplified Approach
To simplify the process, we’ve broken down the drawing into five easy steps:
- Begin by sketching the basic shape of the octopus’ head and body, using light lines to indicate where the tentacles will be placed.
- Add in the tentacles, using curved lines to create a flowing, organic shape.
- Sketch out the details of the eyes, taking care to capture the unique shape of an octopus’ pupils.
- Add in texture to the octopus’ skin by using cross-hatching or other shading techniques.
- Finish by darkening the lines and adding any final details, such as suckers on the tentacles or additional shading.
For a better understanding of these steps, check out online tutorials or videos that provide visual aids and demonstrations.
The Secret to Drawing an Octopus: Tips and Tricks from a Professional Illustrator
To take your octopus drawing to the next level, consider incorporating some tips and tricks from a professional illustrator. One of the most important things to remember is to pay attention to proportion and anatomy. Octopuses have eight tentacles of varying lengths, so it’s important to get these proportions right. Another useful tip is to use reference images, either from books or online resources, to better understand the shape and texture of an octopus’ body.
When it comes to achieving certain effects, such as highlighting or shading, experimenting with different pencil types and techniques can make a big difference. For instance, using a mechanical pencil with a finer tip can allow for more detailed work, while blending different shades of pencil together can create a more natural-looking texture.
Beginner’s Guide to Drawing an Octopus: Understanding Basic Shapes and Anatomy
As mentioned earlier, understanding the basic shapes and anatomy of an octopus is crucial to creating an accurate and realistic drawing. An octopus’ body is made up of a bulbous head and a long, narrow mantle that connects to the eight tentacles. These tentacles become thinner and more flexible towards the tips, with each one containing a series of suction cups or suckers.
When drawing an octopus, it’s important to pay attention to the placement and length of these tentacles, as well as the relative size of the head and mantle. Reference images and visual aids can be helpful tools for getting these proportions right.
Drawing an Octopus with Pencils, Ink, and Digital Tools: Comparing Different Methods
There are many different methods for drawing an octopus, each with their own unique advantages and disadvantages. Traditional pencil drawing is a popular choice due to its accessibility and simplicity, but it can also be limiting in terms of color and texture. Ink drawing, on the other hand, allows for greater precision and detail, but can be difficult to correct mistakes.
For those looking to create digital artwork, tools like drawing tablets and computer software can provide greater control and flexibility. However, these methods also require a greater investment in terms of equipment and software.
Dive into the Deep World of Octopus Drawing: Inspiration, Ideas, and Resources for Artists
If you’re looking for inspiration for your next octopus drawing, there are many resources available for artists of all levels. Books like “The Octopus: Great Barrier Reef” by Tim Flannery and others can provide fascinating insight into the world of these creatures, while online tutorials and videos can offer step-by-step guidance and visual aids.
For those looking to take their octopus drawings to the next level, experimenting with different materials and techniques can be a fun and rewarding challenge. Consider trying out different pencil types, shading techniques, or even incorporating mixed media elements like watercolors or collage.
Conclusion
Drawing an octopus can seem like a daunting task, but with the right approach and tools, anyone can create a beautiful work of art. By following our step-by-step guide, incorporating tips and tricks from professional illustrators, and experimenting with different methods and materials, you can create a unique and captivating octopus drawing of your own.


