Introduction
Drawing a head can be a daunting task, but it doesn’t have to be. With the right techniques and practice, anyone can learn to draw a realistic or stylized head. In this article, we’ll take you through the step-by-step process of drawing a head from scratch, and provide tips and tricks along the way to improve your skills.
Step-by-Step Tutorial
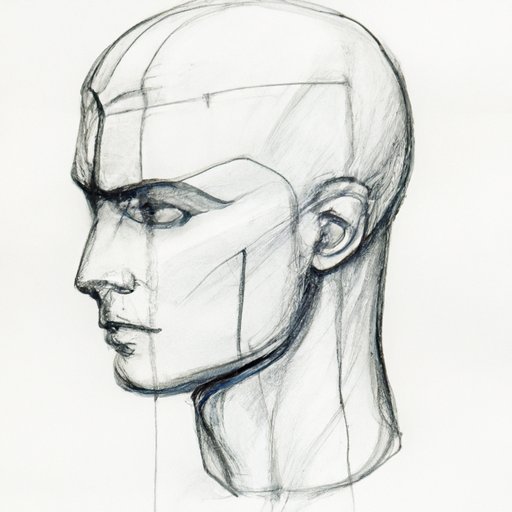
The first step in drawing a head is to sketch out the basic shape. Start with a circle or oval to represent the skull, and add a line down the middle to divide the face in half. From there, you can add guidelines for the features of the face.
Next, it’s time to add details for the features of the face. We’ll start with the eyes, which should be drawn on the horizontal guideline, with the distance between them being roughly one eye’s width. The nose should be drawn on the vertical guideline, with the nostrils being at the center point. The mouth should be drawn below the nose, with the corners of the lips lining up with the center of the eyes. Finally, the ears should be drawn on either side of the head, roughly at the level of the eyes to the nose.
Shading is also crucial to drawing a realistic head. Use light and dark values to create depth and dimension, and pay attention to shadow and highlight placements. A blending tool can be used to smooth out shading and create a more realistic look.
Common Mistakes to Avoid
When drawing a head, there are several common mistakes that beginners make. One of the most common mistakes is disproportionate features, where the eyes, nose, mouth, or ears aren’t in the right place or size compared to the rest of the head. Another mistake is drawing flat or wonky features that lack depth and realism. Finally, many beginners struggle with getting depth right, especially with shading and lighting.
To avoid these mistakes, it’s important to pay careful attention to the guidelines and proportions. Use references and check measurements to make sure everything is in the right place. Don’t be afraid to experiment and make mistakes, and practice regularly to improve your skills.
Different Angles and Perspectives
One of the most challenging aspects of drawing a head is getting it right from different angles and perspectives. A head can look completely different depending on the angle and perspective you’re drawing from. When drawing a head from the side or three-quarters view, use guidelines to make sure everything lines up. When drawing a head looking up or down, adjust the shape of the eyes, nose, and mouth to match the perspective.
Experiment with different angles and perspectives to improve your skills and create more dynamic drawings.
The Importance of Proportions
Proportions are crucial when drawing a head, as they help create a realistic likeness and convey emotions and expressions accurately. To get proportions right, use guidelines and measurements to make sure everything is in the right place. The “grid method” is a popular technique that involves drawing a grid over your reference image or sketchbook, and then drawing a corresponding grid on your paper to help you measure and check proportions accurately.
Materials and Tools
When drawing a head, it’s important to have the right materials and tools to get the job done. Graphite pencils are a popular choice, as they come in different degrees of hardness and are great for shading. A kneaded eraser can be used to lighten and correct mistakes, while a blending tool can help smooth out shading and create a more polished look. A sketchbook is also a must-have, as it gives you a place to practice and experiment with different techniques.
Tips and Tricks
To improve your head-drawing skills, there are several additional tips and techniques you can try. Use reference images to help you get proportions and details right. Practice drawing basic shapes and forms before adding details. Take breaks to avoid eye strain and fatigue. And, most importantly, don’t be afraid to experiment and make mistakes.
Realistic vs. Cartoon Styles
There are two main styles of drawing heads: realistic and cartoon. Realistic heads aim to create a lifelike likeness, while cartoon heads are stylized and exaggerated. To draw a realistic head, pay close attention to details and proportions, and use shading to create depth and dimension. For a cartoon head, exaggerate features and simplify shapes to create a more stylized look.
Conclusion
Drawing a head may seem like a challenging task, but with the right techniques and practice, anyone can master it. Remember to pay attention to proportions, use references to help you get details right, and experiment with different angles and perspectives. Keep practicing and experimenting, and you’ll soon be able to draw a realistic or stylized head that you’re proud of. For further learning, check out instructional books or online tutorials.


