Introduction
Learning to draw a tree easily can open up a whole new world of creativity. Whether it’s for a nature scene or just for fun, knowing how to draw a tree can be a valuable skill to have. In this article, we’ll take you through a step-by-step guide, a video tutorial, infographic, creative exercises, tools, tips, and elements to help you draw a tree with ease.
Step-by-step Guide
- Draw the trunk of the tree with a pencil. Start with a straight line for the middle of the trunk and add two more lines on each side.
- Add branches to the main trunk using small curved lines.
- Draw smaller branches extending out of the larger ones.
- Add leaves on each branch, starting from the bottom. Use small triangle shapes with rounded edges to draw the leaves.
- Draw more leaves and details to make the tree look more natural.
- Go over the pencil lines with a pen or marker, then erase the pencil marks.
Remember to use light, gentle strokes when drawing the initial sketch with a pencil, and go over them with firmer lines once you’re happy with the overall shape. Don’t worry about being too precise, as it’s better to focus on the overall shape and later add details.
Video tutorial
The best way to learn how to draw a tree is to follow a video tutorial. Watch the video below and follow along with the instructions to draw a tree with ease.
You’ll notice that the tutor in the video offers tips and tricks throughout the tutorial to help beginners perfect their technique. Do not hesitate to pause the video and go back to the previous step if you feel you need more time to practice.
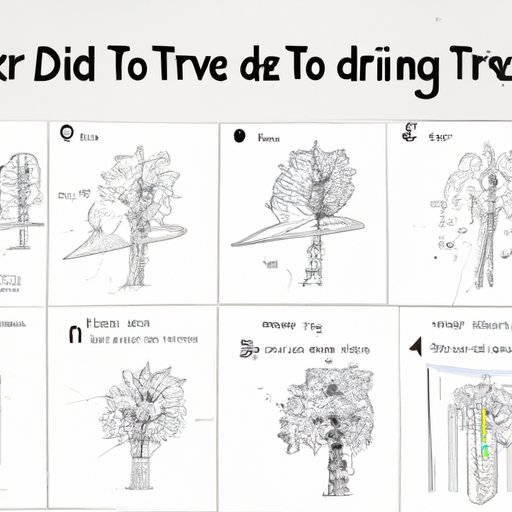
Infographic
Another helpful tool for learning to draw a tree is an infographic. It’s a more visual reference tool that can help you remember the steps quicker and easier.

This infographic illustrates the steps to draw a tree easily using a combination of visuals and written instructions. Print it out and use it as a quick reference tool while you practice your new skills.
Creative Exercises
If you’re looking to improve your tree drawing skills further, why not try out some fun and creative exercises?
- Use your non-dominant hand – Try drawing a tree with your non-dominant hand. Although it may be frustrating at first, you’ll train your brain to think creatively and develop a more personal style.
- Draw using only shapes – Try drawing a tree using only circles, triangles, squares, and other simple shapes – this will immensely help you focus on the basic shapes and proportion of the tree.
- Create a series – Draw a series of trees with different gestures. Experiment with different angles, shapes, proportions, and styles to create a unique set.
Remember, these exercises are all about experimenting and embracing mistakes. So, don’t stress too much about the outcome and have fun with it. Breaking the monotony of learning with fun exercises will also help you develop faster and learn more efficiently.
Tools & Tips
Having the right tools and materials can make a big difference in how your tree drawing turns out. Below are some tips to help you get started.
- Use a range of pencils – Different pencils create different lines. HB, 2B, and 4B are good pencils to start with for line variation.
- Try different types of paper – Not all paper is created equal. Experiment with different textures and thicknesses to find the right one for you.
- Blend colors – Use a blending tool like a blending stump to create smoother and more natural shading.
- Focus on contrast – Make sure there is enough contrast between the dark and light regions to create the illusion of depth.
Incorporate Elements
Once you’ve mastered drawing a tree, consider incorporating other elements to create a more detailed scene. Here are some ideas:
- Add people or animals – Try drawing a tree with a person sitting under it or add an animal like a bird or squirrel on one of the branches.
- Add scenery – Try drawing the tree in a forest with other trees in the background or add a mountain or lake to the background.
- Change the perspective – Draw the tree from a different angle or perspective, such as looking up the tree from the base or above, looking down at the scenery.
Conclusion
Learning to draw a tree can be a valuable skill for any artist. We’ve broken down the process into simple steps, and provided helpful tips in each step, a video tutorial, and an infographic. We’ve also suggested fun and creative exercises to help you develop your skills further, offered tips on tools and materials, and ways to incorporate additional elements. Keep practicing and experimenting, and you’ll soon be able to draw a tree with ease.
“Drawing is the backbone of art. To learn to draw well is to learn to see well.” – Mark Kistler.


