Introduction
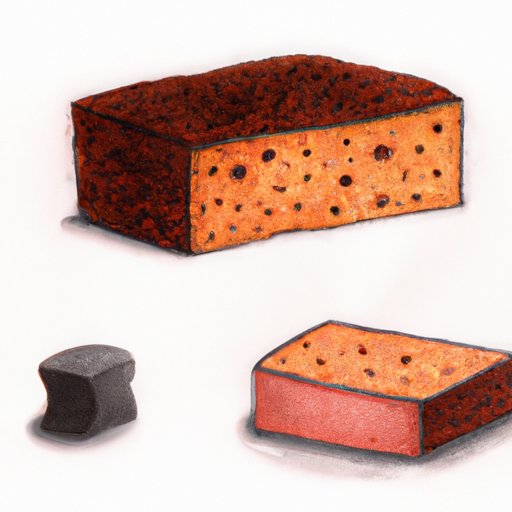
Drawing a sponge may seem like a simple task, but creating a realistic and detailed depiction can be a challenge. In this article, we will explore the techniques and tips necessary for drawing a sponge that looks lifelike. Understanding how to draw a sponge is critical for artists since the sponge structure in a painting or illustration can add depth, texture, and detail to a piece. So, let’s dive in!
Start with the Basic Shapes
As with any objects, it’s essential to begin with a basic skeletal structure to create a sponge. Utilizing simple shapes like rectangles, squares, and triangles to create the sponge’s initial structure helps to create its form and build up more detail.
The more geometric the shape, the more rigid the sponge will look. Juxtapositionally, a more natural sponge will have softer, flowing lines. Finding the right balance of structure is key in creating a sponge that looks lifelike.
Add Texture
Texture is the most critical element of drawing a sponge’s surface. Of course, not all sponges have the same texture, so figuring out what form you want to evoke is essential. For example, if you’re drawing a cleaning sponge with a rough surface, use short pencil strokes and apply more pressure downward to create a rough texture.
To create a delicate texture similar to a sea sponge, use lighter pencil strokes that will blend in better and create a more subtle texture. When it comes to texture, be mindful of the uniqueness of the sponge you are creating as every sponge has its texture.
Play with Shading
Mastering shading techniques is crucial in creating a sponge that looks realistic. Shading creates depth, tonality, and light to any drawing. To shade a sponge, first determine the direction of your light source.
By understanding the source of light, you can determine where shadows should be and how dark they should be. Using a simple pencil, you can create soft grey tones by using a tool like a blending stump or with your finger. Adding shading will enhance the three-dimensional appearance of the sponge.
Use a Reference Image
Using a reference image is an essential part of the drawing process. Reference images provide more detailed information about the sponge structure and texture, making it easier to create more realistic depictions.
You can find reference images of sponges in print magazines, on the internet, or even in your local aquarium. Regardless of where you get your reference image, take the time to observe and understand its likeness to use that knowledge in your drawing.
Experiment with Different Materials
Experimenting with different art materials will allow you to create unique textures and finishes when drawing sponges. Graphite pencils are an excellent choice for drawing sponges as they can create a wide range of textures depending on the softness of the pencil used and the pressure applied while drawing.
Charcoal and ink also create entirely different finishes and textures. When experimenting, don’t be afraid to mix different techniques, mediums, and materials, discovering what works best is what art is all about.
Practice by Drawing Different Types of Sponges
Eventually, the more often you practice drawing sponges, the easier and more realistic your depictions will become. There are several different types of sponges to choose from, such as sea sponges or cleaning sponges.
Using different types of sponges will help you develop proficiency in creating different textures and shapes. Additionally, drawing a sponge from various angles and perspectives will further expand your skills and breadth of depictions.
Try Drawing a Scene with Sponges
Beyond just drawing individual sponges, try using sponges to create an entire scene. Incorporating sponges into illustrations can add depth and complexity to the image in ways that are unexpected but incredibly effective in creating art pieces with dynamic textures and shapes.
As you create your scene, keep the following in mind: how the sponges will fit together, how the texture will interact with other elements in the scene, and lighting. Building a scene with sponges as a key element can be a fun challenge when trying to take your sponge drawing abilities to the next level.
Conclusion
Drawing a sponge takes practice and patience. Starting with the basic shapes, adding texture, experimenting with different materials, and understanding the impact of shading can all contribute to a lifelike sponge depiction. Don’t be afraid to use reference images, practice by drawing many sponges, and try drawing sponges within scenes. The more you practice, the more natural and accomplished the drawings become.


