
How to Draw a Sea Turtle: A Step-by-Step Guide
Turtles are one of the most beloved animals in the world. The graceful sea turtle, with its smooth and streamlined body, is a favorite of many. Drawing a sea turtle is a great way to practice your artistic skills and even learn about the animal while you do it. In this article, we’ll show you how to draw a realistic sea turtle step-by-step, explore different styles and techniques, and offer tips and tricks for nailing the details. Read on to discover how to create your very own sea turtle masterpiece!
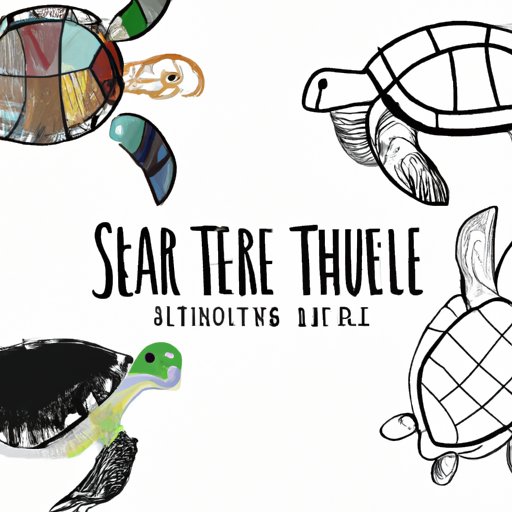
Step-by-Step Guide: How to Draw a Realistic Sea Turtle
Drawing a sea turtle can seem like a daunting task, but breaking down the process into easy-to-follow steps can make it more approachable. Here’s a step-by-step guide:
- Begin by sketching out the sea turtle’s basic shape, which should be an oval for the body and a circle for the head.
- Draw a curved line to represent its upper shell, and another one for the lower shell.
- Sketch out the flippers and keep in mind how they are positioned depending on the angle you are drawing from.
- Add small circles for the eyes, the pupils should face the direction where the sea turtle is looking, and add nostrils near the top of the head, which should be slightly elongated.
- Draw the cross stitch pattern and lines on the turtle’s shell for more details.
- Finally, shade the body of the turtle with smooth shading techniques to add depth and dimension to your drawing.
Remember, you can customize your turtle by altering the patterns on its shell, adding different textures, or incorporating different colors.
Tips and Tricks for Nailing the Details on Your Sea Turtle Drawing
When drawing a sea turtle, it’s important to get the details right. Here are some tips and tricks:
- Pay attention to the turtle’s shell’s shape and texture. Look for reference images and try to replicate the details as accurately as possible.
- Observe the flippers carefully to capture their unique structure. Flippers have digits similar to our fingers, so make sure to add them to the drawing to make it more life-like.
- Work on the turtle’s eyes and nostrils; they are tiny details but very critical. The eyes should be glossy to reflect the light, and the nostrils should be elongated to resemble the nose.
- Study the lighting and shadows in your reference image and use these techniques to add depth, value, and dimension to your drawing.
Using these tips can make a big difference in the realism of your sea turtle drawing.
Get Creative With Your Sea Turtle Drawing: Different Styles and Interpretations
Once you’ve mastered the basics of drawing a realistic sea turtle, you might want to explore other styles and interpretations. Here are some ideas:
- Cartoon – try drawing a more exaggerated, animated version of a sea turtle. This can be a fun and fresh take on the animal.
- Abstract – play with shapes, colors, and textures to create an abstract representation of a sea turtle. Use muted colors like blue, green, and gray to give the drawing a more watercolor-like effect.
- Realistic – if you want to challenge yourself, try creating a drawing that is as realistic as possible. Pay attention to the details and use advanced shading techniques to create a more natural-looking turtle.
Remember, the possibilities are endless when it comes to creating your own artistic interpretation of a sea turtle!
Materials Matter: Choosing the Right Tools for Your Sea Turtle Drawing
When it comes to drawing sea turtles, the right tools and materials can make all the difference. Here’s what you’ll need:
- Pencils: you’ll need at least two pencils, a hard one for sketching, and a softer one for shading (H and B.)
- Paper: pick drawing paper that is textured and heavy-weighted to prevent smudging on the surface.
- Erasers: a good quality eraser to clean up mistakes and improve the sharpness of your drawing.
- Blending tools: such as blending stumps, tortillons, or your fingers, to smudge and blend the shades together for a natural transition.
Always choose your tools based on the style you want to achieve. Markers or watercolors may be appropriate for more vibrant drawings, while charcoal or graphite would work better for a more moody piece.
Common Mistakes to Avoid When Drawing a Sea Turtle
Even the best artists make mistakes, and when it comes to drawing sea turtles, there are some common errors to avoid:
- Don’t make the shell too flat or round; instead, focus on its natural shape. They come in different shapes depending on the species.
- Don’t make the eyes too big or too small. A simple reference photo can help you determine the correct size and position.
- Avoid adding unnecessary lines on the shell. Just pinpoint the curvature of the shell and the cross-stitch pattern to add details.
By avoiding these common errors, your drawing will appear natural and realistic.
Drawing Beyond the Basics: Adding Depth and Texture to Your Sea Turtle
If you’re looking to take your sea turtle drawing to the next level, try adding depth and texture with the following techniques:
- Layering: building up the layers of your drawing with varying shades and thicknesses, so the turtle appears more three-dimensional.
- Cross-hatching: to add lines and textures to the shell, as well as areas with less direct sunlight that seem shadowed.
- Blending: try using overlapping shades to create a smooth transition and soft texture on the turtle’s skin.
By using these techniques, you can create a truly magnificent sea turtle drawing that captures its natural beauty and authenticity.
From Sketch to Masterpiece: Presenting Your Sea Turtle Drawing in an Artistic Way
When you’re finished your sea turtle drawing, you’ll want to present it in the best possible way. Here are some creative ideas:
- Frame it: mounting your drawing in a high-quality frame will show it off and make it look more professional.
- Digital design: scan or photograph your drawing and use digital editing software to add filters or effects that highlight its unique features.
- Turn it into a collage: combine your sea turtle drawing with other ocean-related objects, such as seashells, photographs, or dried seaweed to create a visually appealing piece of art.
By presenting your sea turtle drawing in a creative way, you can showcase all the hard work and creativity you put into it.
Conclusion
Drawing a sea turtle is a fun and fulfilling artistic endeavor that can lead to a deeper appreciation of nature and the animal itself. By following the steps outlined in this guide, you’ll be on your way to creating a beautiful and realistic sea turtle drawing in no time. Make sure to practice and experiment with different styles and techniques to make your drawing unique.


