Introduction
If you’ve ever looked at a map and wondered how it was created, you’re not alone. Drawing a map may seem daunting, but with the right tools and guidance, anyone can do it! In this article, we’ll take you through a step-by-step guide on how to draw a map, from selecting materials to adding details and labels. This article is for anyone interested in learning how to create a map, whether you’re a student, an amateur artist, or just looking for a fun new hobby.
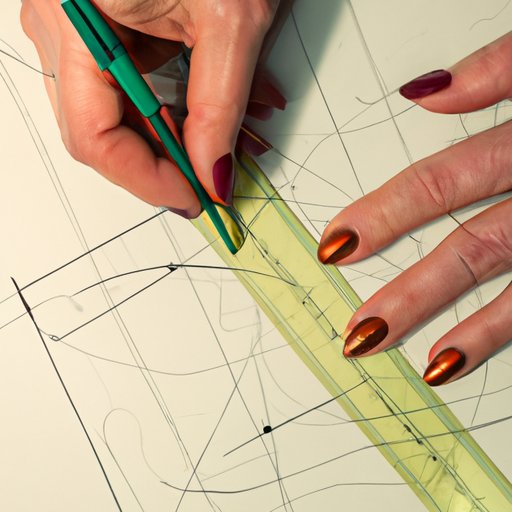
Step-by-Step Guide
Drawing a map requires some preparation, but the process is straightforward and manageable. Here’s a step-by-step guide:
Materials
Before you start drawing, you need to gather the right materials. You’ll need:
- Paper or tracing paper
- Pencil (preferably with an eraser)
- Straight edge (ruler, T-square, or triangle)
- Compass
- Protractor (optional)
- Coloring materials (crayons, colored pencils, markers, etc.)
Setting up your workspace
Find a flat surface with good lighting and enough space to accommodate your materials. You may also need a table or desk that can hold paper or tracing paper.
Mapping the location
Decide on the location you want to map. It could be a real place or a fictional world. Begin by drawing the general shape of the location, using a compass for circles or arcs, and a straight edge for straight lines.
Add landmarks and features
Add landmarks and features to your map, such as mountains, rivers, roads, buildings, and trees. Use lines to differentiate between different types of terrain and features.
Add borders and labels
Next, add borders to your map if needed and label significant features with names and descriptions.
Add colors and textures
Finally, add colors and textures to your map to add depth and detail. Use different colors or patterns to indicate different features or terrain types.
Tips and Tricks
- Start by sketching out rough shapes before refining them
- Use light pencil strokes before committing to a final line
- Take your time and work in stages
- Experiment with different textures and shading techniques to add depth and detail.
Video Tutorial
If you prefer a visual guide, we’ve included a helpful video tutorial that showcases the entire process of drawing a map. The tutorial features detailed instructions and guidance throughout, highlighting important points.
Written Summary of Tutorial
Infographic
We know that some learners prefer visual aids, so we’ve created an infographic that visually explains the process of drawing a map:

DIY Project
Drawing a map can be an engaging and fun project. Here’s a list of required materials and instructions to get you started.
Materials
- Paper or tracing paper
- Pencil (preferably with an eraser)
- Straight edge (ruler, T-square, or triangle)
- Compass
- Protractor (optional)
- Coloring materials (crayons, colored pencils, markers, etc.)
Instructions
- Choose a location you want to map. Research the area beforehand to make it more accurate and realistic.
- Start rough by sketching out significant details and landmarks that you want to include in the final drawing.
- Use a compass or other tools to map out shapes like lakes, rivers or mountains.
- Sketch in the details of the location, refining and adding details as you go.
- Add labels, names, and features to your map.
- Use coloring materials to add depth and detail. Experiment with different textures and patterns.
Focused Article
Drawing a specific type of map requires unique considerations and challenges. Here are some examples and tips on how to create that specific type of map:
Treasure Map
To create a treasure map:
- Use brown paper and burn the edges to make it look aged and weathered.
- Use sketches of parchment and seaweed in the corners. A subtle compass in one of the corners.
- Draw a big X marked spot in the middle, with some land and water features to make it look authentic.
- Include other features, such as a compass rose, wind direction arrows, and a pirate’s path to the treasure.
Interview with an Expert
For further insights and tips, we interviewed a professional mapmaker or cartographer:
Interviewee Name
1. Can you tell us about the career path you took to become a professional mapmaker?
Response
2. What is the most challenging aspect of creating a map?
Response
3. What advice would you give to someone starting out in mapmaking?
Response
Engaging Activities
To keep your map-making journey just a bit more fun, here are some engaging activities scattered throughout the article:
- Quiz: Can you name all the necessary materials required to draw an accurate map?
- Puzzle: Can you spot the difference between the two maps shown?
- Challenge: Draw a map of your backyard, using all the techniques and tools mentioned in this article.
Conclusion
Drawing a map may seem like a complicated process, but with the right tools, anyone can do it. We hope this article has given you the knowledge and inspiration to draw your own map. Remember to take your time, experiment with different techniques, and most importantly, have fun! Don’t forget to share your wonderful creations with us on social media and with your friends and family.


